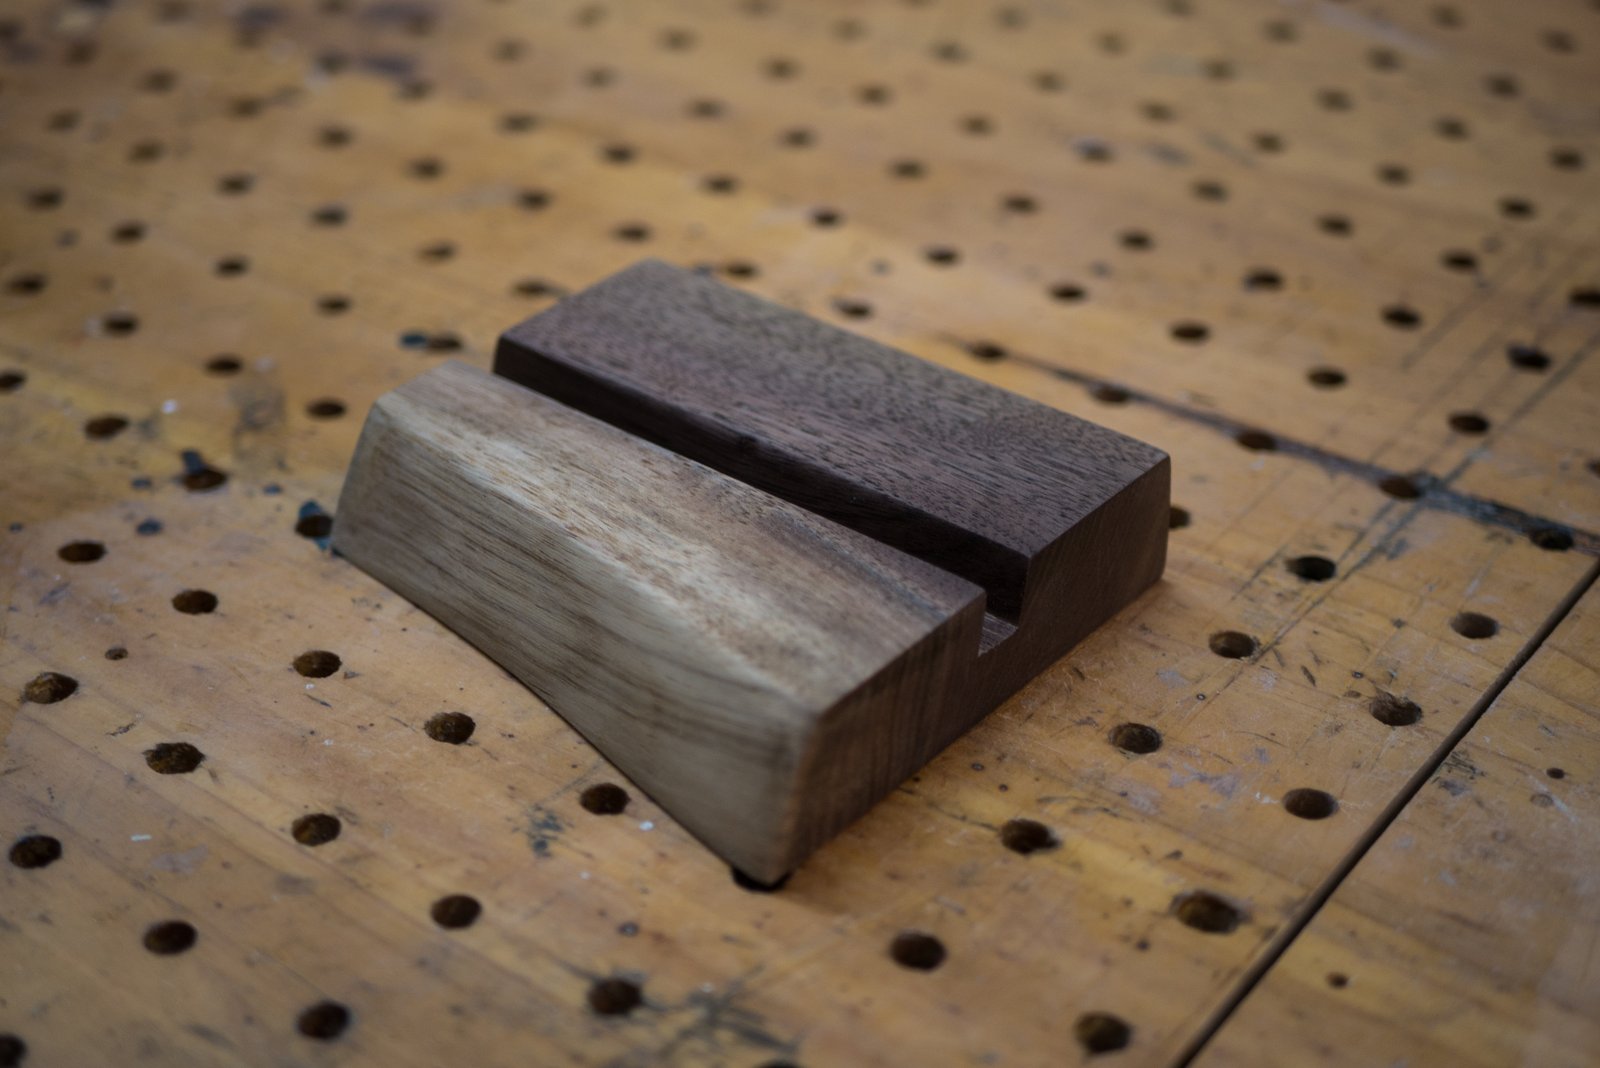
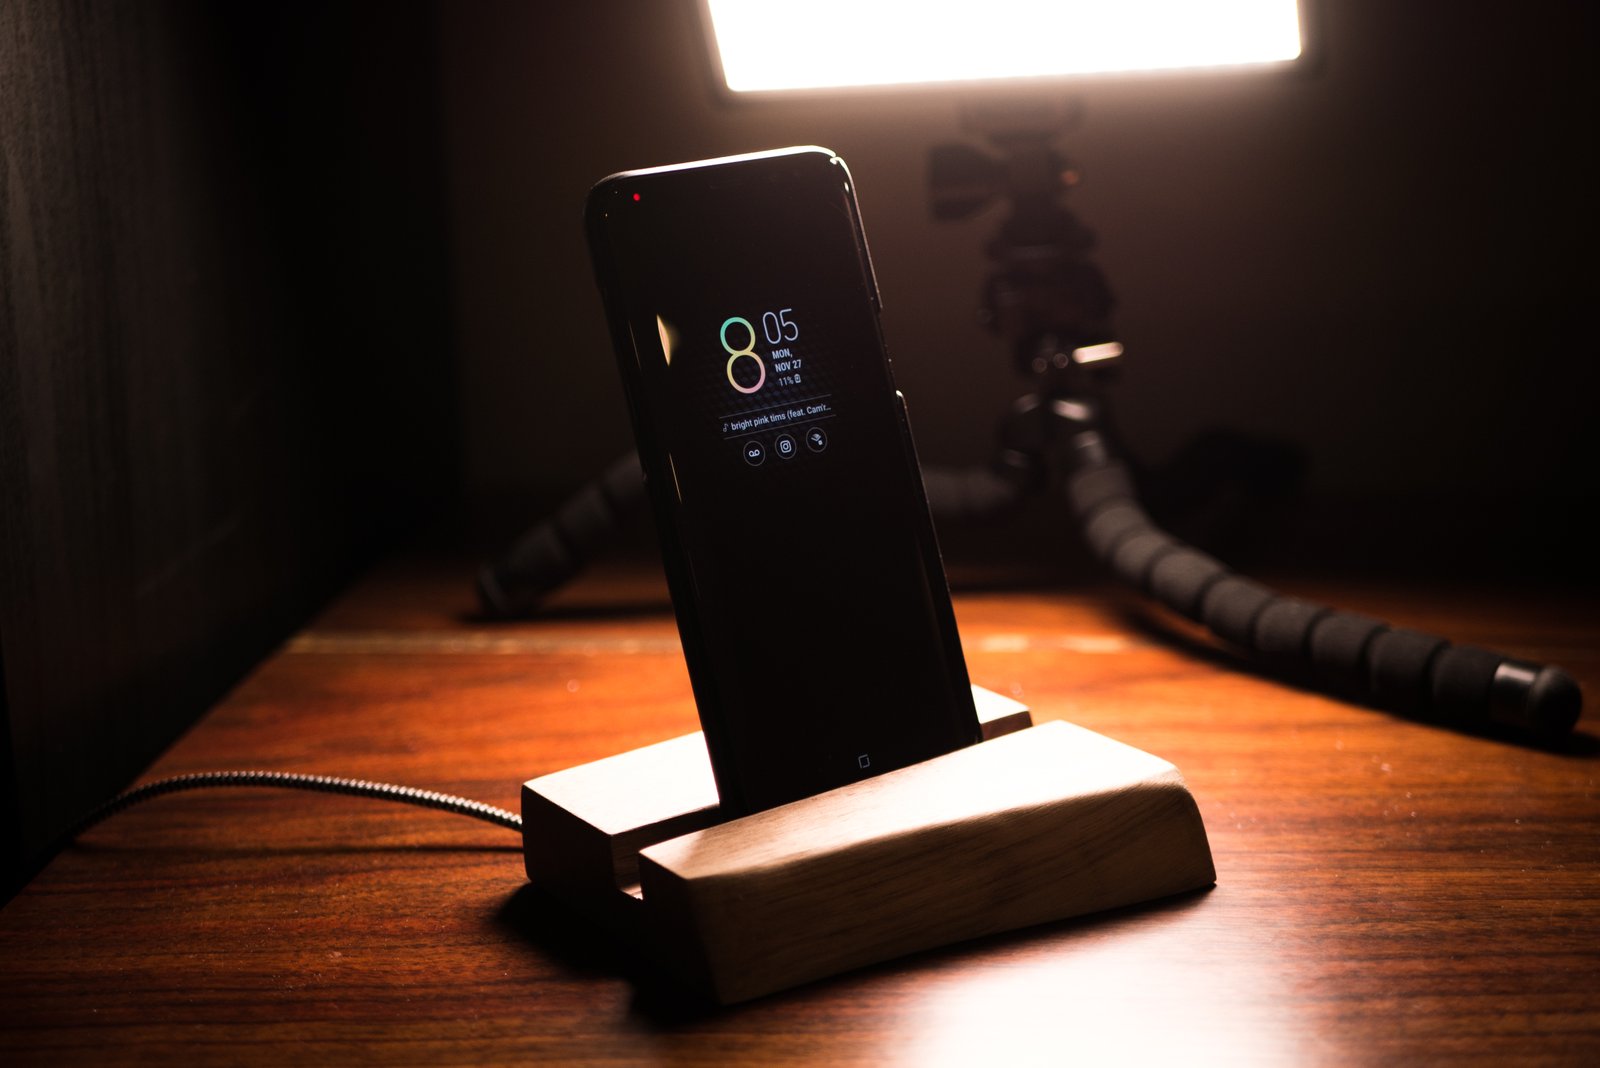
Walnut Slab Charging Cradle

Remember charging cradles and docks?! Sure you do, they used to come with your iPod… or maybe they were sold separately? I can’t remember. But I wanted to make one for charging my phone on my bedside table. There were some cheap ones on amazon, but I wanted to make my own, so I grabbed a scrap piece of walnut and a USB C cable and got to work! This is how it turned out.

Here’s the scrap of walnut I started with. I bought a piece of walnut to do this project and another one. In the other project I made a very similar wireless charger. You can check it out here.

I bought the wood for about 10 bucks and I paid 11 dollars for a right angle USB C cable. Total project cost was under $25 CAD.

Charging Cradle (1 of 36)

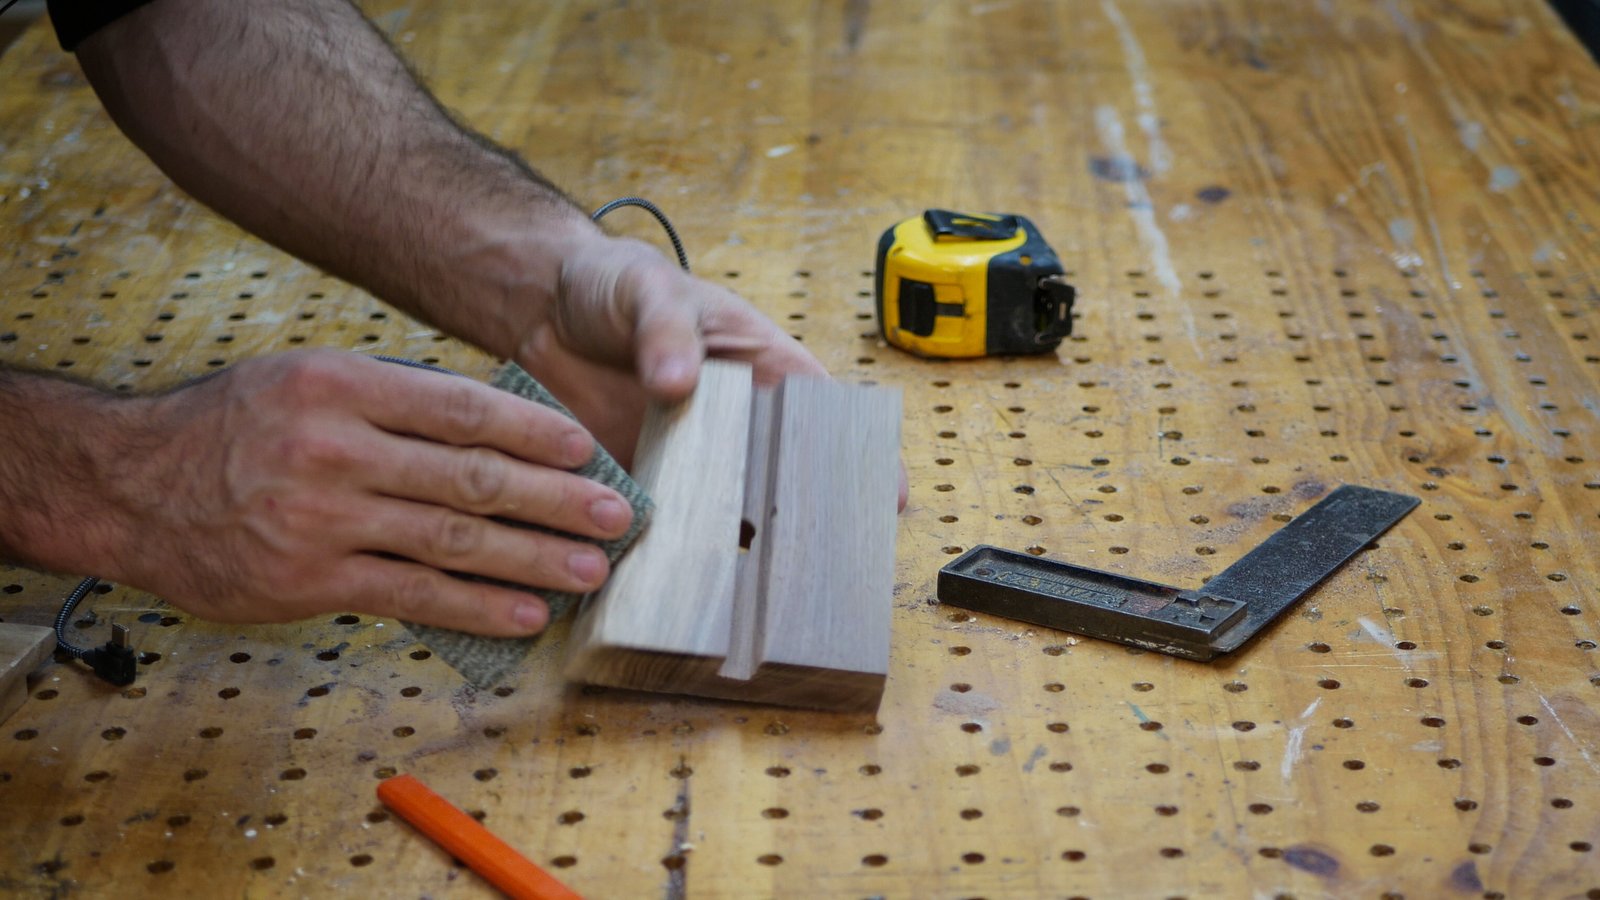
First I started by squaring up 3 sides of the piece of wood. Using a large framing square I marked out where I would need to cut in order to square up the piece of wood.

Charging Cradle (4 of 36)

Next I carefully cut those lines on a chop saw. Be very careful here, especially when cutting such a small piece of wood.

Charging Cradle (5 of 36)

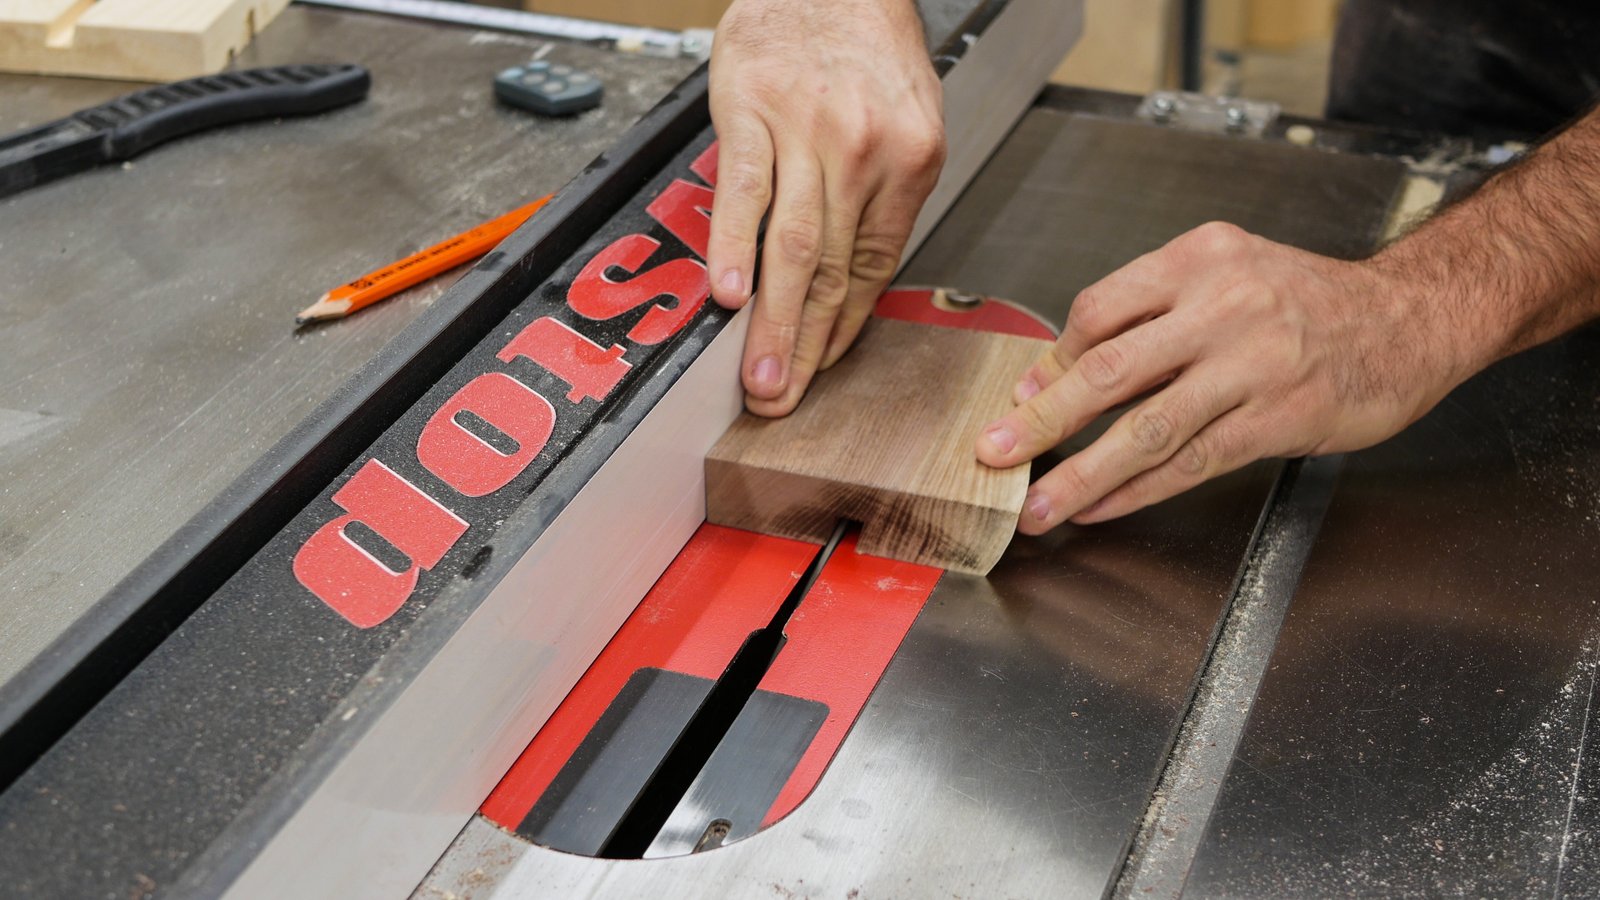
Now I had to cut a grove into the piece of walnut that was the same width as my cellphone. I set my table saws blade to a 15 degree angle and raised it 1/2″ above the surface of the table.

Charging Cradle (6 of 36)

After I made my initial cut, I slowly moved the guide closer to the saw blade and pushed piece of walnut through. After repeating this process about 5 times I finally got the perfect width so that my phone fit in snuggly.

Charging Cradle (7 of 36)

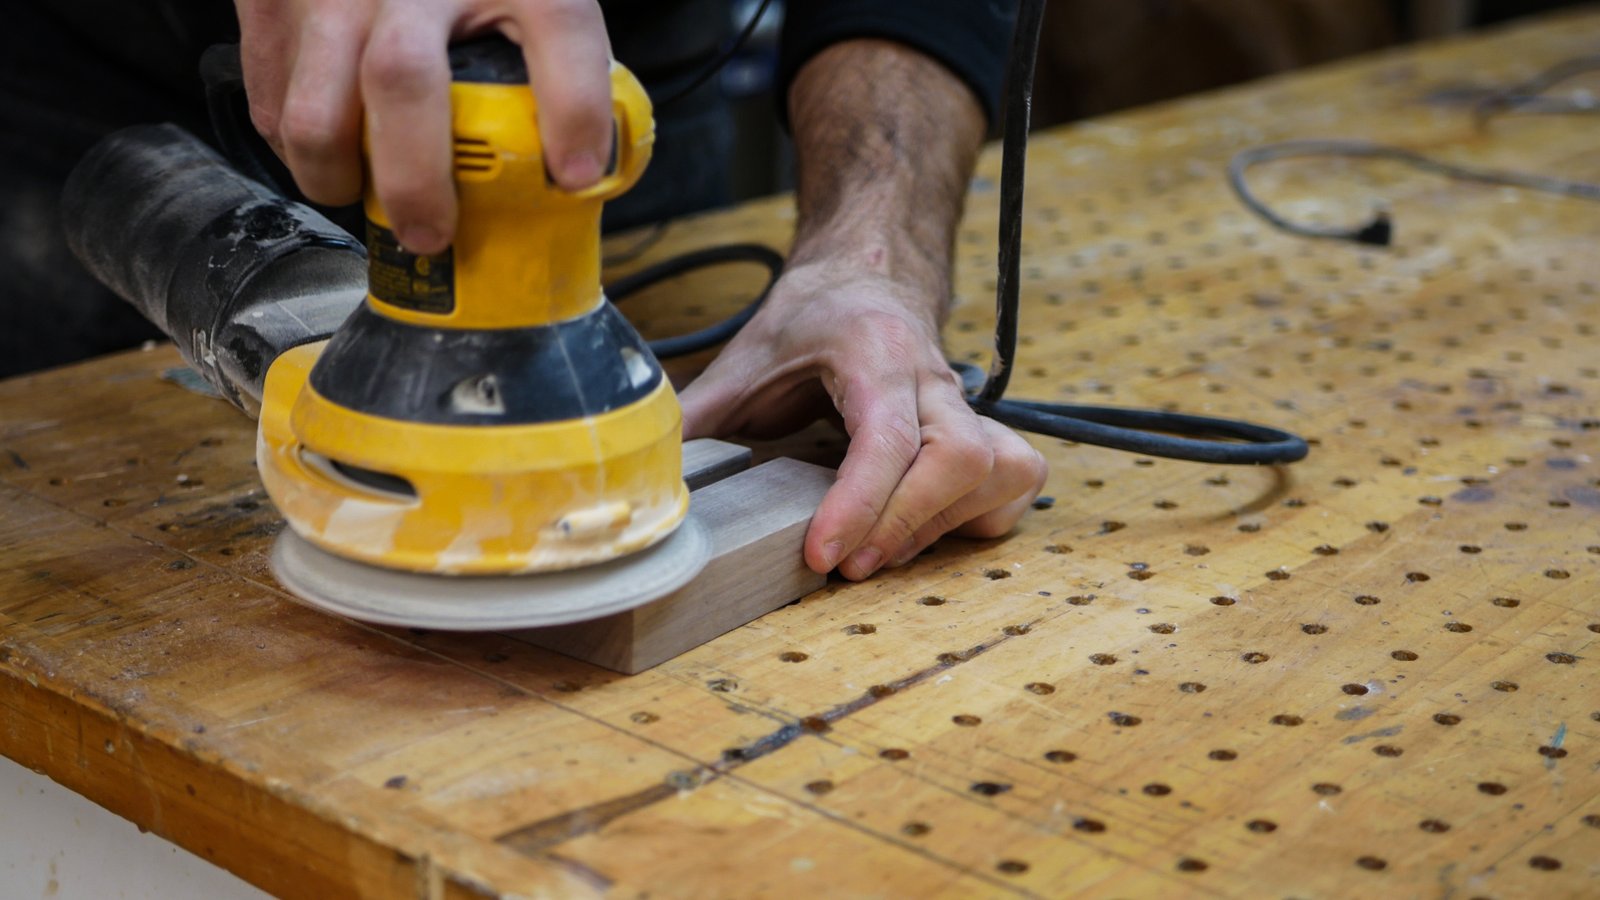
After all the cuts on the table saw this is what I was left with.

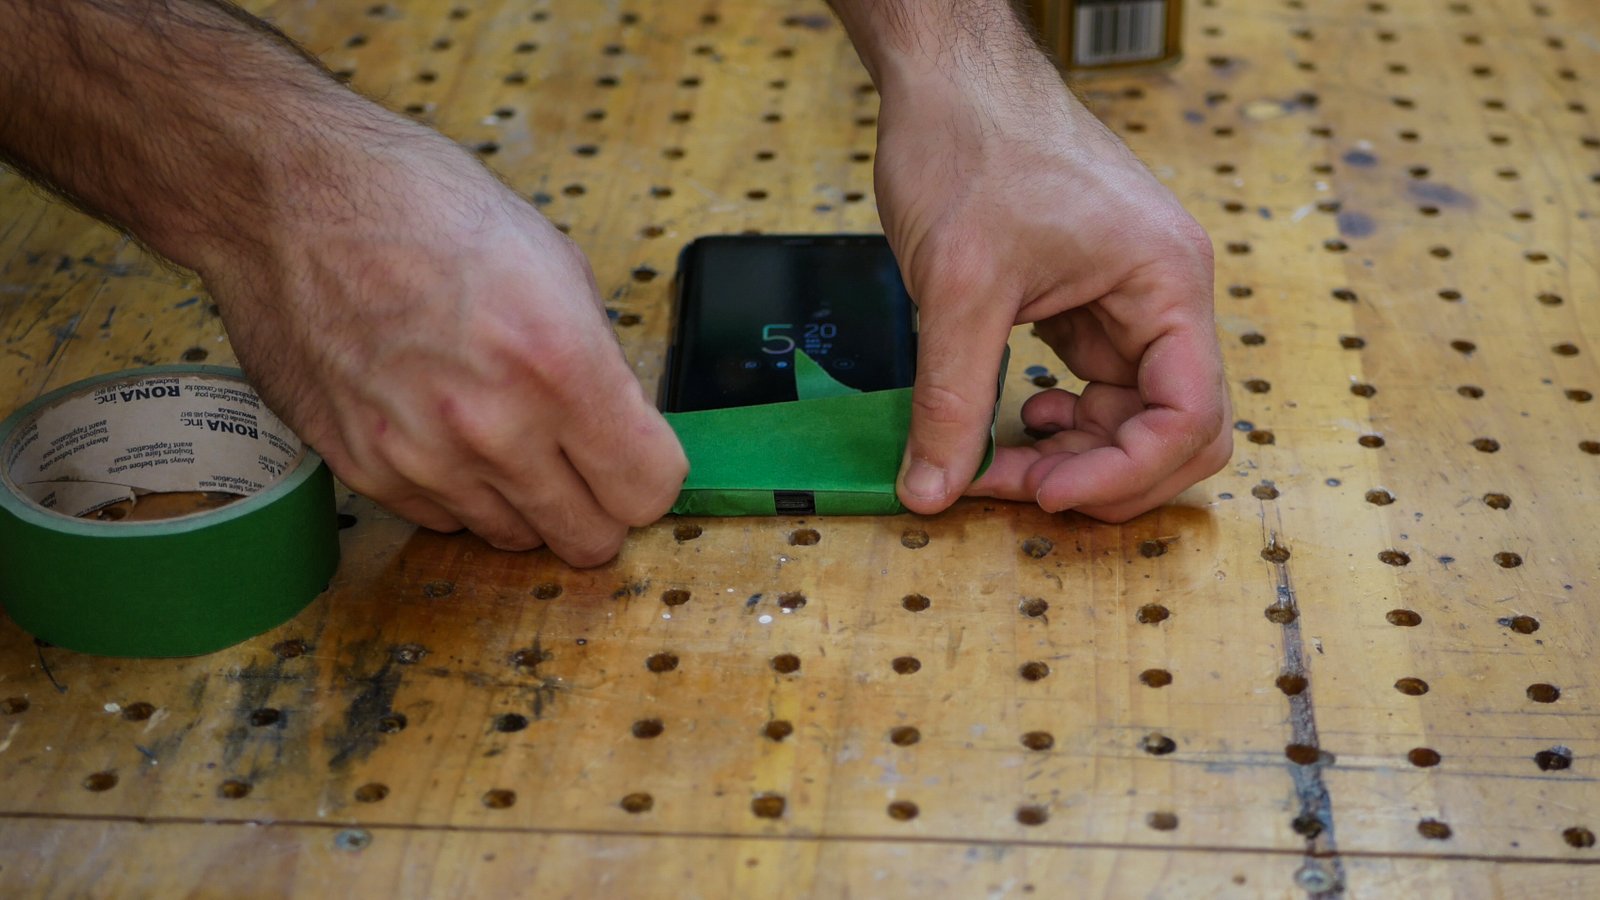
I tailored the gap to be the exact size of my cellphone with a case on. Otherwise I’d have to take my case off in order to use the cradle and who wants to do that?!

Charging Cradle (8 of 36)

Quick test. It’s very stable. You’d be surprised how shallow of a grove you can get away with.

Charging Cradle (9 of 36)

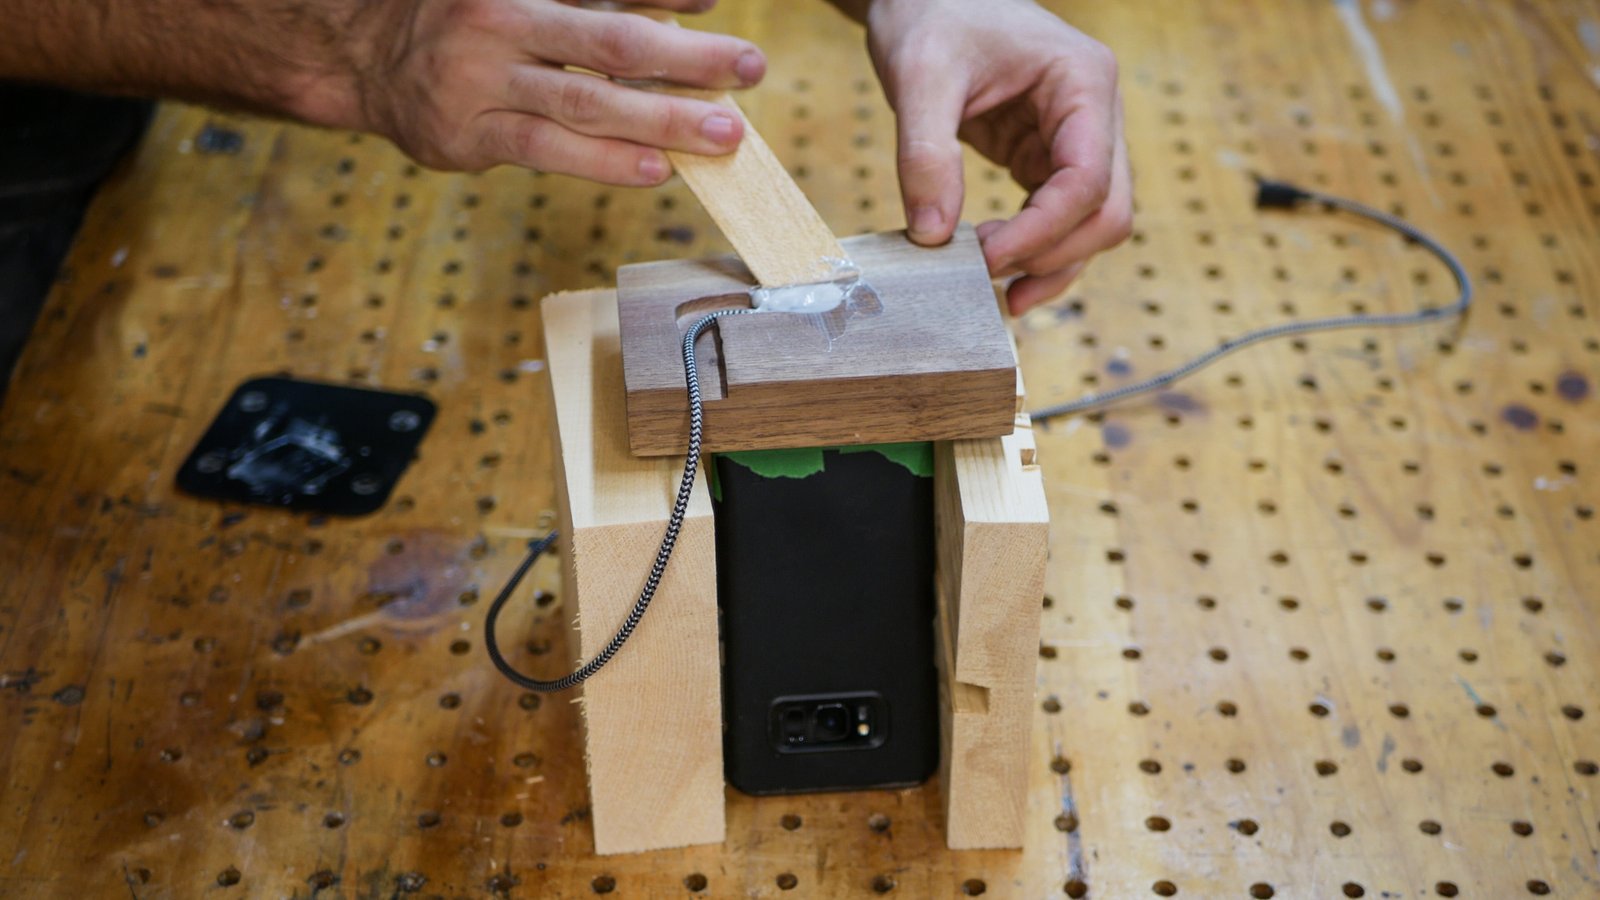
Next I needed to add my USB C connector. I wanted to have it come out in the middle of the cradle so I marked the exact middle.

Charging Cradle (10 of 36)

Then I found a drill bit that was the same diameter as the USB C connector. Being careful not to pick a drill bit that was any bigger than absolutely necessary. The closer you get the cleaner the finished product will look.

Charging Cradle (11 of 36)

Holding my drill at approximately the same angle as the grove in the piece of walnut I drilled a hole right through to the other side.

Charging Cradle (12 of 36)

Now I needed to add a path to route the USB cable through on the bottom side of the cradle. For this job I used a trim router with a 3/8 cutting bit. Starting from the outside of the slab I cut a channel into the walnut that the USB cable will sit into.

Charging Cradle (13 of 36)

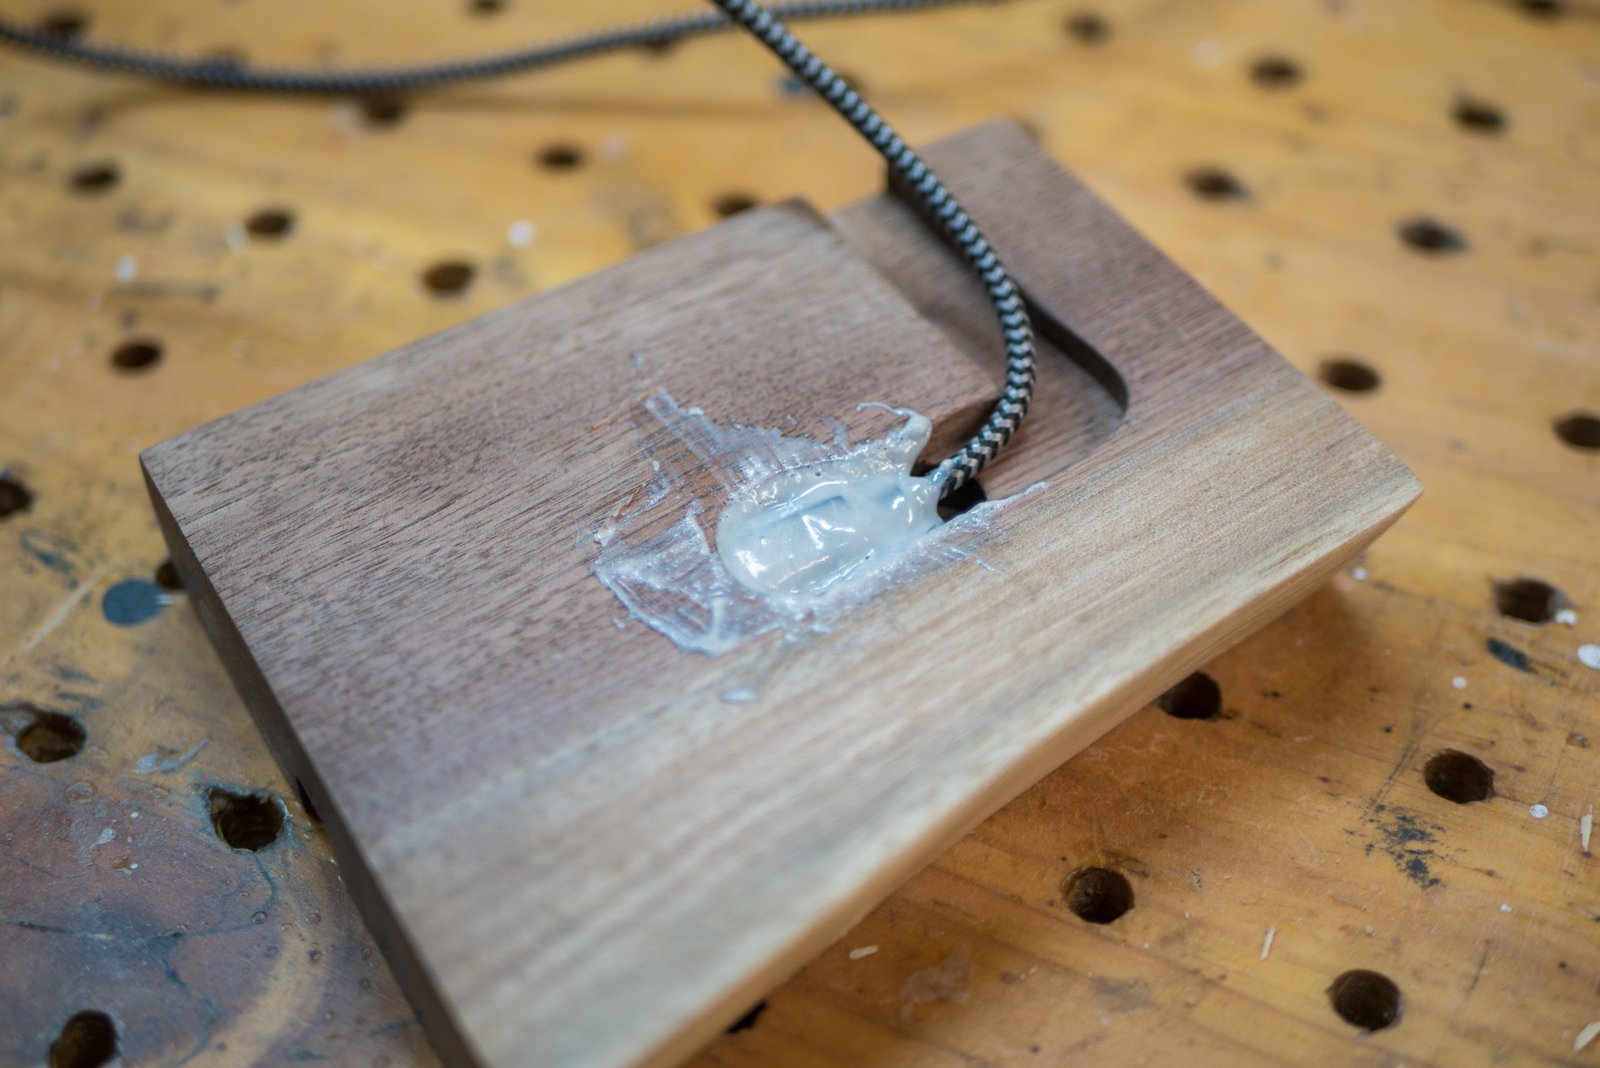
Right around the hole on the bottom side of the piece of walnut I needed to remove a little bit more material to allow the USB connector to sit flush inside. Because I don’t have a plunge router I had to use a drill press with a big drill bit to start my hole.

Charging Cradle (14 of 36)

Then I expanded that hole by using the trim router some more.

Charging Cradle (15 of 36)

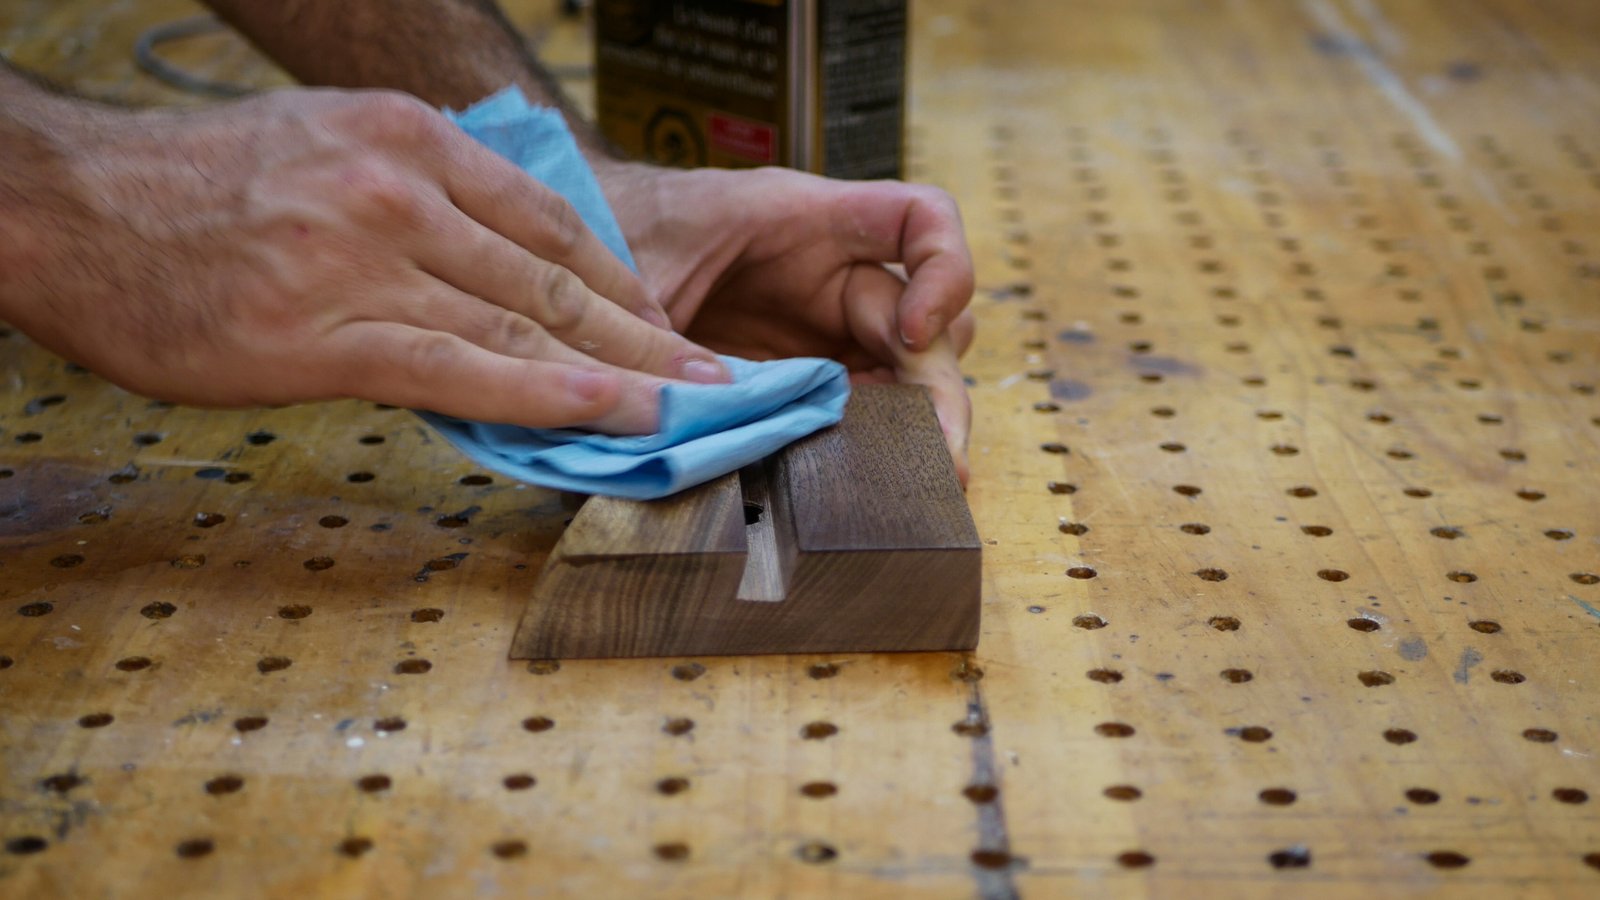
After it was all said and done this is what I was left with. It doesn’t look TOO pretty, but it works and you wont ever see it.

Charging Cradle (16 of 36)

IT WORKS! Before moving on it’s always important to check your work. I brought along a USB power bank and connected it through the cradle and into the phone.
Charging Cradle (17 of 36)
Sanding was next. Time to buff this thing REAL GOOD. I started out with 80 grit and worked my way up to 220. Making sure to remove any imperfections along the way.
Charging Cradle (19 of 36)
I probably could’ve sanded it all by hand, but a random orbital sander made very short work of the flat sections.
Charging Cradle (20 of 36)
Wipe on poly urethanes are my go to for project like this. They leave the wood with a nice natural finish, but help to enhance the color and appearance of the wood. Plus it only takes a few minutes to dry to the touch and I’m almost always in a rush to keep going.
Charging Cradle (21 of 36)
Here it is after 2 coats of the wipe on poly and a ton of sanding.
Charging Cradle (22 of 36)
Here comes the risky part. Many of you may cringe here. It did occur to me that I might ruin my phone at this point. I used painters tape to help mitigate that risk.
Charging Cradle (23 of 36)
I put the phone into the cradle, connected the USB C cable, flipped the whole thing over and put it up on blocks as you can see here. Anyone figure out what I’m going to do next yet?
Charging Cradle (24 of 36)
I mixed up some 2 part epoxy and smushed it in. My thinking was the the USB cable would be help in the perfect place by the phone and the phone would be protected by the tape. The 2 part epoxy was pretty thick so I wasn’t that worried about it dripping down and onto my phone.
Ok… I was pretty worried, but not enough to stop and re-think my plan. FORWARD!
Charging Cradle (26 of 36)
Ahhh yes, what a beautiful application. Not to worry though, the 2 part epoxy dries rock hard so it’s actually pretty easy to clean up if you have the right tools.
Charging Cradle (27 of 36)
I cleaned up all of the excess with a sharp chisel and a razor blade. Then I gave the underside a quick sand to smooth things over.
Charging Cradle (28 of 36)
After I got it home and all cleaned up it looked something like this. My desk is made out of walnut, so it only makes sense that I have a phone cradle made out of walnut too!
Charging Cradle (30 of 36)
The phone slides in effortlessly now and has a satisfying click when the cable is full inserted. I was a little worried that I might not have got the alignment just right.
Charging Cradle (36 of 36)
Can’t take glamour shots without over the top lighting. I love these LED light panels. Super cheap and they throw so much light. Also the keen eyed can see what kind of music I listen to while doing my photo shoots.
Charging Cradle (35 of 36)
Here’s a link to the USB C cable I used.
I used a right angle USB cable because I wanted to keep everything as compact as possible. A normal USB cable would’ve needed way more room in the bottom side of the stand.
Fun fact: I didn’t even know right angle USB cables were a thing until I needed one to do this project.
Charging Cradle (31 of 36)
Thanks for checking out this build guide! Let me know if you have any questions or comments!
Mon panier
00 $