Walnut, Ash, and Epoxy Wall Clock
With a clock strapped to my wrist, in my pocket (cellphone) and on basically every other piece of electronics I own, the last thing I really needed was a wall clock. If I’m honest, it really wasn’t about adding another visual reminder of the slow, steady, ever-persistent, march of time. No, no, the point of this project was to practice working with epoxy so that I can integrate it into future projects. And boy, good thing I did a practice run, because I learned more than a few things with this project. Catastrophic failure is a hell of a teacher, so long as you don’t let it deter you from trying again.
Scroll along with me, I’ll show you how I made the clock and hopefully impart a little bit of knowledge that I learned along the way.
But first, we’ve got to handle a little bit of dirty clerical work. Do you like DIY projects? Do you like woodworking projects? Do you like photos of said projects?! Well then, look no further friend, my Instagram page is what you’re looking for. You can find it at @zacbuilds (direct link: https://www.instagram.com/zacbuilds/) I post all of my projects there, along with any tidbits and morsels of information that I glean along the way. Hopefully helping others to avoid making any of the same mistakes I’ve made. So please check it out, and if you like what you see, consider dropping a follow 🙂

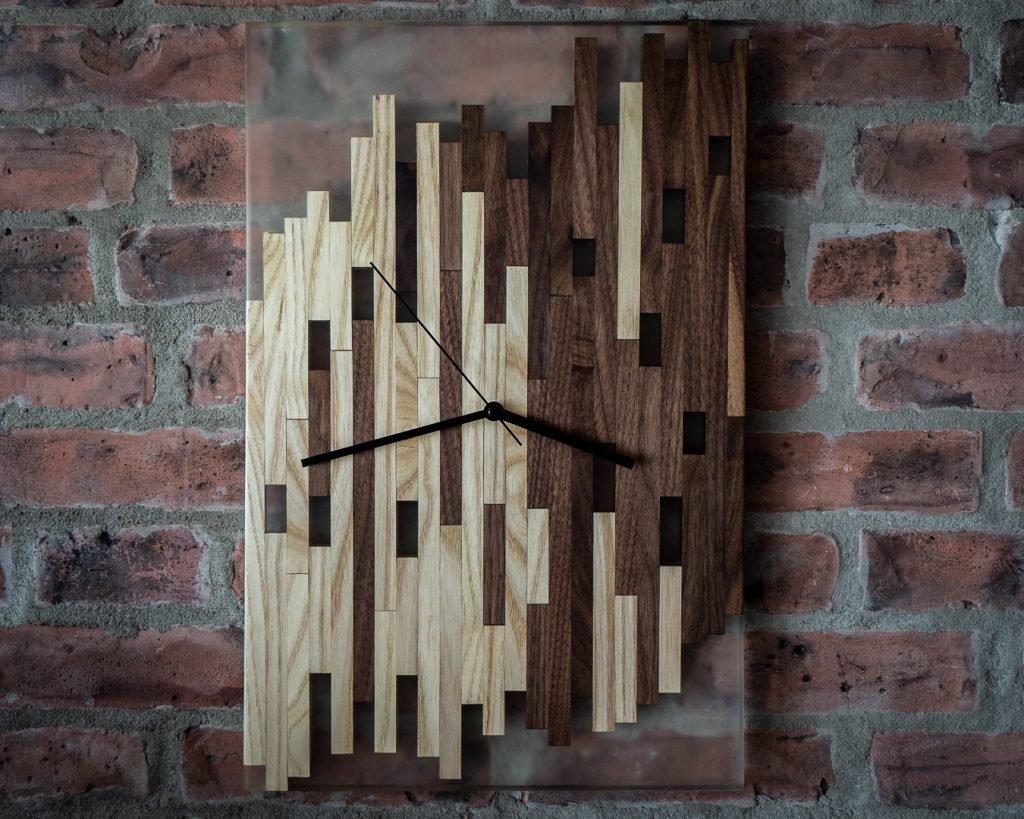
I’m super happy with how this project turned out. The clock’s face is made of a combination of ash, walnut, and of course that clear resin epoxy, that I polished to a satin finish.
I love how the epoxy renders anything behind it in a blurry haze. It reminds me of out of focus elements in photos. And as you’ll see from the rest of my photos, I’m a complete bokeh whore.
Spoiler alert: I didn’t make the actual clock mechanism or the hands of the clock. I bought them as a kit, you can find them from a number of online retailers for 10-20 bucks. When you order it you get a motor with a single drive shaft, some very thin metal arms and a nut that locks the whole setup together. With this kit you could drill a hole into anything and transform it into a clock. Well… maybe not anything… Exercise a bit of discretion.
I ordered mine from Amazon, but I’m sure there millions of people selling them. My kit came with zero brandings on it what-so-ever, just a clear plastic bag with all the parts in it. A sure sign that there’s a single factory in a developing country cranking out thousands of these things every day so that they can be sold under a multitude of brand names.

Maybe I should’ve added some number to the clock face, but frankly, I really enjoy the brutal simplicity of it. The pattern of the clock face is already a bit on the busy side and I think numbers or characters would’ve made it look too busy.
Besides, I spent my entire childhood staring at analog clocks just waiting for 3:30 pm. All that experience made me into the pro-clock reader that I am today. I don’t need no amateur numbers on my clock haha.

The first step of this project was ripping all the pieces of wood that I used to make the clock face, on my table saw. Each piece was 1/2″ wide and 1″ thick. I had some scraps of walnut leftover from another project that I used. Which is good, because I love walnut (and basically everything made of walnut), but it’s not cheap, so it was nice to be able to use some scraps that otherwise would’ve ended up in the trash.
I’m not above scavenging my, or anyone else’s, scrap pile to save a few bucks. I’d love to posture like I’m trying to save the planet by reusing materials that might otherwise be thrown out, but its much more a factor of my own frugality.
Oh ya, I also bought a little bit of ash wood that I cut to the same dimensions.
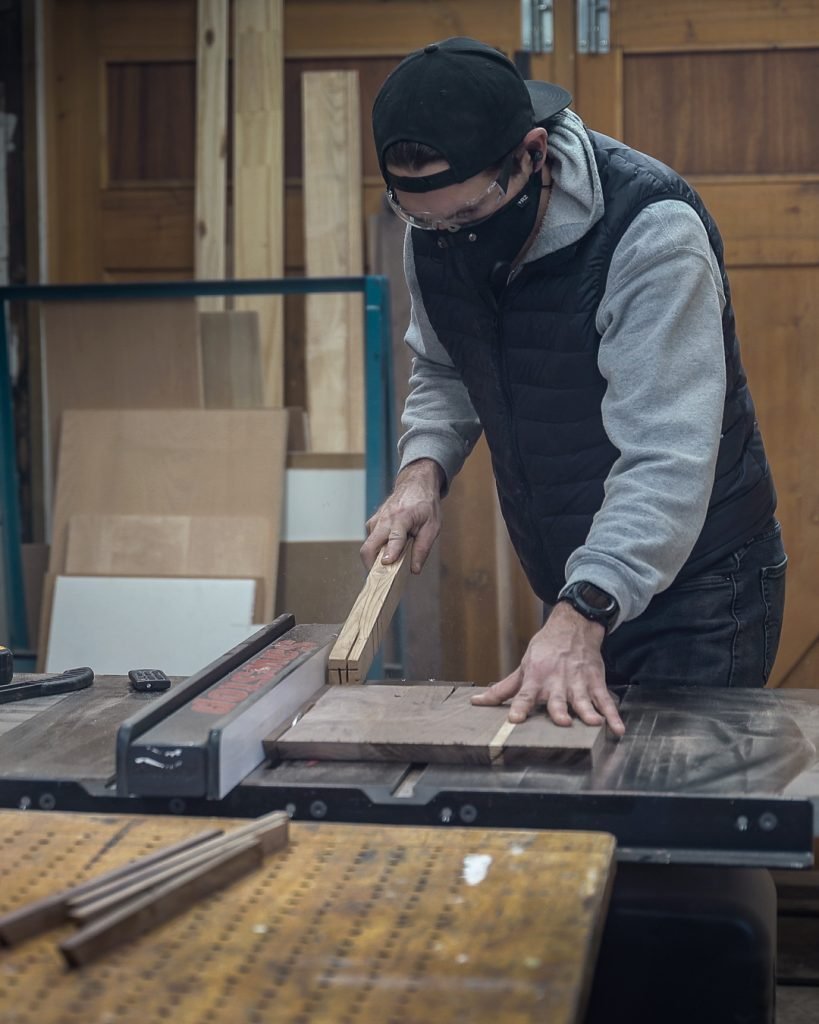
I cut all of the pieces of wood to random lengths on a miter saw and then set up my table for a good old fashioned glue-up.
I covered the table in a thick plastic sheet to simplify my clean up and to protect my table. Glue ups tend to get a bit messy and if you aren’t careful you can end up gluing whatever you’re working on to the table itself. Not that I’d know that from personal experience or anything…
The other bit of prep I did was tracing the rough dimensions of the clock onto the plastic with blue painters tape. I didn’t have an exact plan of what the clock face would look like, but these lines gave me some guidelines to play within so I didn’t get carried away and make the thing too huge.
Once the prep work was out of the way I set about applying carpenters glue to the 30-40 pieces of walnut and ash.

I then arranged the pieces into a visually pleasing pattern and applied some clamping force using these cute little F-clamps.
I know what you’re thinking: “Visually pleasing is a subjective statement. What you find attractive, might not appeal to everyone.”
And indeed, that’s very true. But I’m also the narrator, so I get to say whatever I want 😉

After the glue set and I was able to remove the clamps I put the clock face through my planer to remove any high points and reduce the whole thing to a uniform thickness.
I love it when a whole project fits through the planer! I’ve done a bunch of bigger glues ups for tabletops and had to plane them down by hand (or with a belt sander) and it’s a much more laborious process. I don’t know what those Luddites were on about, machines are great!

The clock face was prepped and I was ready to move onto the next step: Making the form that I would cast the epoxy resin into. I used some scrap melamine pieces that I had leftover from building some shop cabinets and assembled them into an open face box.
The interior dimensions of the form were 12.5″ x 20″, just slightly larger than the clock face. This gave me a little bit of a margin for error around the whole perimeter of the clock face. I figured it was pretty unlikely that I’d get a perfect casting so I wanted to have a bit extra I could cut off to get a clean edge.

I used tuck-tape to line the inside of the form. The epoxy doesn’t stick very well to the tuck-tape so it makes it easier and cleaner to remove the forms once the epoxy has cured.
I learned this trick from watching other Instagramers (is that a thing people say?) do epoxy pours. Most people use red tuck-tape. I used the white kind because I’m special and different! Or maybe it’s just because I happened to have it kicking around the shop.

Ok, here we go. This is the big show. Time to cast some epoxy.
When you buy epoxy it comes in 2 parts, a resin, and a hardening agent. You mix the two together at a 2:1 ratio (or at least this epoxy was 2:1, it varies depending on the type and brand you’re using) and then pour it into your form. Ok, simple enough, I can handle that. At least… I thought I could.
I mixed together my first batch. 500ml of resin and 250ml of hardener. This was my first mistake. You’ve got to mix the epoxy pretty vigorously, but the containers I was mixing in was 750Ml so I ended up making quite the mess. Leave a little bit of room for stirring!
I’d definitely recommend anyone attempting this at home layout some material that you can ball up and throw away after you’re done to make clean up more manageable. Kind of like what I did for the glue-up step. It sticks to everything and then dries rock hard, so it’s really annoying to clean up.

Let that epoxy flow! I’ve got to say it’s super satisfying to pour out the perfectly clear epoxy. It’s has a honey-like consistency and because it pours so slowly it looks like an example of laminar flow (shout out to SmartEveryday haha).
I carefully poured out my first container, taking care to fill all of the crevices. I quickly realized that if I wanted to fill this whole form I was going to need mix another batch up ASAP. In the end, I used close to 1.5L epoxy.

Hey wait a minute… That’s not what this was supposed to look! This is a complete disaster!
Remember how I said I learned a few things along the way? Well, one of the things I learned is that there are different types of epoxies. The epoxy I was using was a fairly rapid setting epoxy, which generates a lot of heat as it cures. Because I poured so much at once and poured it so thick, all of that heat caused the epoxy to boil as it cured. It would’ve been fun to watch, in a weird science experiment kind of way, if I hadn’t known I was watching hours of hard work get flushed down the drain. Oh well, chalk this one up to a learning experience.
There’s a trade-off to be had between the amount of time it takes the epoxy to cure and the depth at which you can pour to. Epoxies that take longer to cure, generate less heat (or at least they generate the same amount of heat but over a longer time period so it has more time to dissipate) so you can pour them deeper. I should’ve used a deep pour epoxy and next time I do a project like this I will.

I wallowed in self-pity for a few minutes and then I hit the reset button and got back to work. If at first, you don’t succeed, try, try again.
I’ll spare you all the steps that I’ve already covered and skip ahead to me removing the forms triumphantly from my second epoxy casting, which went much better than my first.
Did I switch epoxies? No. I still had 3/4 of a gallon of perfectly good epoxy left and I was going to find a way to use it! Instead of doing 1 big pour, I split it up into 4 smaller pours. I would pour 1/4″ of epoxy at a time and wait 24 hours and then repeat.
It was a bit labor-intensive, but hey, it’s better than boiling the whole thing and having to start over for a third time.

Who knew cutting epoxy would instantly turn it into confetti?! I sure didn’t. So you can imagine my surprise when planer started spitting long strands of epoxy shavings into the air haha.
Normally I have a dust extractor attached to my planer, but the volume of the epoxy confetti was so great that it would clog up the ducting almost instantly. It stuck to EVERYTHING too. I’ve been told that the longer you wait before cutting or working with it the less prone it is to stick to everything.
I had to remove my entire dust cleaning apparatus and resort to just vacuuming after every pass on the planer.

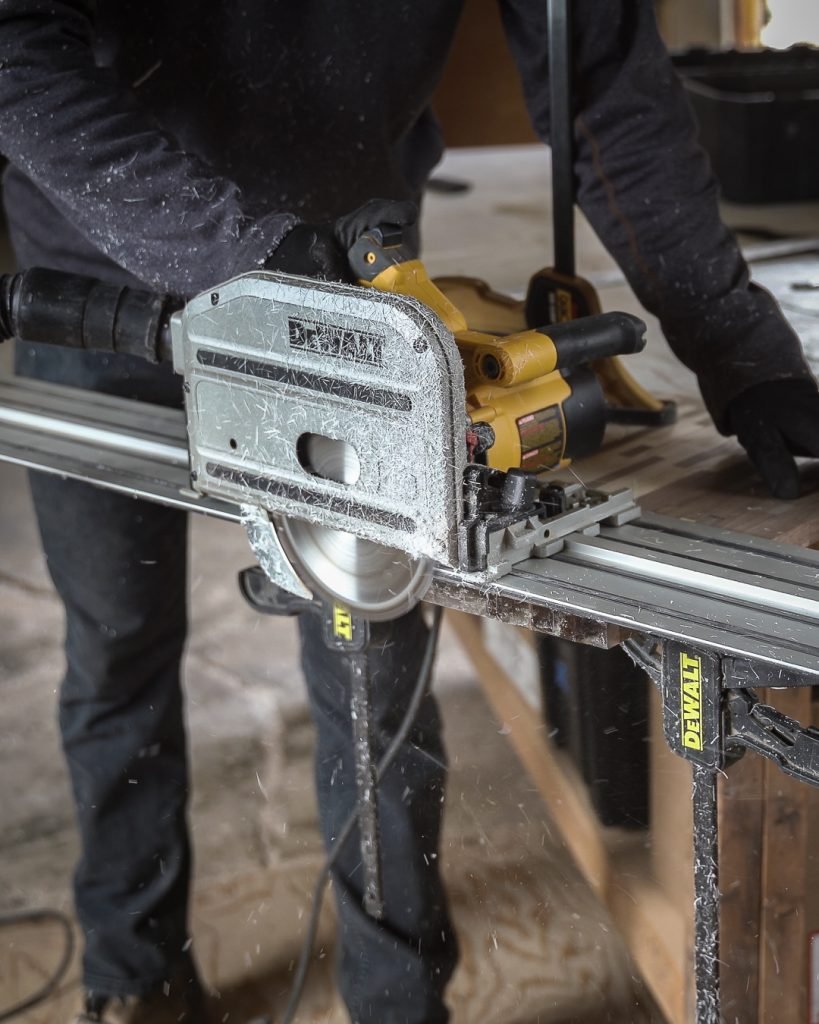
Removing the forms did a little bit of damage to the edges and corners of the clock face (as I knew it would). Nothing major, just a few small chips here and there. I used my track saw to trim off 1/4″ of material the whole way around the clock face. That’s that margin of error I was talking about before coming back into play.
I love using my track saw for these types of cuts. It makes it really easy to cut straight lines on irregularly shaped objects.
The longest single part of this project was definitely the sanding part. I spent a few hours working my way through the various grits of sanding pads I had. I started with 80 grit sand paper and worked my way up to 320 grit sand paper. Even after many passes at 320 grit, I was still nowhere near my desired level of finish.
I searched my shop high and low so sanding pads that were finer than 320 grit but came up empty-handed. Off to the hardware store I went.
Except the hardware store didn’t have anything higher than 320 grit either! Well, at least not in sanding pads anyways…

I picked up some sheets of 600, 1000 and 2000 grit sandpaper and proceeded the rest of the way without any help from Tesla or Edison. Just good old fashioned manpower. I don’t need those guys anyways! (I totally do!).
I sanded, and sanded, and sanded until my arms just couldn’t take it anymore! After sanding with 2000 grit for a while I was actually pretty satisfied with the finish of the epoxy.

Perhaps if I had kept going with even higher grits of sandpaper I could’ve got the epoxy to look crystal clear. I don’t think my arms could’ve taken it and to be honest, as I was working on it I really started to like the satin-y look it had at 2000 grit, so I decided to stop there.
I also knew that adding a clearcoat/varnish to it would also help to make the epoxy less opaque.

At this point, I was on a real 2-part kick, so I decided to use a 2 part rub on clear coat to finish the clock face. I mixed the finish and a hardener in a plastic container, poured it out onto the clock face and then used a plastic spreader to smear it around.
The product I used was called Rubio Monocoat and if you’ve never used it before, let me tell you, it smells wonderful haha. And I’m not one of those weirdos that loves the smell of chemicals, it just legitimately smells nice. Kind of citrus-y. A real pleasure to work with.

I let the Monocoat sit for 15 minutes and then wiped up any excess using a lint-free cloth as per the instructions.
All I could say was “wow”. I really liked the way the finish looked. It added a lot of contrast to the wood grain without altering the natural color of the wood very much. And like I suspected, it also helped to make the epoxy a little less opaque.
I think I’ll have to find more uses for this finish in the future.

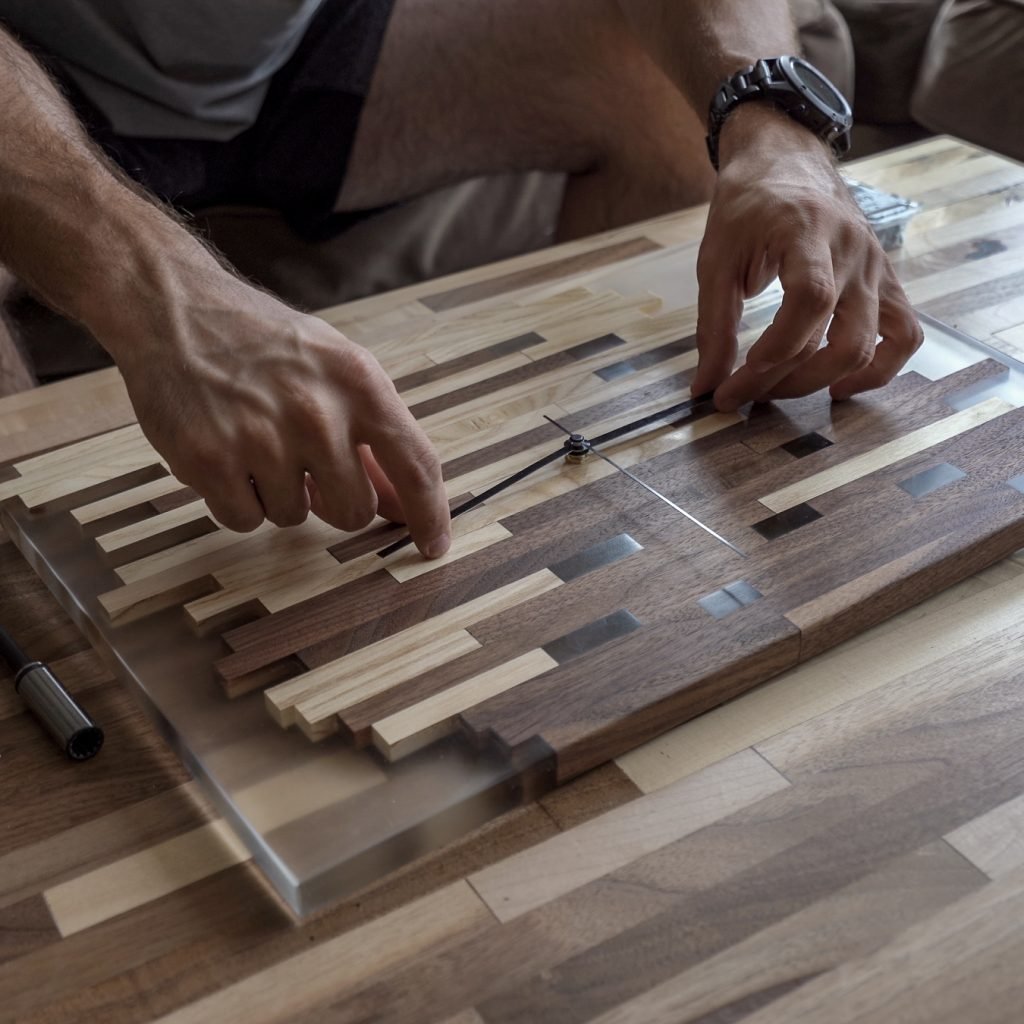
The main drive shaft (is that even an applicable term for such a tiny motor?!) for the clock mechanism was 1/4″ thick so I thumbed through my collection of drill bits until I found a 1/4″ drill bit and bored a hole through the very center of the clock face.
I put that piece of blue painters tape down for 2 reasons. First, it let me figure out where the exact center of the clock face without drawing directly on it and, second, I find that a little bit of tape helps to prevent the drill bits from tearing out any unintended wood, especially when the drill bit is a little dull. Like most of mine are.

I quickly realized that the drive shaft of the clock mechanism wasn’t long enough to thread through the clock face. That meant I had to either find a DIY clock kit with a longer shaft, or I had to mortise out the backside of the clock face to allow the clock mechanism to sit into it.
I think you can tell from this photo which I opted for.
I traced the outline of the clock mechanism onto the back of the clock face and then used a hammer and a semi-sharp chisel to carefully remove material until the driveshaft was able to poke the whole way through the clock face.

When it comes to mounting solutions everyone loves a good french cleat, right? I thought about making my own, but then I found these simple metal ones on Amazon for a couple of bucks, so I ordered them at the same time I ordered the clock kit.
I centered the male side of the french cleat on the back of the clock face, being careful to position it in a spot where you couldn’t see it through the epoxy and screwed it in place. I pre-drilled the holes to avoid snapping the screws or splitting the wood.
Oh and BTW, you aren’t seeing double. The coffee table I’m working on is another one of my projects and is very much in the same vein as this clock. If you want to see how I made that, you can check it out here: Faded Table Build

Alright, let’s get that clock mechanism installed!
My mortising did the trick, it slid right in and the drive shaft threaded through to the front of the clock face.

Once the driveshaft was poking through the other size I was able to secure the whole assembly in place using a single nut that tightened against the clock face.
So far so good!
Once I tried to install the arms on the driveshaft, this DIY kit really started to show its cheapness. The arms are made of really, really thin metal. I understand why they do it this way, the less mass the motor has to spin the longer the battery will last. Fair enough. The problem is that you have to pressure fit the arms onto the driveshaft and it requires quite a bit of force. Predictably the arms bent, I swore, and then spent the next 10 minutes trying to straighten out the arms as best as I could.
I mounted the female side of the french cleat on the wall in my living room and then dropped the clock in place.
Ahhh job well done.
And, hey, I only had to completely reset and start the whole project from scratch once. That’s a win in my book.

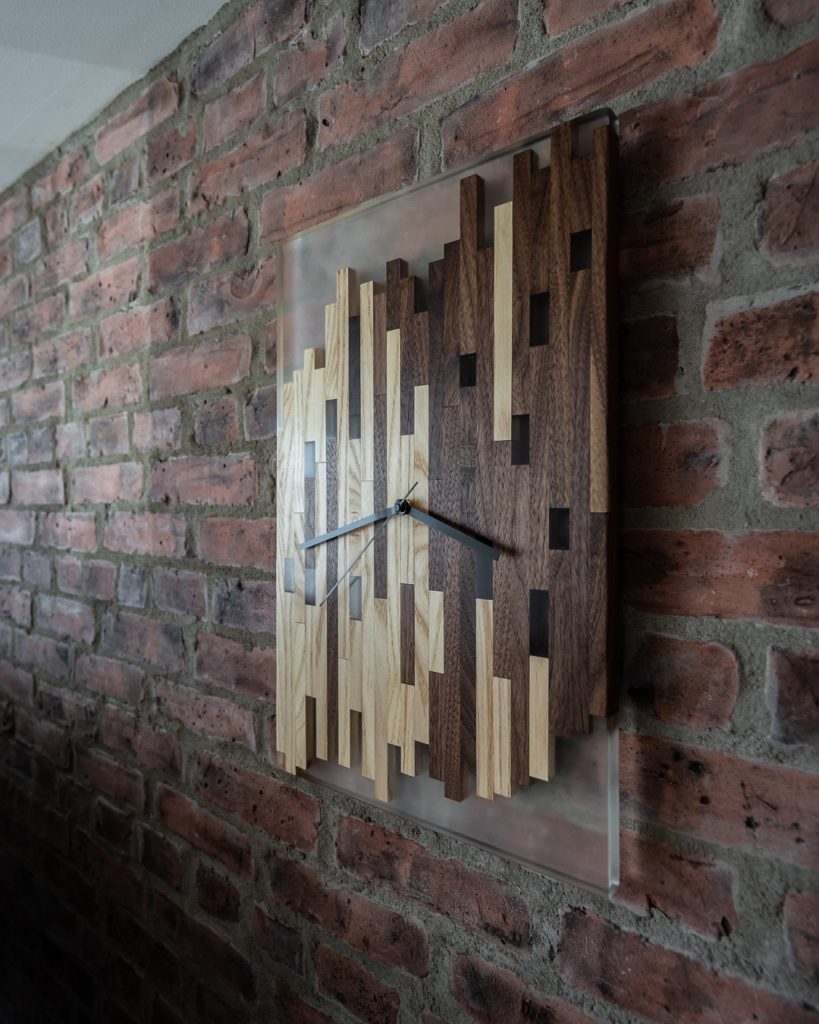
Zoom out and bit and now you can see what it looks like within the context of my living room. I think it goes nicely with the rest of my wooden decor. Especially the coffee table that I just mentioned.

It was really fun working with epoxy for the first time (if you ignore the crushing emotional pain of screwing up the first attempt) and I’m excited to incorporate it into more builds in the future.
I think going forward I’ll probably try to get my hands on some slower curing epoxy so that I can do everything in a single pour. Doing the pour in 4 parts was a bit of a bummer, most of my time was spent just setting up and getting ready to pour.

Bonus blade runner style shot!
I like to do photography almost as much as I like to do woodworking, so it’s always fun to take pictures of my projects. Lately I’ve been trying to learn more about lighting and I can use it to affect feeling and mood in my photos.

To get that last shot I had to use a couple of battery-powered external LED lights. Thankfully lights are getting cheaper and cheaper these days so you don’t need a huge budget to get a cool lighting setup. I got these light wands recently that do full RGB, 6000k white for about 100 bucks each. They kick out a decent amount of light for their size, perfect for taking pictures of stuff this size.

Thanks for checking out my clock build. Congrats on making it this far. If you have any questions or comments I’d love to hear them. Unless they are negative in which case I probably wouldn’t love to hear them. But that’s what I get for posting anything on the internet.
I’ll do my best to answer all of the questions! And again if you haven’t already, do me a favor and check out my Instagram page.