Walnut and Ash Mosaic Nightstands
What a project this was. Let me tell you, this probably took me close to a month to finish. I was only working on it in my spare time on weekends and after work, since my day job has been really busy lately. Definitely one of my longest projects, but totally worth it! I’m really happy with how it all turned out!
Before we get into the rest of the post if you havent already, check me out on Instagram! You can find me @zacbuilds or (direct link: https://www.instagram.com/zacbuilds/)
Years ago I saw a coffee table that had a mosaic wood pattern that slowly transitioned from a darker wood to a lighter wood and it’ been stuck in my mind ever since. Recently I was trying to brainstorm some designs for a nightstand for my bedroom and figured I’d finally do my own take on it. These are the results!
I liked it so much that I made 2 of them! Everyone knows you ain’t shit if you don’t have a matching set of nightstands (obviously just kidding, this is my first matching set).
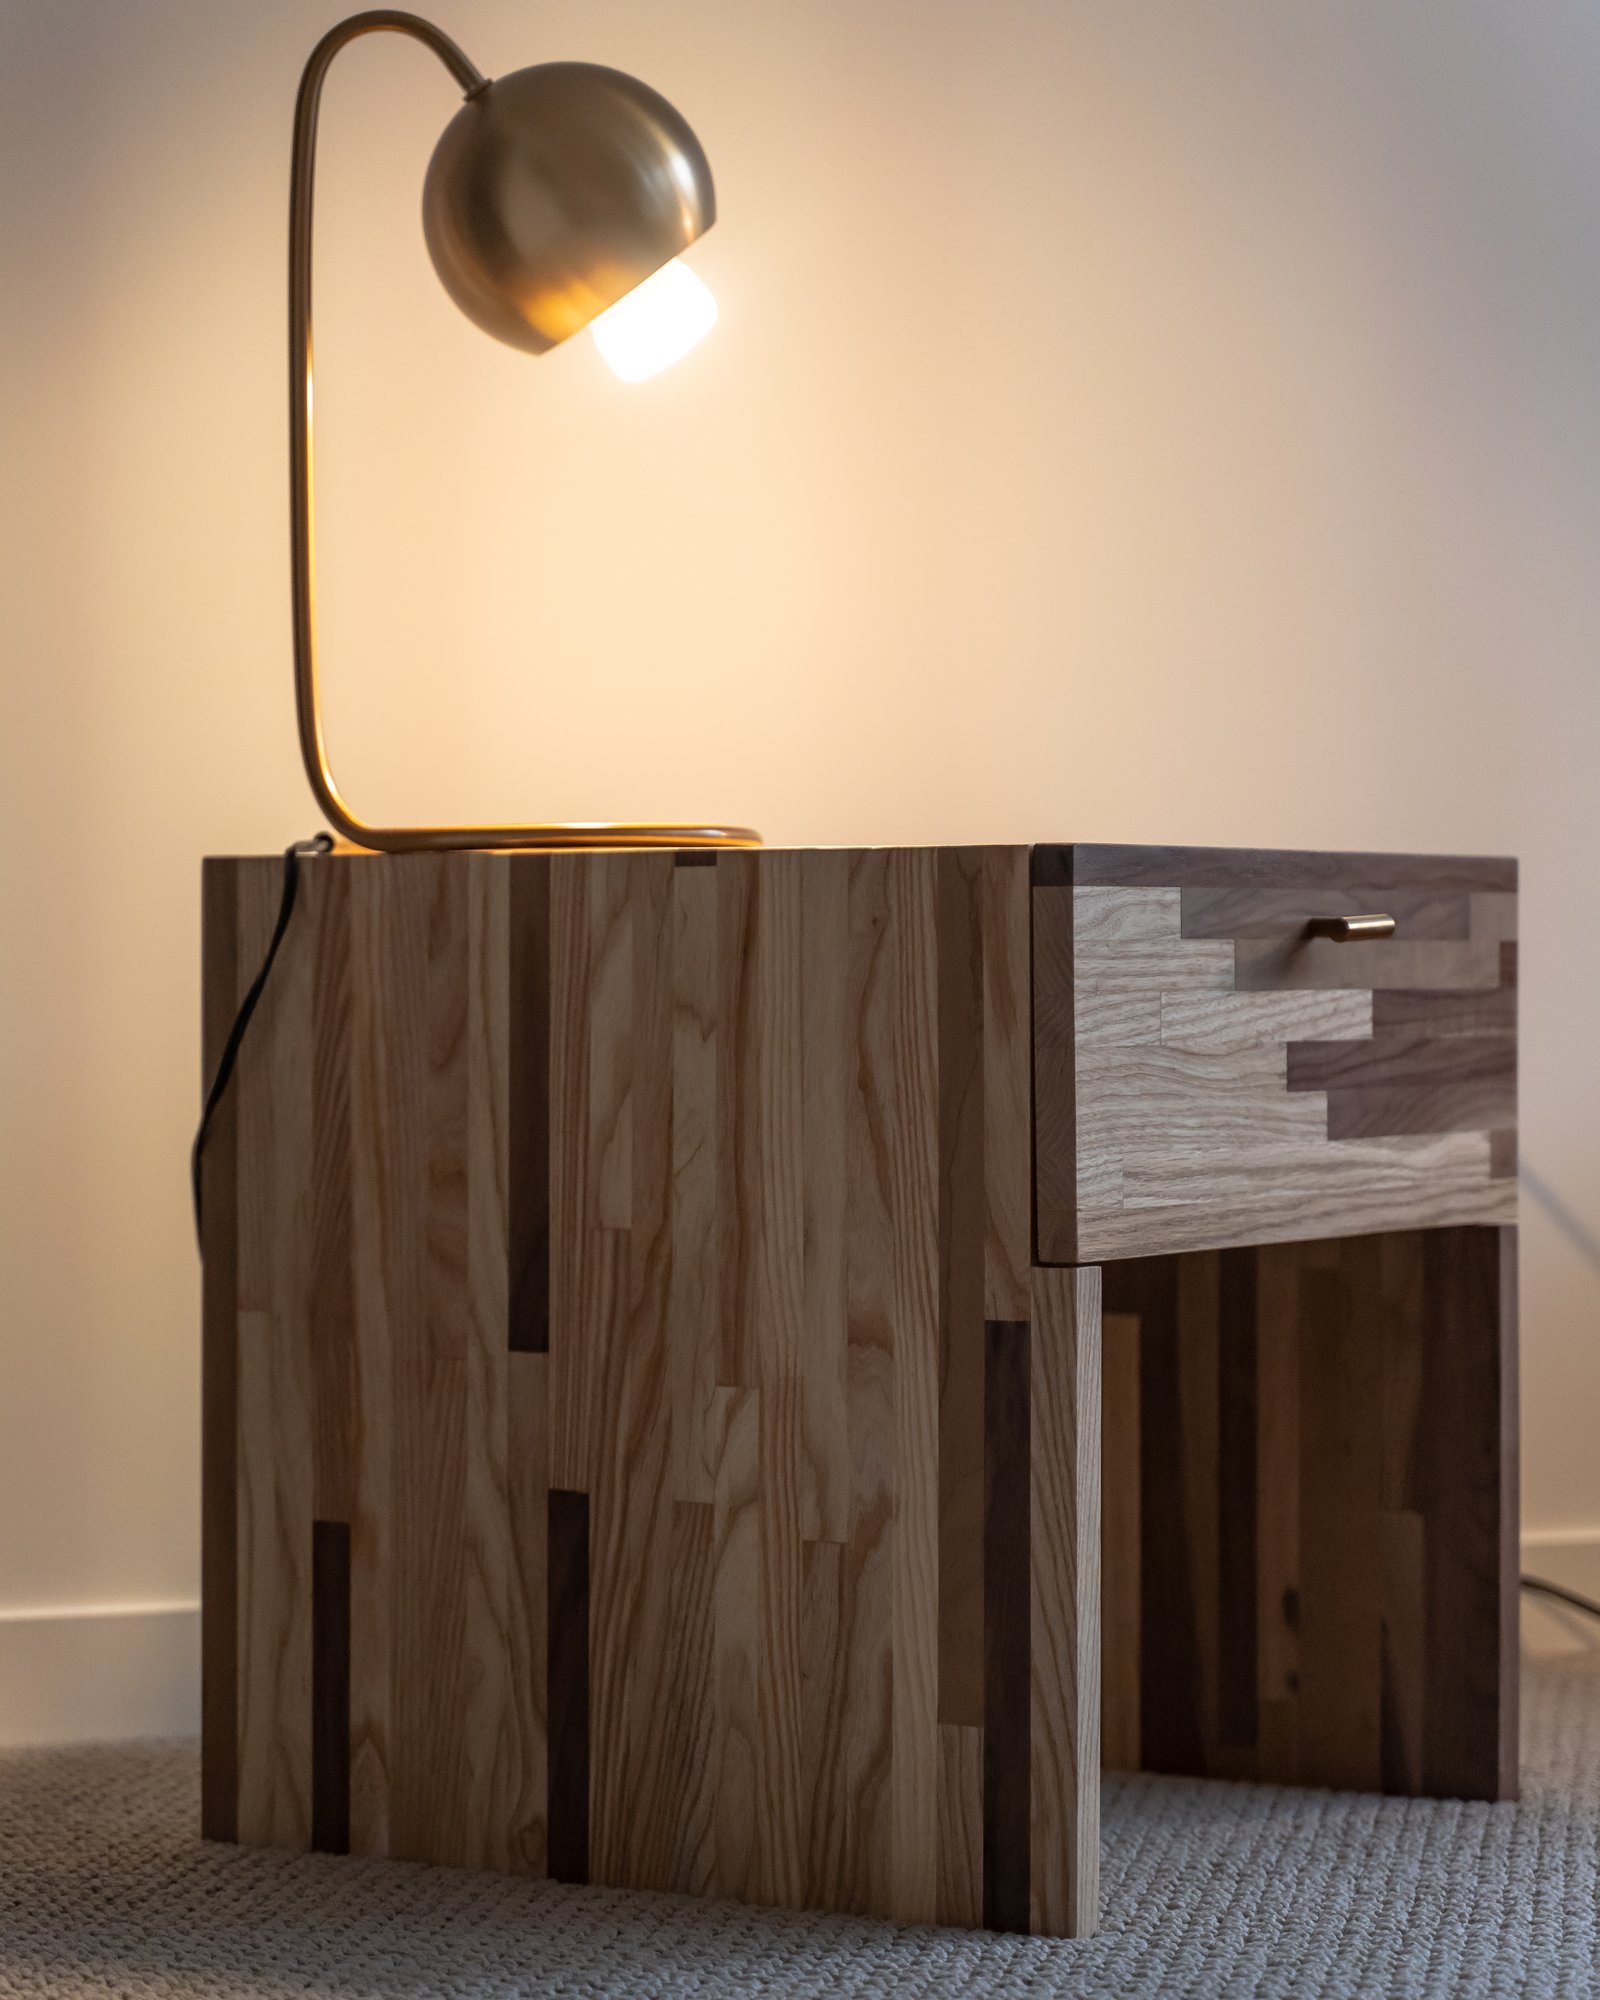
As you can see each nightstand is approximately 50% ash and 50% walnut, I wanted each nightstand to “fade” from the darker wood (walnut) to the lighter wood (ash).
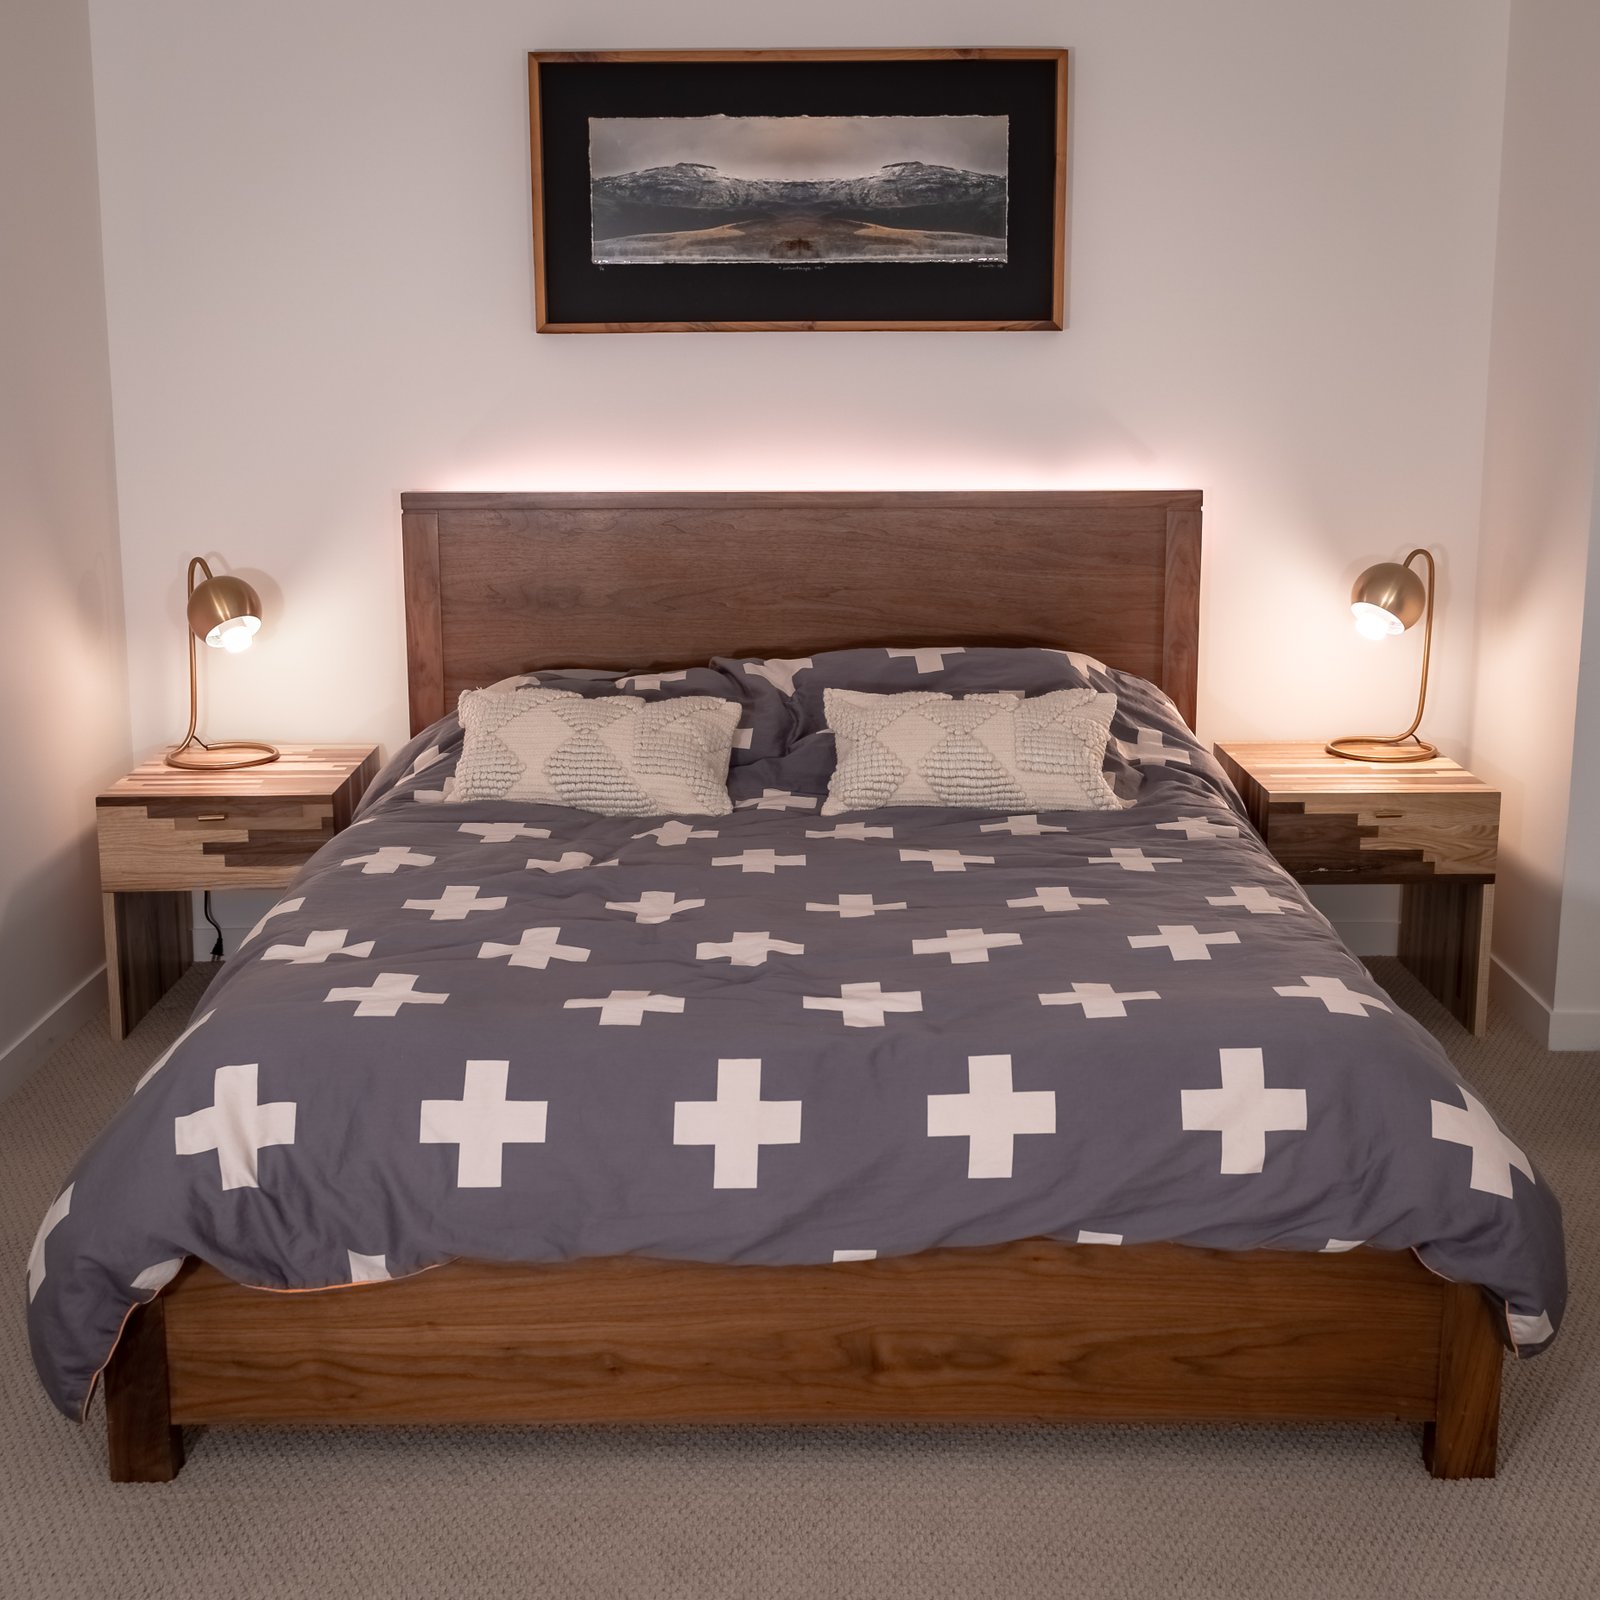
Here they are set up in my bedroom! Ok, you’re right, the other shots were in my bedroom too, but on the other side of the room. Nothing gets by you.
My bedframe is made of walnut, so obviously, the walnut side of each nightstand faces towards the bedframe. As you move away from the bed frame the nightstands transition to ash.
In the future, I’d like to build on this concept and add some ash shelves in the corners on either side of my bed. A couple of triangular shelves in each corner will look good.
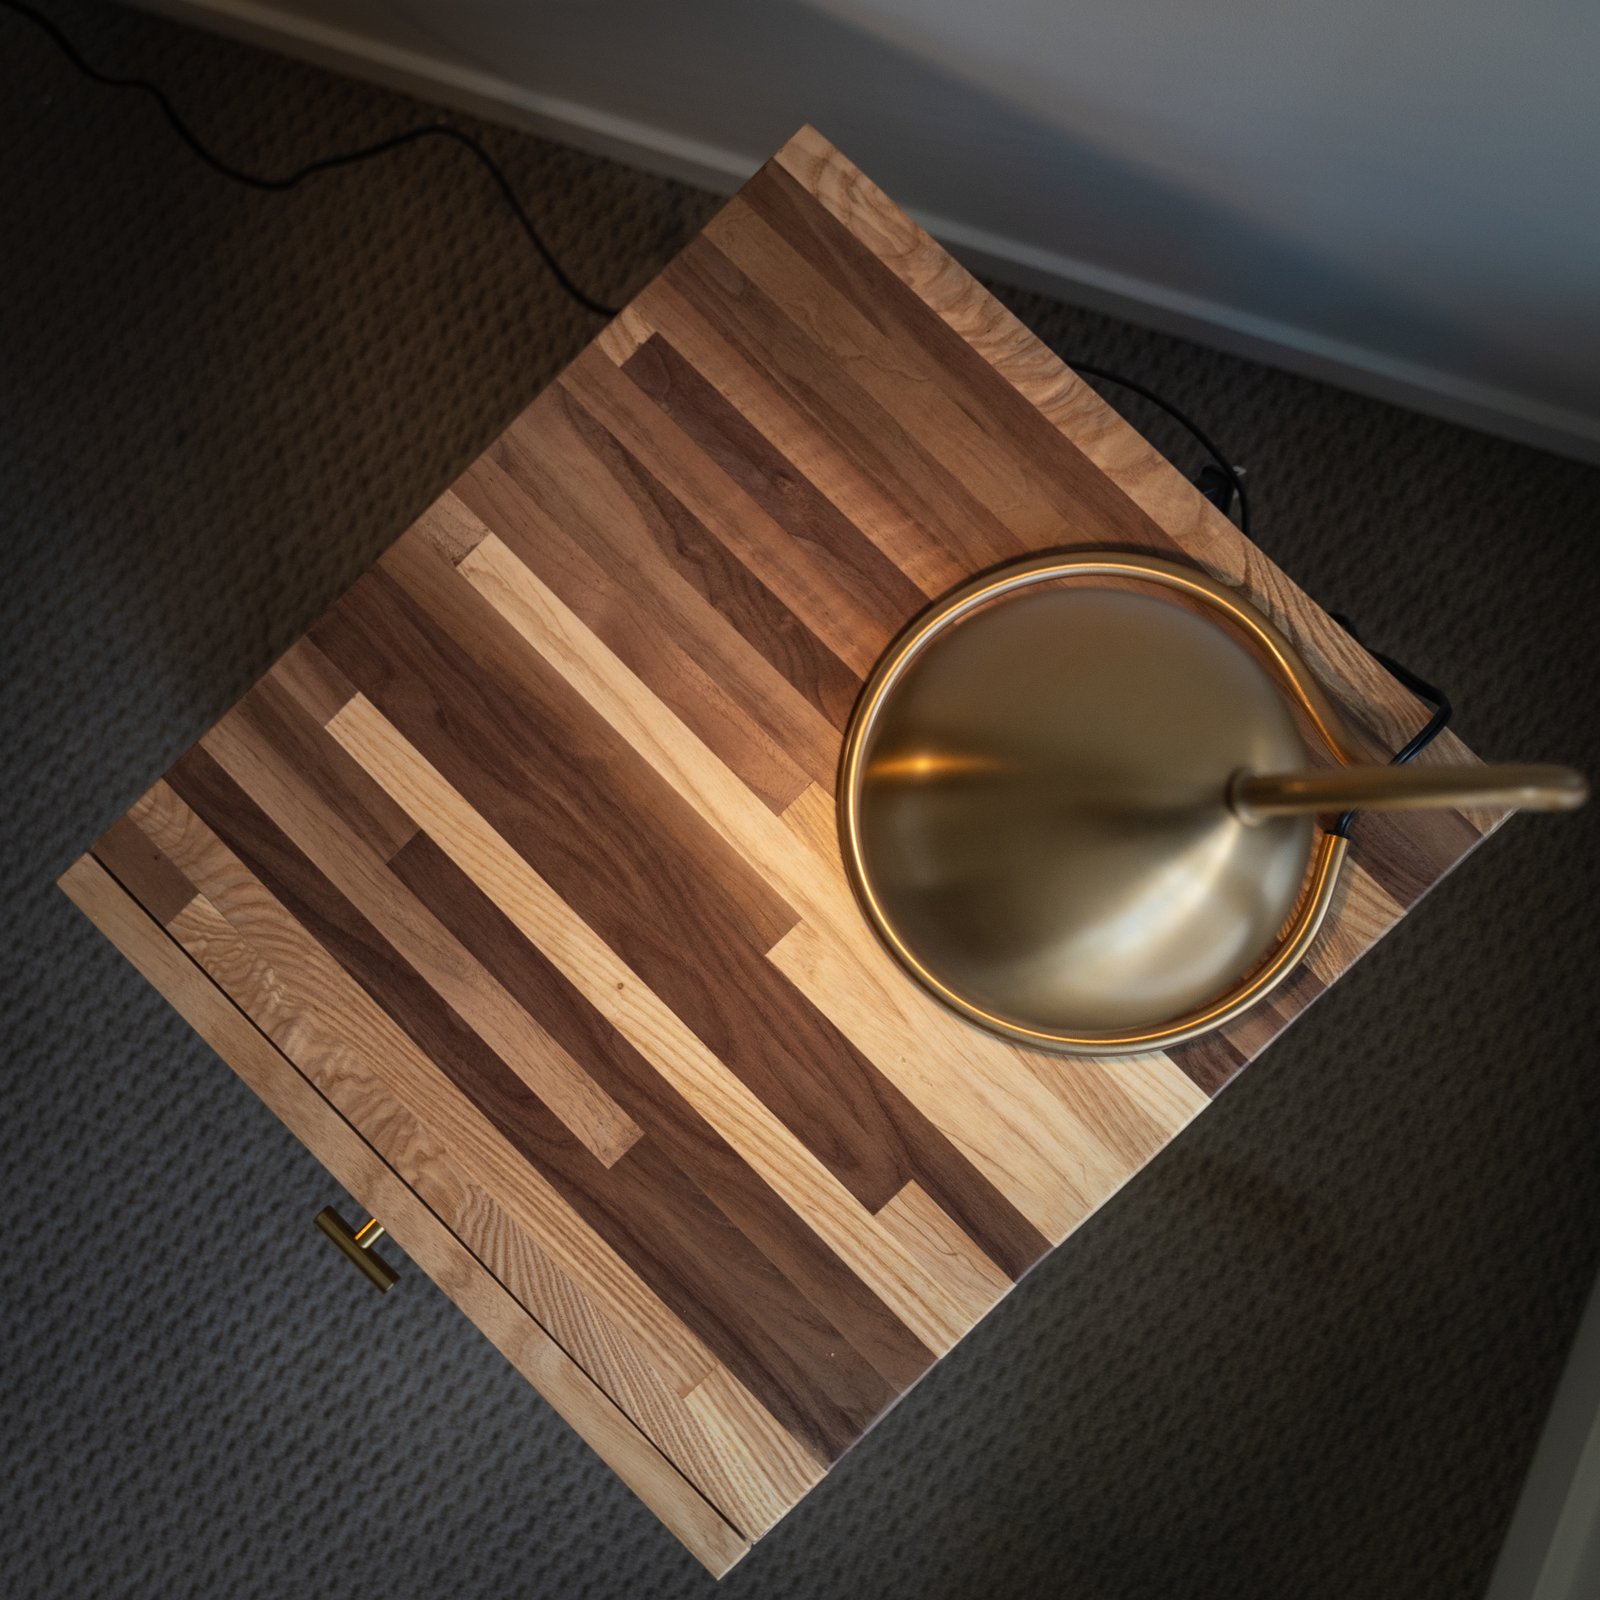
I feel like this picture best illustrates the concept of fading from walnut to ash as you move away from my bed frame.
So are you sufficiently interested at this point? Do you like DIY? Because I have a pretty detailed guide that follows on exactly how I built these nightstands. If you’re just interested in seeing more finished pictures skip ahead to the end I probably have about 10 more shots detailing various features of these nightstands. If you’ve got some time and want to see how I did it, keep reading!
This is the small pile of wood I started with. Just some 4/4 ash and 4/4 walnut.
I had about 20 board feet of each type of wood. I bought it at a local mill and it cost me about $150 CAD. This was the bulk of the cost for the project, I used a lot of stuff I already had, but I’d say I had a good $50 dollars in other misc expenses along the way (glue, wood filler, etc).
When I was picking out my wood I tried to pick pieces that had as few defects as possible to maximize my yield. It helps that I cut everything up into small strips, but even still any cracks or missing knots can make a piece unusable. I also tried to pick pieces that divided nicely into 1″ increments because that’s the width I’d be cutting everything to.
And we’re off to the races!
To start I cleaned up every piece of wood by running it through the planner. This process removes a thin layer from the top of the wood, exposing the nice smooth surface beneath. I repeated this process many times until each piece of wood I had was a uniform thickness.
By the time I was done I was 3 hours older and the wood was about 3/4″ thick.
Note my ear protection. They actually double as a bluetooth headset. While I worked I listened to the audiobook of “China’s Great Wall of Debt” by Dinny McMahon. Really interesting book for anyone interested in finance/economics/geopolitics. Highly recommend it.
For anyone who thinks that stuff is boring, I’d counter that it’s not nearly as boring as planing wood in complete silence.
This crazy contraption is called a straight edge jig. I used it to remove the slight bows from my piece of wood.
After placing the concave side of the wood against the jig you can then push it through the table saw and cut a perfectly straight line on the opposite side of the wood.
Then once you have a perfectly straight line on one side of the wood you can work off of that line and be confident that all of your subsequent cuts will be nice and straight as well.
Once I knew all my wood was straight and a uniform thickness I set about cutting it into smaller strips. I set my table saw to 1″ and began ripping. I pushed each and every piece through the table saw until I had a bunch of long 1″ x 3/4″ sticks of ash and walnut.
Again this was pretty time consuming, thankfully I still had my headphones and my audiobook. As the pictures go on, you’ll see I actually switch headphones quite a bit. When the battery runs out on one pair I switch to the other.
Heaven forbid I actually have a moment alone with my own thoughts *shudder*.
After everything had been ripped into long and thin piece I cut them into random lengths using my chop saw (miter saw).
I stuck to lengths between 1′ and 3′ so that I wouldn’t have any piece that were too small or too big in the mix.
Finally all the cutting is done!
Ok well, maybe not completely done, but, at least done for the first day. Here you can see all the individual piece that would come to make up my nightstand.
Getting to this point basically took me all day. I know it doesn’t look like much but prepping and cutting the wood is normally one of the most labour intensive parts of any project I do. It’s a thankless job that I’d gladly outsource at the drop of a hat, but for now, I’m stuck doing it myself 🙂 Maybe I’ll “hire” an unpaid intern to handle this stuff in the future.
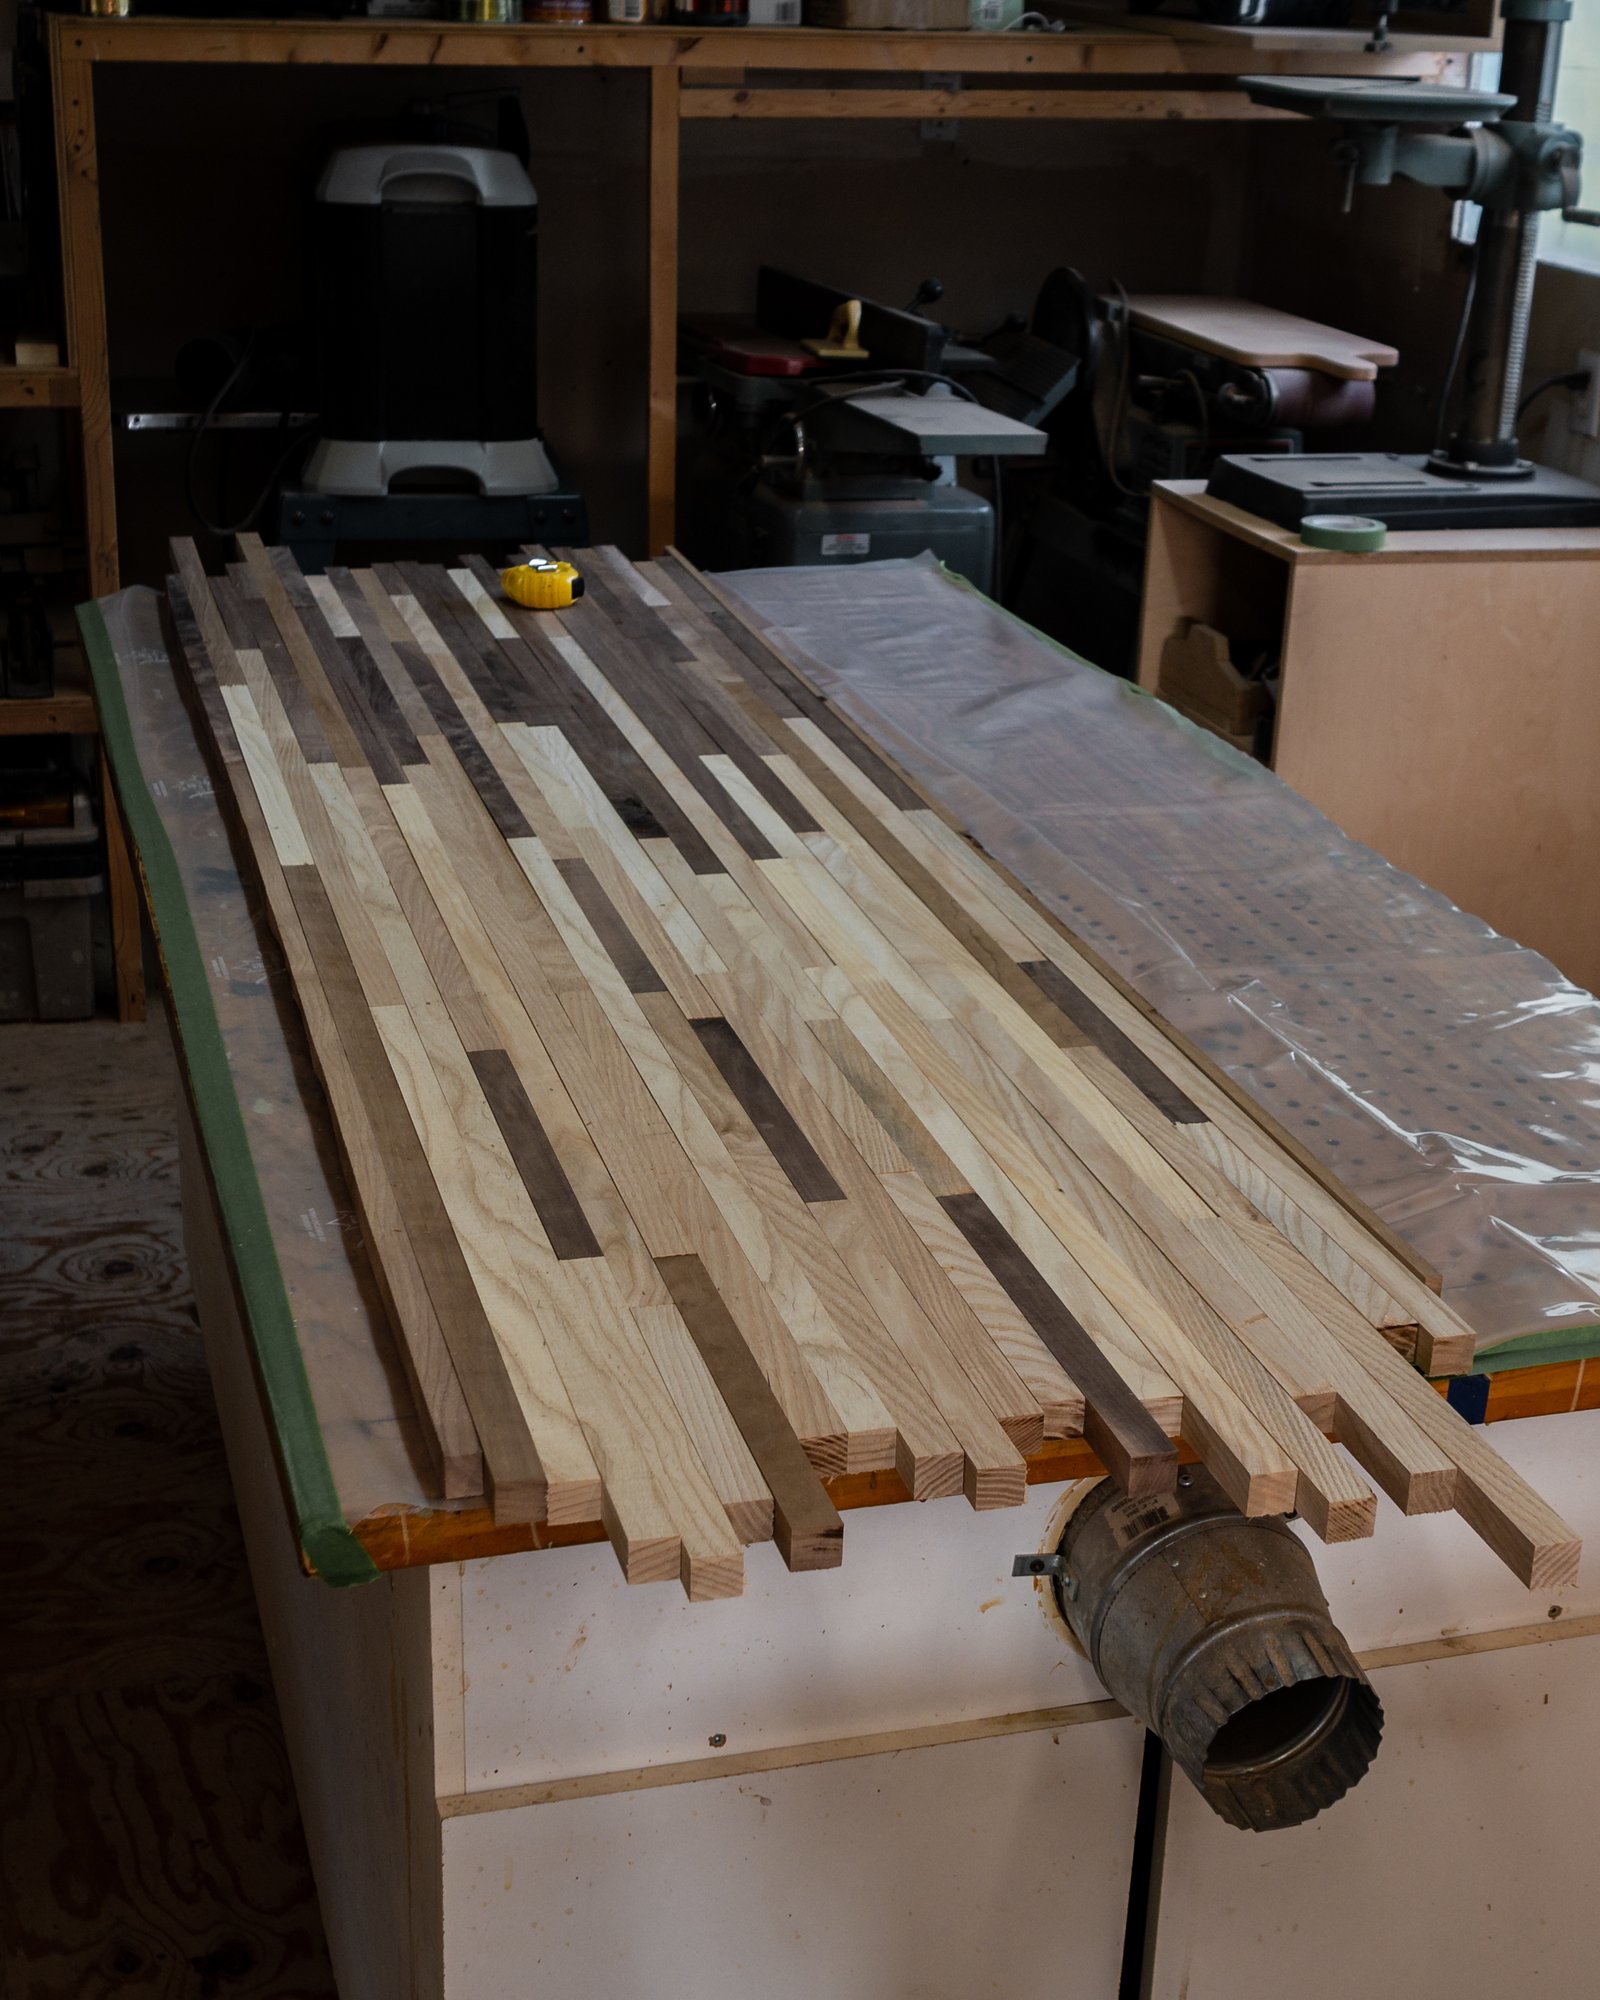
In this picture, I’ve organized all those individual pieces of wood into a pattern that I like. Starting walnut on one end and ending ash on the other.
I’m planning on gluing all these pieces together but I haven’t yet. This is my “dry run”, I use the dry run to figure out my layout and set everything up before I start glueing. It saves time during the actual gluing process, which is in short supply once the glue starts flowing. It’s a race against the clock to get everything done and set in place before the glue starts to dry.
I also took the time to wrap my table with plastic to make for an easier cleanup. When time is of the essence you don’t have time to be worrying about glue drips and spills. Doing big glue-ups like this tends to be a messy affair.
Tick tock! Here we go! I rolled each piece over onto its side and then applied a generous bead of wood glue to each piece.
Once every piece had some glue on it I rolled them back over and squished them together.
Like I said before, try not to worry about making a mess when you’re doing this. You’re just focusing on getting everything glued and then back in position before the glue starts to dry.
With all of the glue applied and all the pieces in the correct position, I was ready to start clamping.
I clamped my new wood mosaic in 7 different spots using big bar clamps. Again, in the interest of saving time, I had preset all of my clamps to the right size during the dry run phase. So when it came to this step I could just drop the clamps in position, spin the tensioner a couple of times and I was good to go.
It’s all about working as efficiently as possible when you’re doing a big glue up.
After I was done with the big glue-ups I did some smaller ones for things like the drawer fronts and the back of the nightstand.
Same process, but I wasn’t nearly as stressed out about time doing these smaller glue ups.
The next morning I came back to the shop and got to work removing all the clamp. After all the clamps had been removed and I flipped the wood over this is the mess I was left with. All of those stains are the excess glue that was pushed out during the clamping process.
It doesn’t look great right now, but this is actually a good sign. If I didn’t see all this dried glue on the underside I’d really be questioning if I had used enough glue. Then I’d have to live in a state of existential dread wondering if my nightstand might fall apart at any moment. Trust me you don’t want that. I’ve been there before.
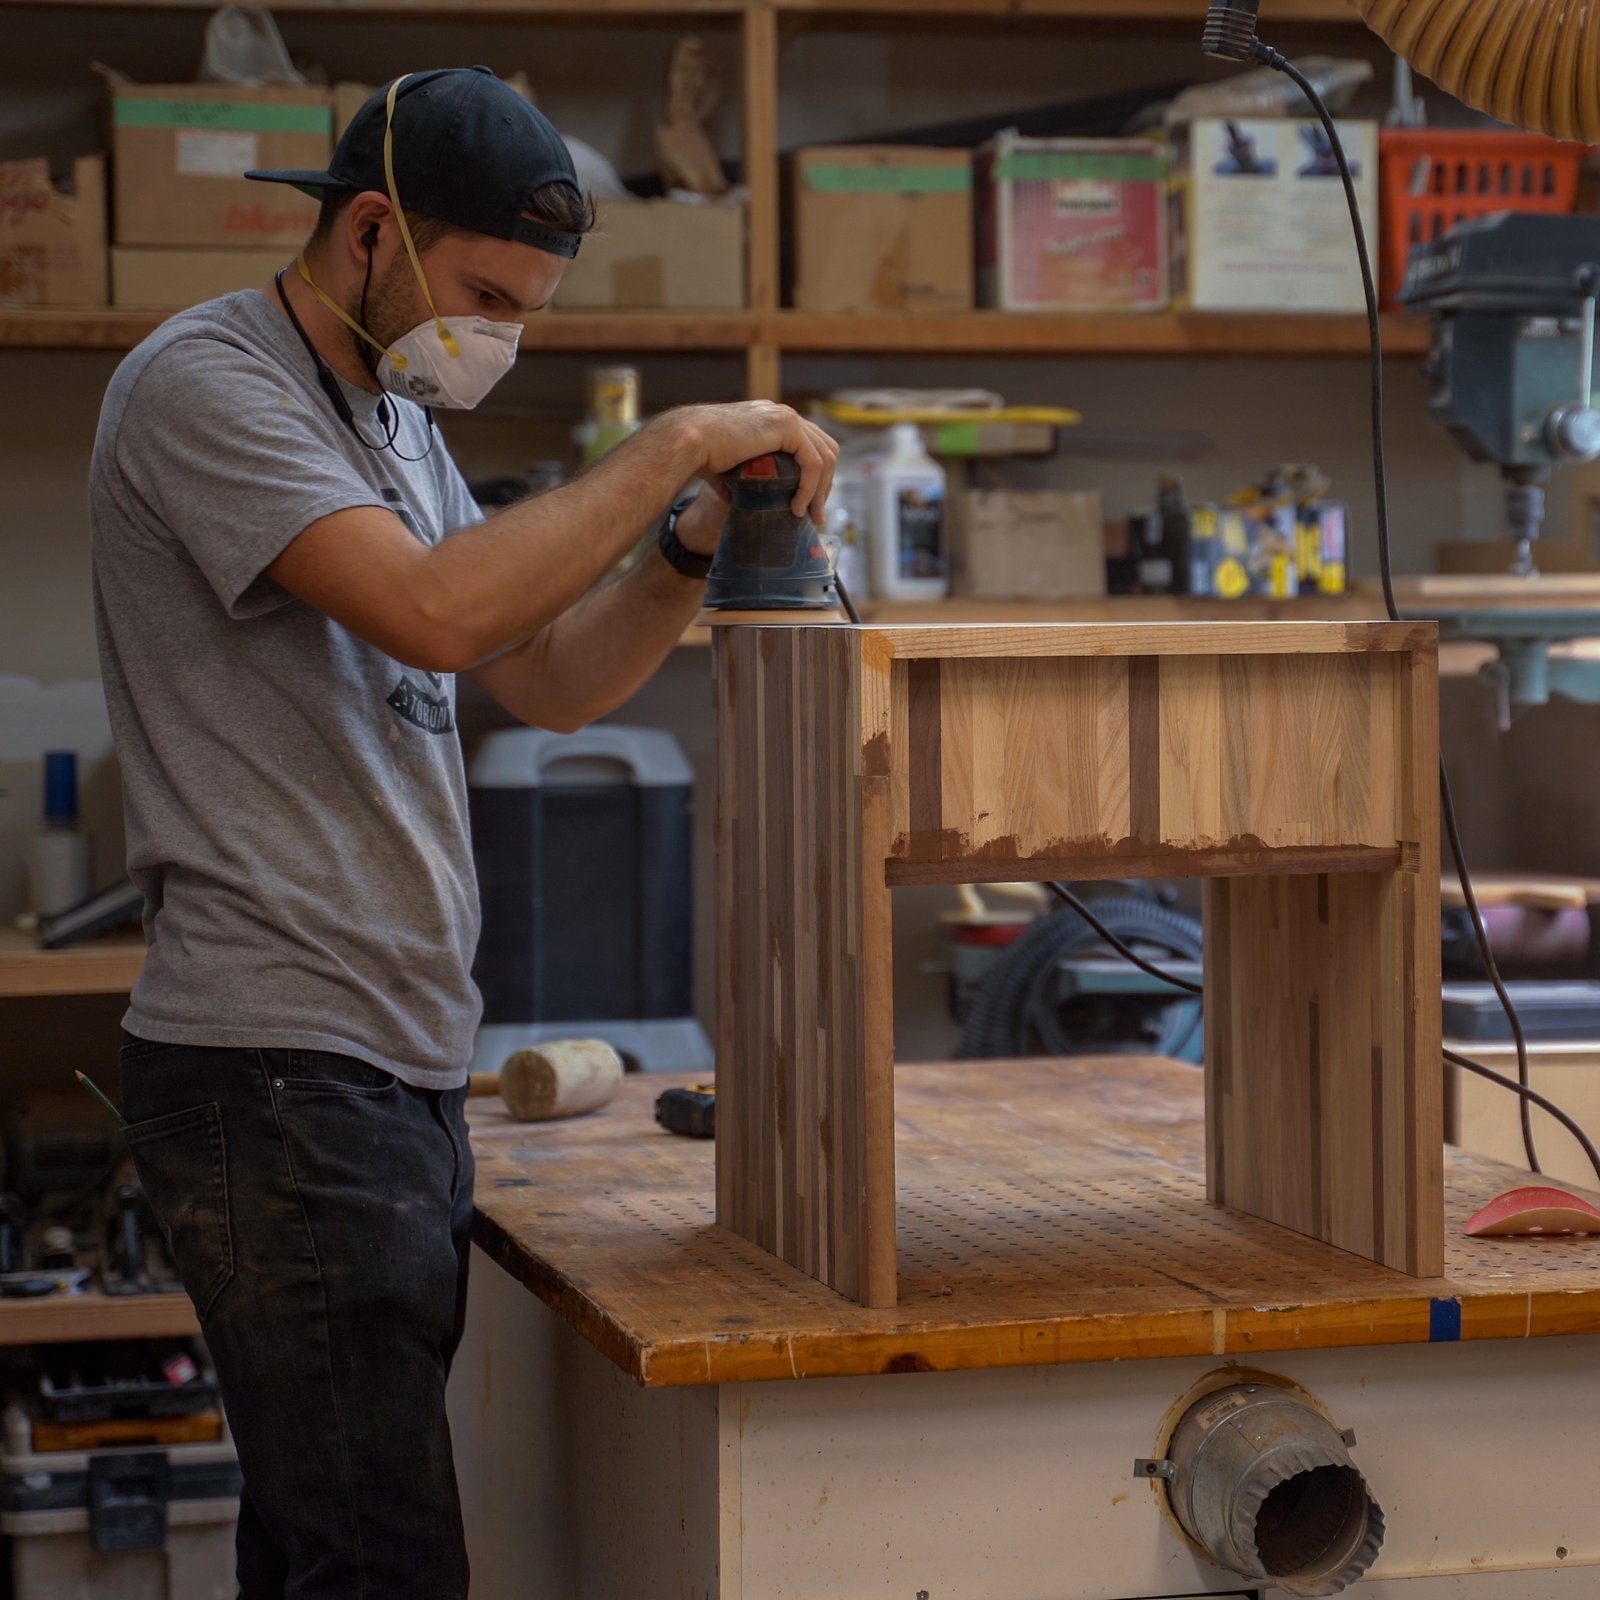
Using my belt sander and some 80 grit sandpaper I smoothed the entire surface. Sanding down high spots and smoothing out any low spots over a large area. I worked to make it as flat as possible. I took breaks randomly to check my work and apply wood filler to any small gaps between pieces.
I really wish I had a giant planer I could feed this whole thing through, but for now, the best I have is this belt sander.
This is the part of the process where pictures don’t really do the amount of work any justice. You, the reader, simply scrolled from one picture to the next. That single picture has to encapsulate like 3 hours of sanding. Needless to say, I made a lot of progress on my audiobook during this part of the project.
So I’m about 1.5 days into the build at this point, and so far all I have to show for it is this flat slab of wood. Granted it’s a pretty cool slab of wood, but I think it’s time to give this thing some actual shape.
That piece of wood though is going to form the bulk of my nightstand, it just doesn’t know it yet!
I spent some time figuring out all the cuts I would have to make and visualizing how it would all go together.
Using light pencil marks I actually traced out every cut and mortise I would need to make onto the surface of the wood. Don’t worry about the pencil marks, they sanded off easily later. This made it so much easier to visualize what I was doing and really helped to prevent mistakes down the road.
With all the planning out of the way, I was ready to grab my track saw and get to cutting. This part was actually pretty easy because of all the planning I did previously. I knew exactly where I had to cut and what angles were necessary.
It’s important to note though that because I wanted my nightstands to have a continuous grain pattern I really only got one shot at each of these cuts. If I messed one of them up and had to do it again or use a different piece it would’ve been really noticeable.
Similarly, because I wanted to have the cleanest miter cuts possible I had to do all of my track saw cuts in a single pass with no stopping and restarting. Luckily it all went off without a hitch.
All those track saw cuts left me with these 3 pieces (well actually 6 because I was making 2 nightstands, but you get what I mean).
The middle piece is 18″ x 19″ and the two pieces flanking it are 19″ x 19″. Hopefully, from this picture, it’s pretty obvious how the whole thing folds into shape.
If not that’s fine, keep following along, you’ll see soon!
Before I could do any assembly though I still had some mortising to do on each piece.
I set the table saw blade 1/4 above the table surface and cut the mortises by remove one blade of material at a time.
I probably should’ve done this with a dado blade or a router, but honestly sometimes setting up the dado blade takes more time than just doing multiple passes with a regular blade.
I had to cut a notch in the front face of the nightstand to recess the drawer fronts. I did most of the heavy lifting on the table saw, but in order to finish off the cuts, I used a flat saw.
Finishing the cuts by hand gave me more control and made for a better finish. Plus I always feel a bit more manly when I’m using hand tools 🙂
Here’s a picture showing the mortises and notch cutout after I was done on the table saw. Try and ignore the part on the left side where I screwed up and ended up cutting too far 🙁
To hold my mitered corners together I used a biscuit joiner. The biscuit joiner cuts pockets in the wood that you can insert wooden “biscuits” into.
If you have two pieces of wood and each piece has a corresponding pocket you can use a biscuit to bridge the gap between them and then glue the whole thing together. Biscuits help keep things aligned and add strength to the miter.
I’ve had various people tell me that biscuits aren’t strong enough for miters or they don’t lend any strength to the join, but, that hasn’t been my experience. I’ve used this exact same technique on things I built years ago and the miters are still perfect despite regular use and abuse. People often recommend that I use a Festool Domino jointer instead, though I can’t see how a domino jointer would be significantly stronger. I suspect this may be a case of people parroting information they’ve heard other people say without actually considering the matter, but who knows.
More glue! Yay! I really need to start buying this stuff in bulk.
Let’s assemble all these various components into something that looks like an actual nightstand!
I applied a generous amount of glue into my mortise channels and then slotted everything into place. The two sides, the middle section and the back all got glued and clamped together.
Remember before when I was talking about biscuits? Well, here they are. I’m inserting the biscuits into their pockets here. I made sure to apply a generous amount of glue to the whole mitered corner, including in the biscuit pockets.
The only piece left to put in place is the top of the nightstand. I pressed it into place and with a little bit of gentle persuasion from my rubber mallet everything seated nicely into position.
There’s a fine line between too much force and just the right amount of force when it comes to assembling something like this. On one hand, if everything goes together super easily you probably didn’t make your tolerances tight enough. On the other hand, if you have to use too much force to get everything to assemble you run the risk breaking something.
The rubber mallet helps reduce the risk of breaking something, but you still really have to be careful when you start smacking stuff around with a hammer.
The last step of assembly was clamping everything together. I used a bunch of bar clamps to make sure everything was just where I wanted it before leaving for the night (end of day 2 for those of you keeping track).
The clamps really helped pull everything together and close any remaining gaps. However, like the rubber mallet, you have to be careful not to go too far with the clamps. It’s really easy to over tighten your clamps and end up pulling something out of square. I went over every corner with a finishing square to make sure I hadn’t thrown anything out of wack while tightening down the clamps.
Ok so at this point the main body of my nightstand was done! Or at least it would be once the glue dried. All I had left to do was build and install the drawers.
In my head I thought this would be the easy part but, it took significantly more time than I expected. This was my first time building a set of drawers from scratch so it’s all part of the learning experience.
I started with the drawer fronts. Luckily my planer is big enough that I could just put the drawer fronts right through it. Saved me from having to break out the belt sander again. After a few passes through the planer, they were nice and smooth.
Using my larger miter saw I cut the drawer fronts to size. 18″ W x 7 1/2″ H for anyone keeping track at home.
Originally I had planned on making the drawers out of solid wood, but unfortunately, I miss estimated the amount of material I needed and had run out of walnut and ash at this point. No worries though, I had some walnut plywood scrap left over from another project so I decided to fake it instead!
Fake it till you make it right? Or make it to fake it in this case? I don’t know.
I cut 4 strips of plywood to 4″ x 31″
Then I set the table saw blade to 1/4 inch above the table surface and cut 1/4″ wide channels into each piece of plywood.
Why’d I do that? To support the bottom of the drawer, which I’m going to make out of 1/4″ plywood.
The good thing about being a contractor is that I always have odds and sods kicking around the shop that I can use in these projects. I had this piece of 1/4″ birch plywood left over from a job collecting dust. I figured this was a better use for it.
I cut 2 pieces of it that were 14″ x 15″.
But wait, I said it was birch plywood, didn’t I? That’s right, I was fresh out of walnut 1/4″ plywood stock (I’m not sure they even make 1/4″ walnut plywood).
I can’t just add another species of wood into my build though. I adhere to a very strict design philosophy: Two’s company, three’s a crowd.
So it was back to my strategy of just faking it. I applied this dark walnut stain to my birch plywood and got a colour that roughly approximates that of walnut haha.
I wiped on 2 coats with a rag and then let them dry for 48 hours. After the second coat, it was actually a decent match to the existing walnut ply. Not perfect, but again close enough for the inside of a drawer.
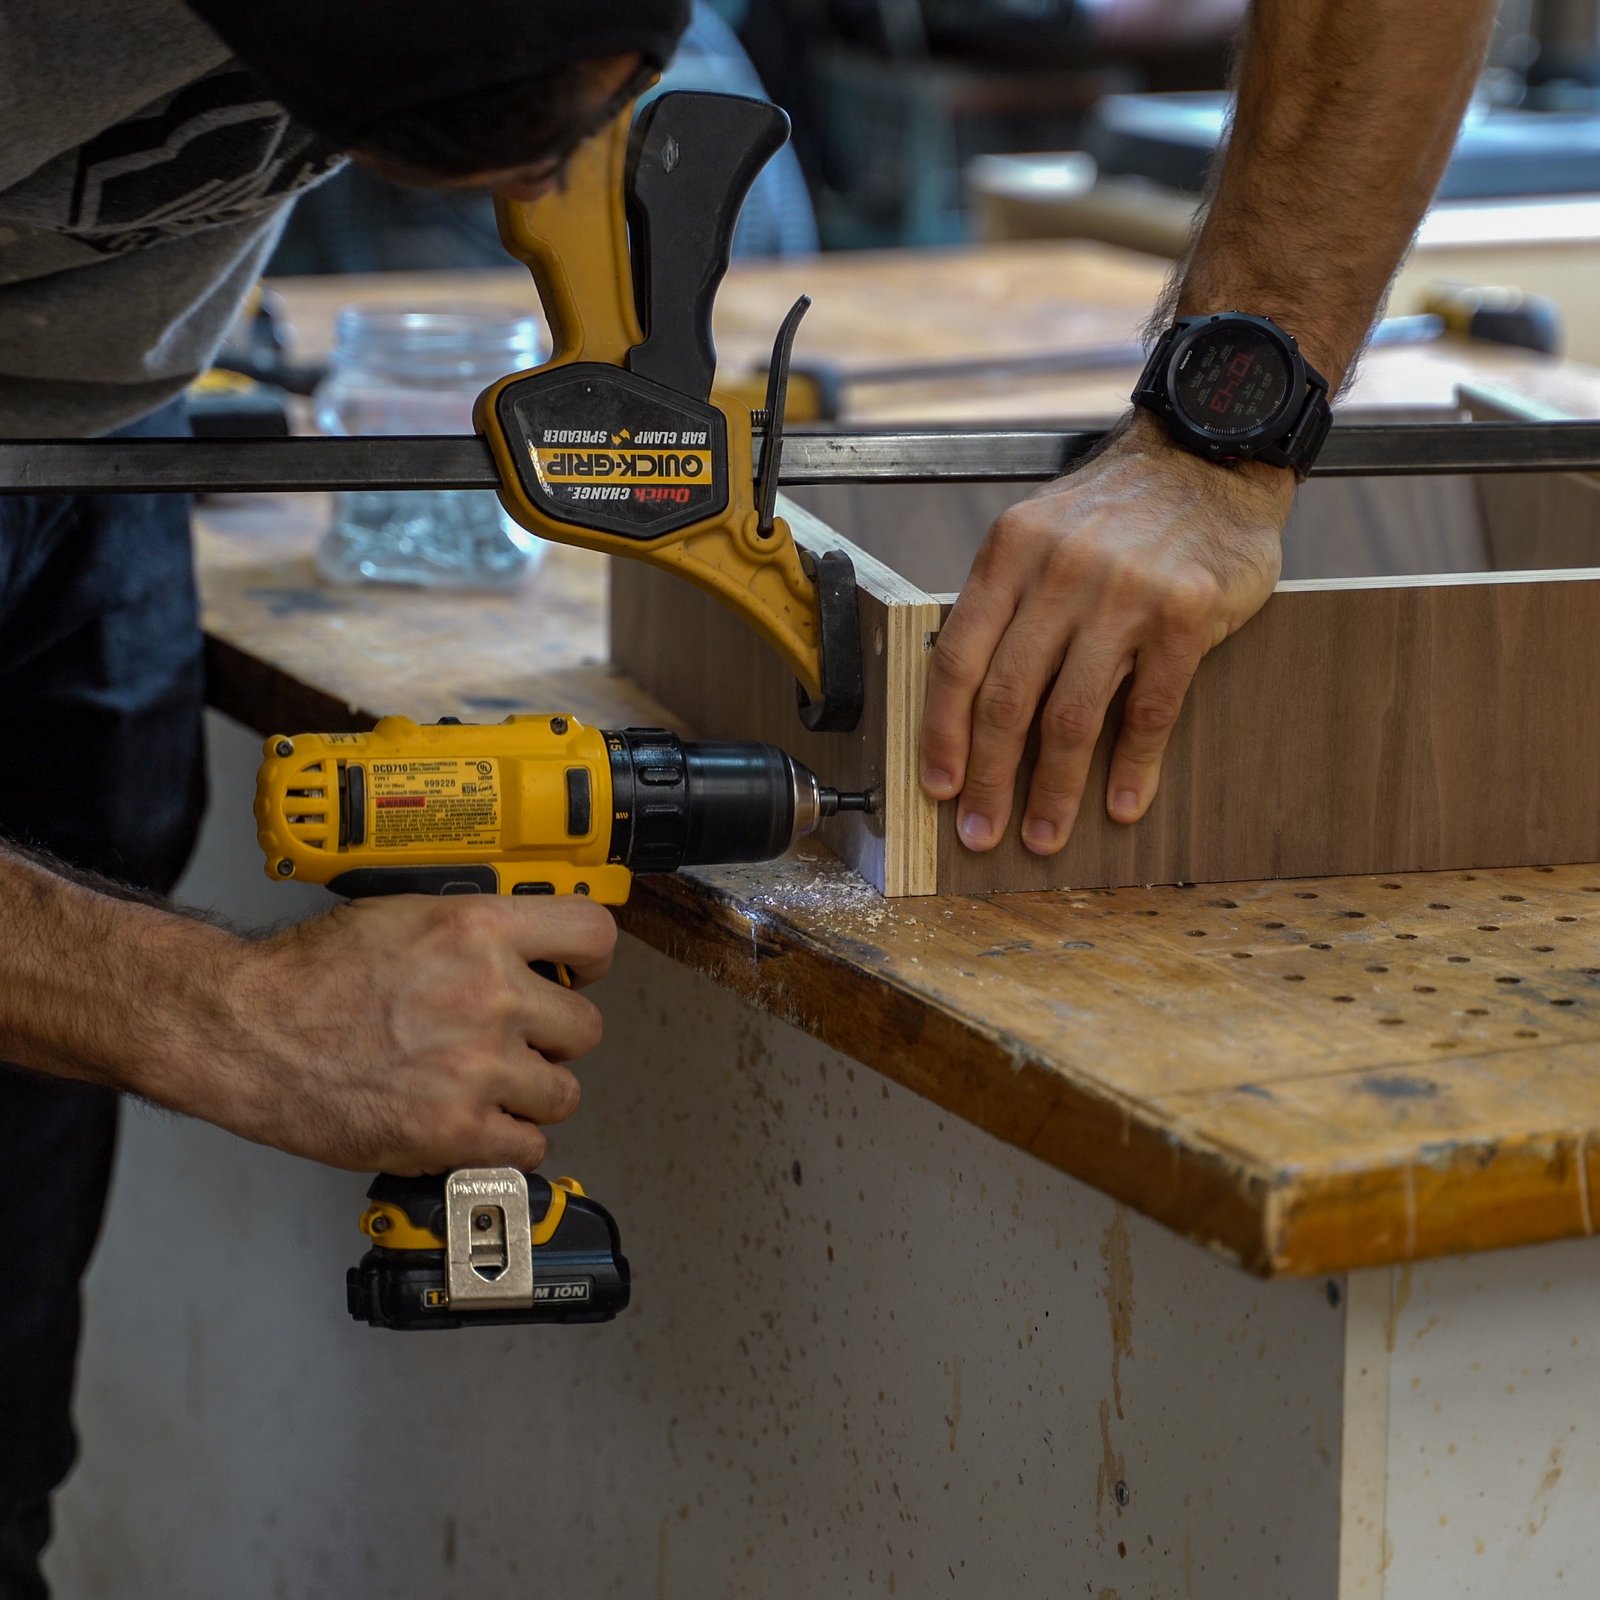
I used a set of soft clamps to hold my drawer pieces in place as I screwed them together. The clamps prevented the wood from squirming around and ruining my alignment. BTW squirming is a fun word to use when describing an inanimate object.
Also fun fact. From this point forward I switched cameras. Let me know if you can tell the quality difference (I definitely can). Previously I was using a Panasonic G85 and from here on I’m using the Sony A7iii.
Before I could finish screwing the drawers together I had to insert the bottom of the drawer. This is a pretty clear picture of how the birch plywood turned out after 2 coats of stain.
The drawer bottom simply slid into the channels I cut into the drawer sides earlier. To lock it all in place I attached the 4th side of the drawer.
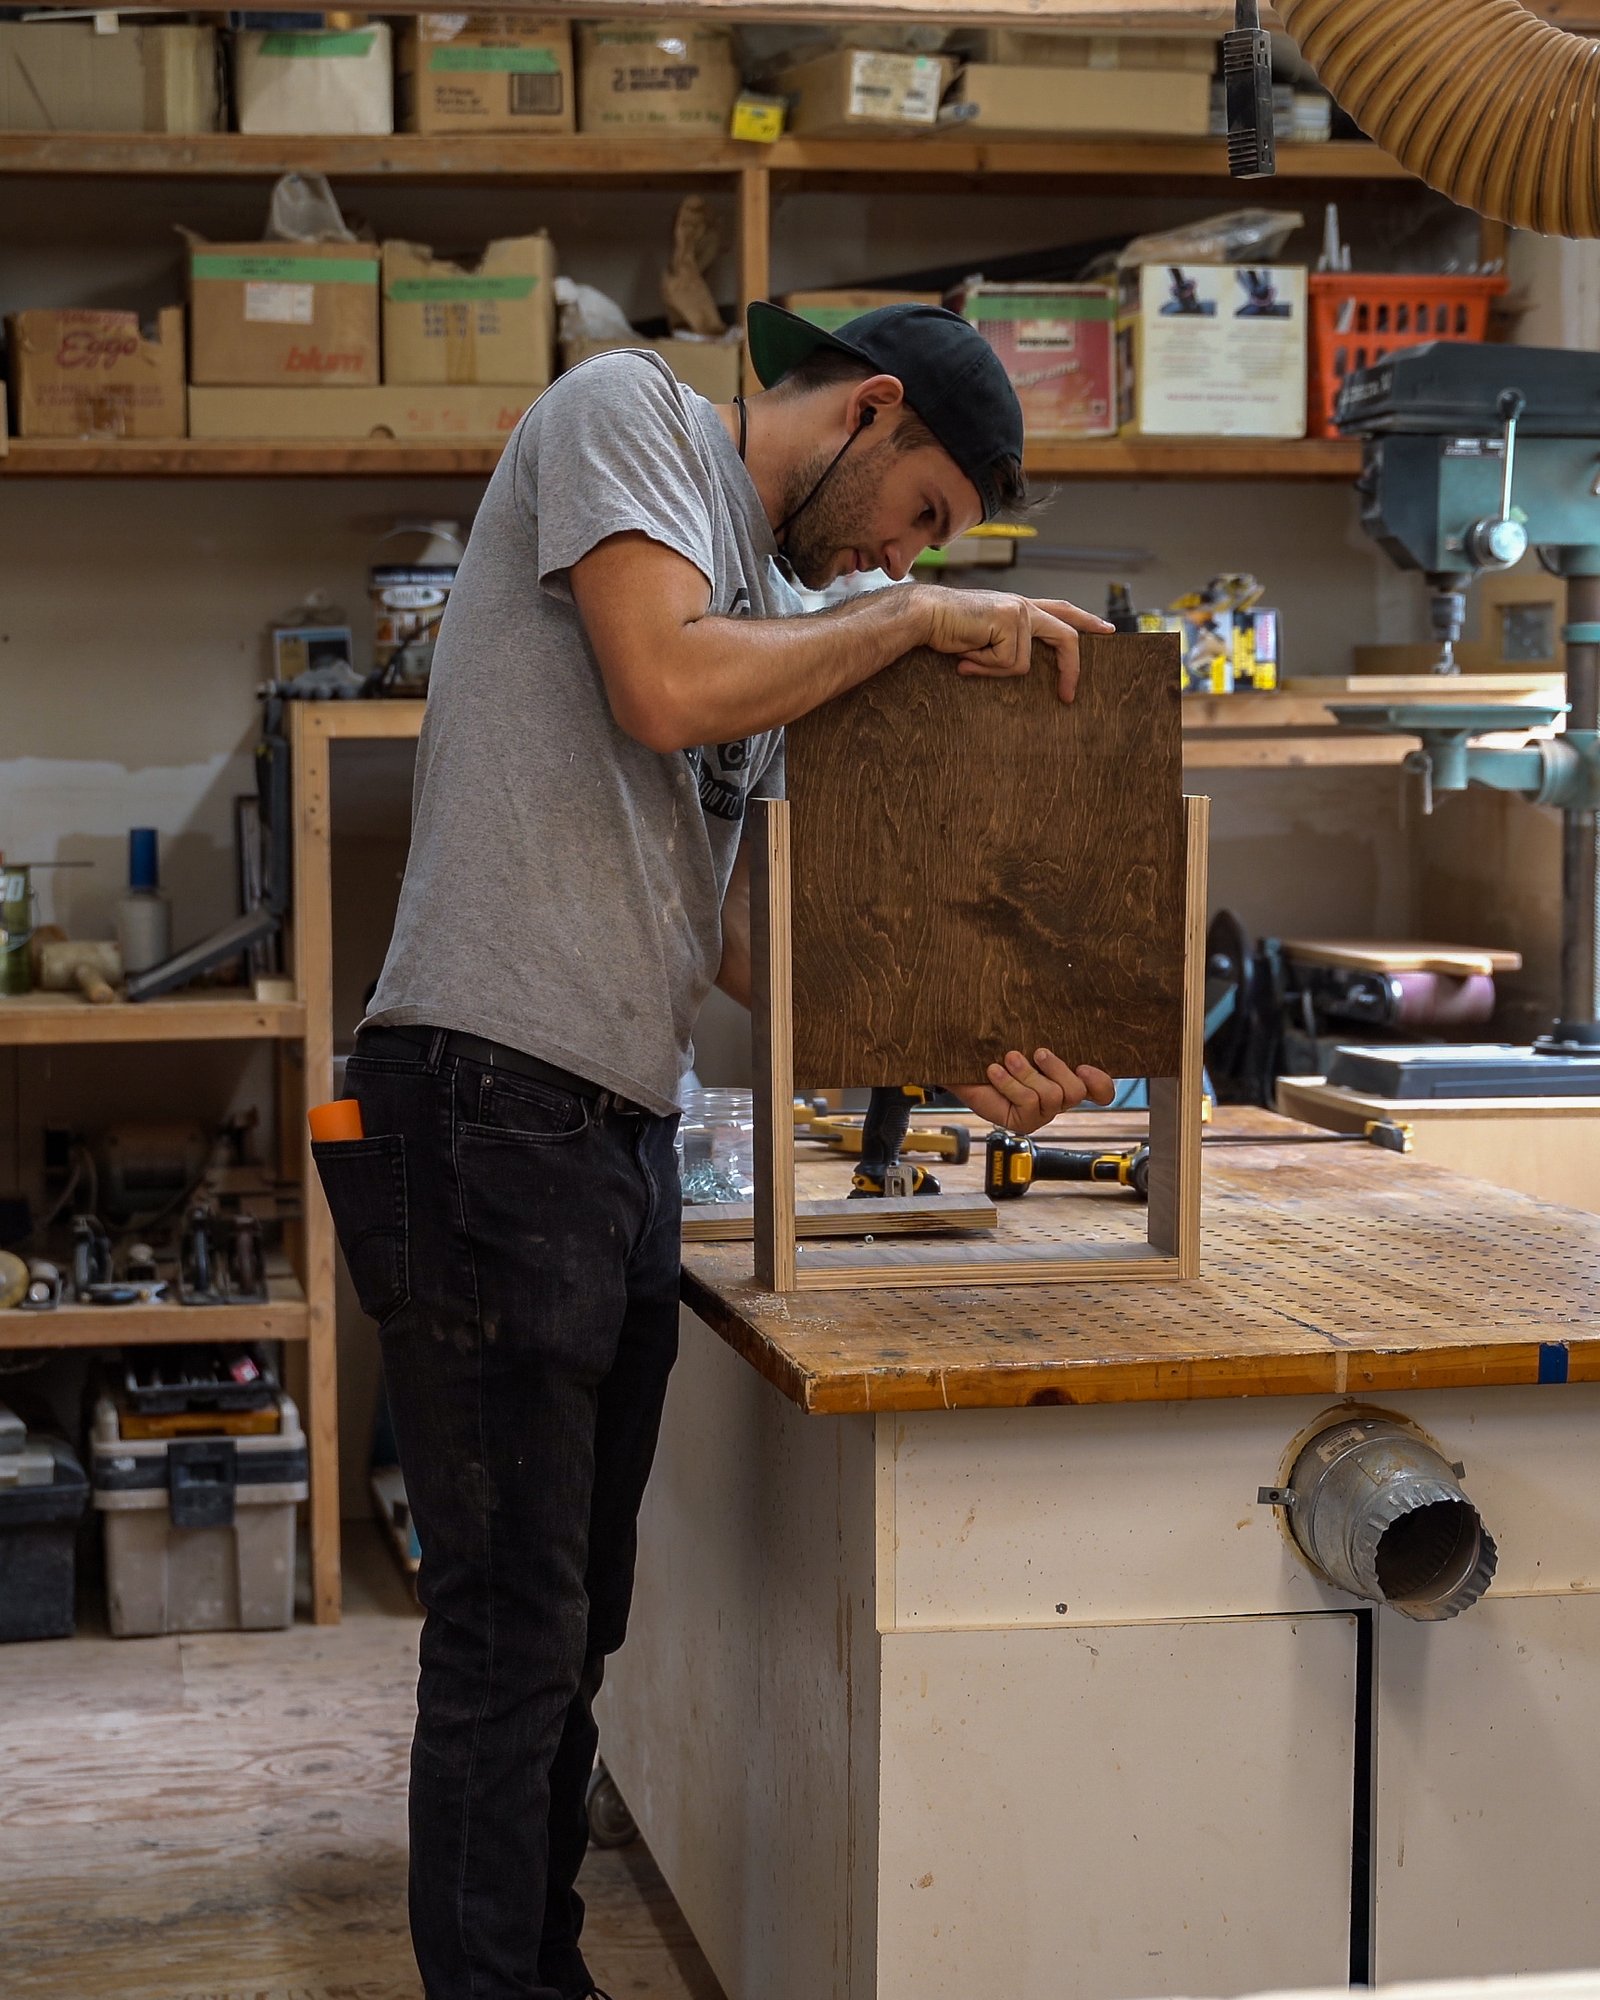
Walnut plywood is great and all, but it really only has 2 finished sides that look like walnut. So I was left with a drawer that was still very obviously made from plywood and that wasn’t going to fool anybody!
Those exposed edges were going to be visible whenever you opened the drawer of the nightstand. I couldn’t stand for that. To cover it up I used walnut edge banding, which is a thin layer of wood with a heat activated adhesive backing. You can find this stuff at most hardware stores.
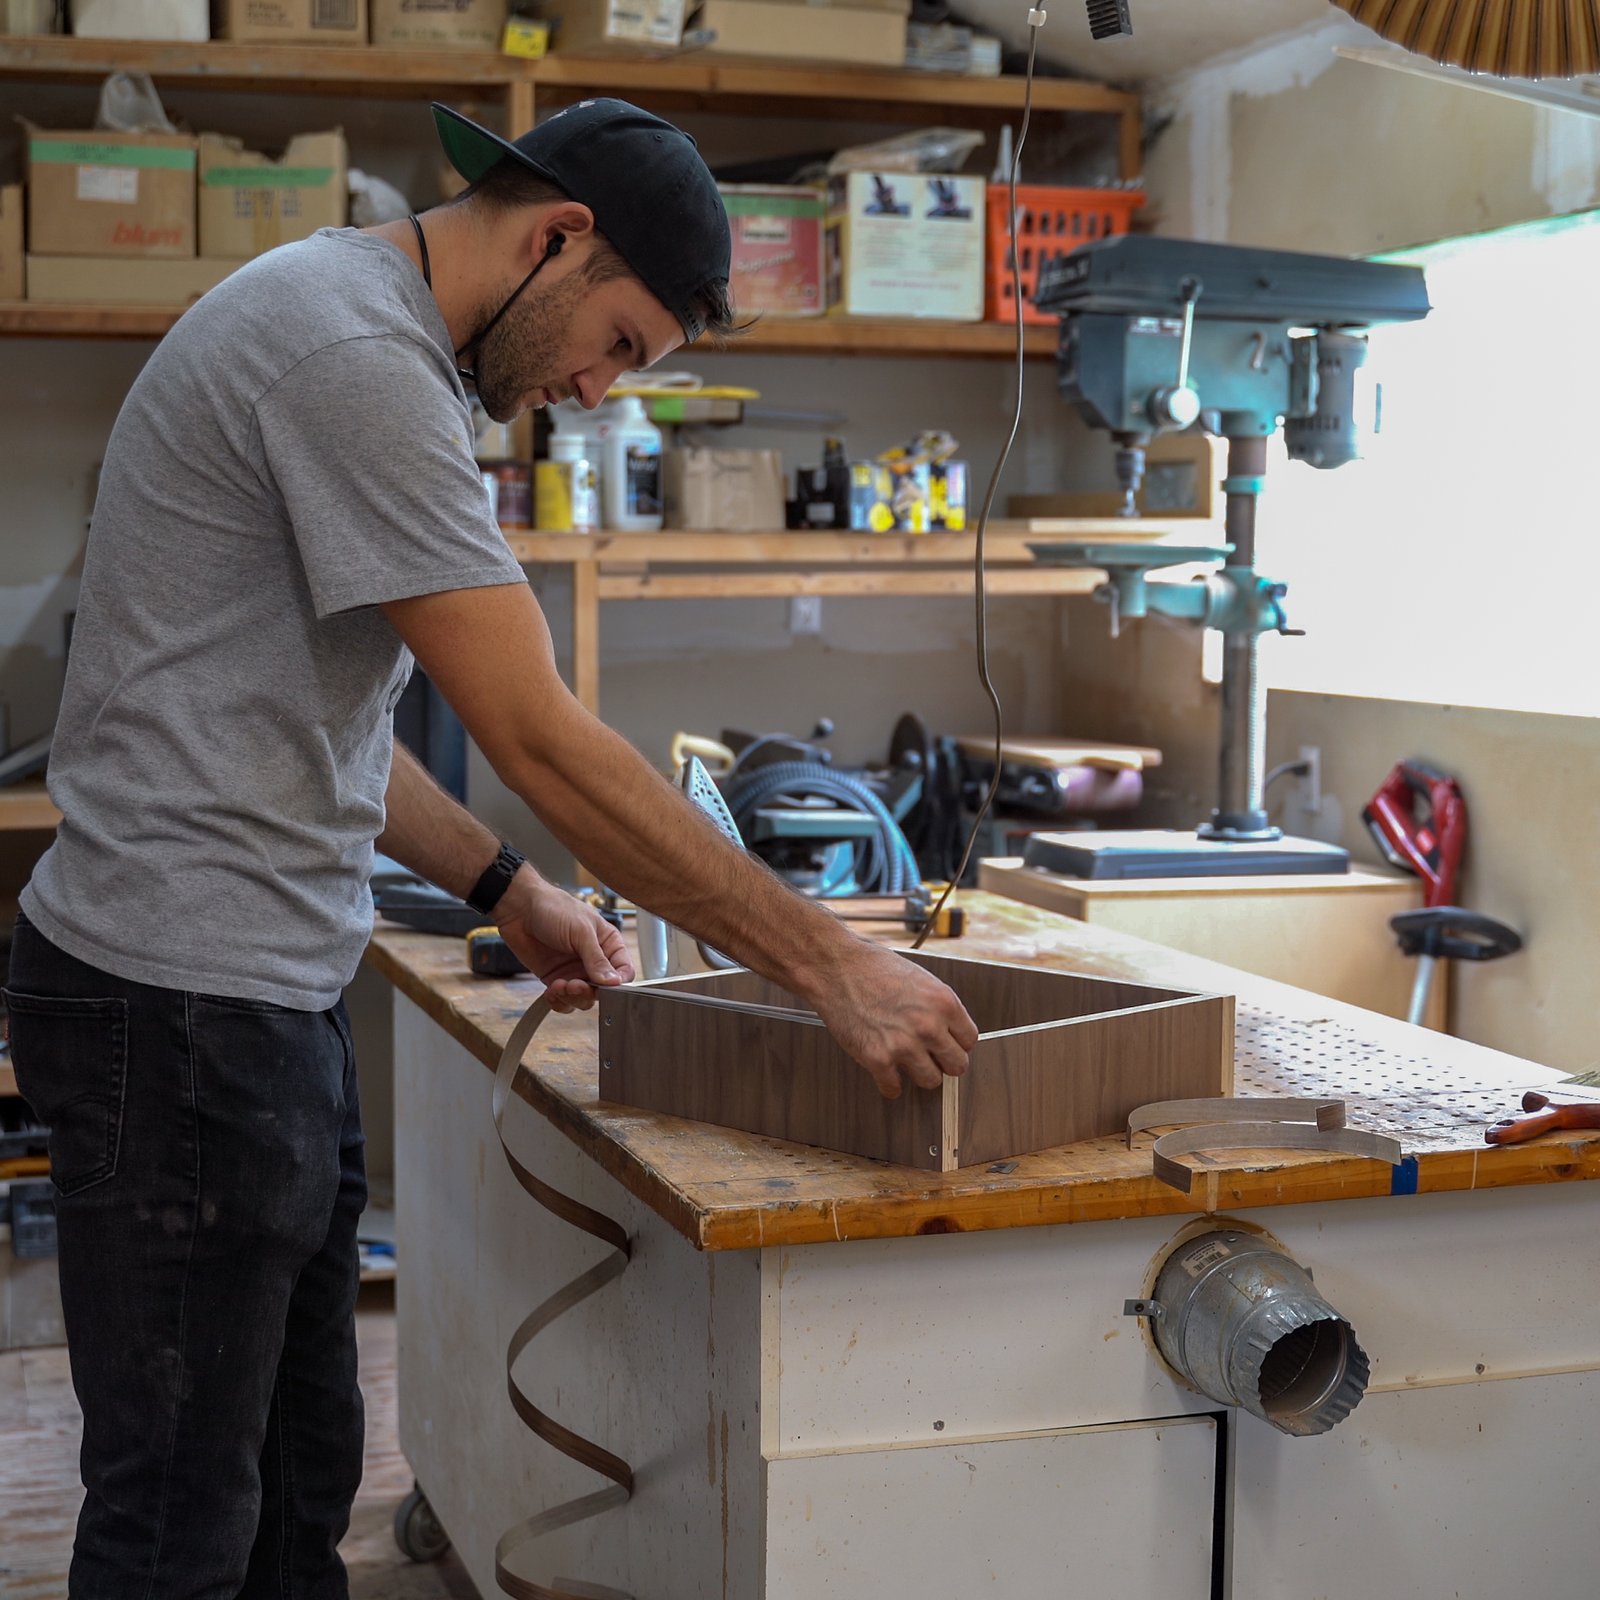
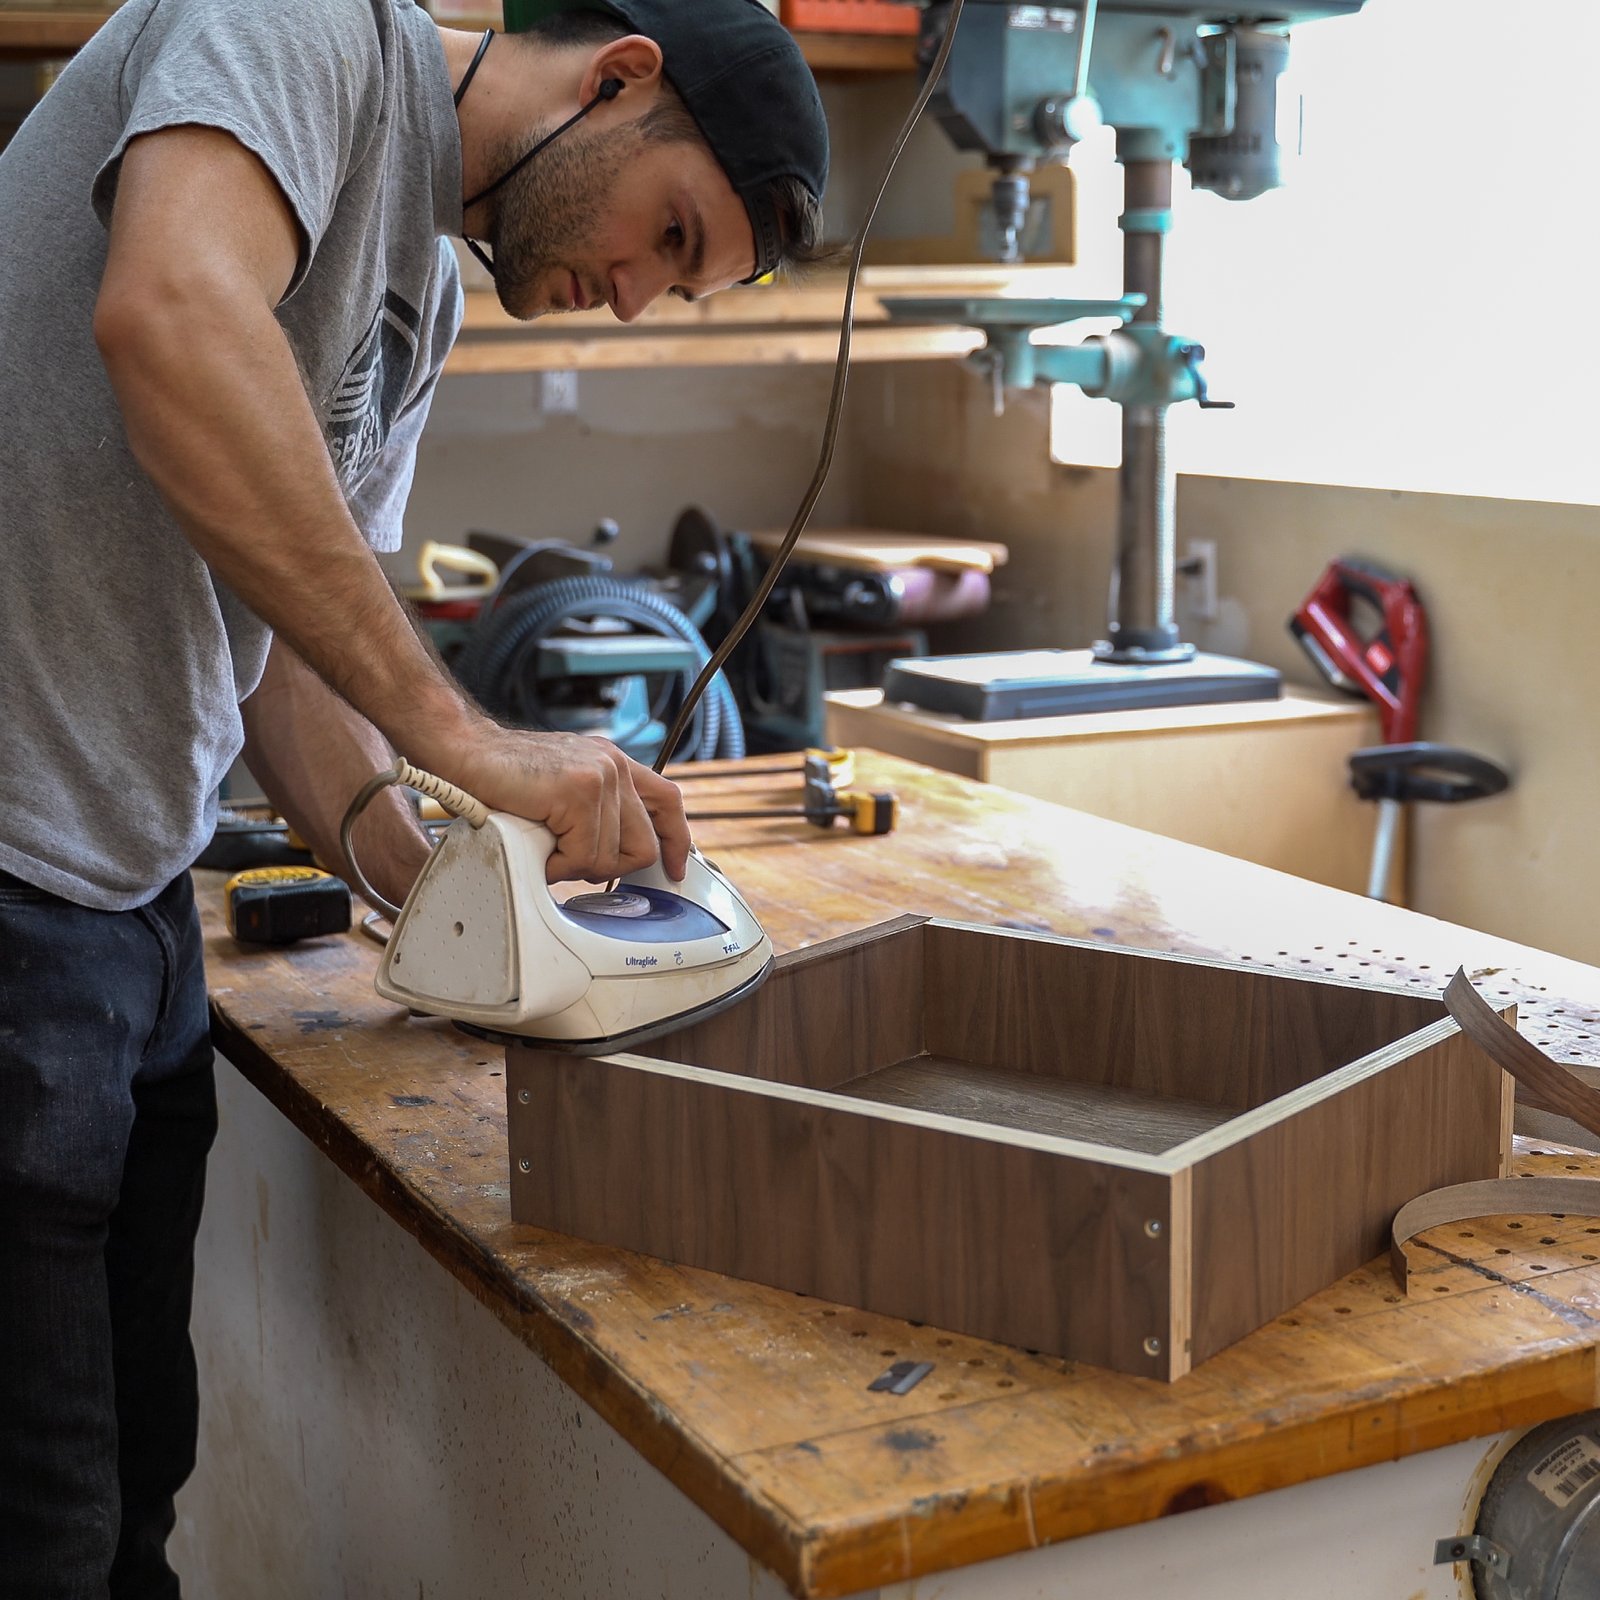
To apply it you simply cut strips of it to length and then iron it onto whatever surface you want.
I think I’ve probably spent more time ironing edge banding than I have ironing clothes. And that speaks more to how little ironing of clothes I do than it does to the amount of edge banding I’ve installed.
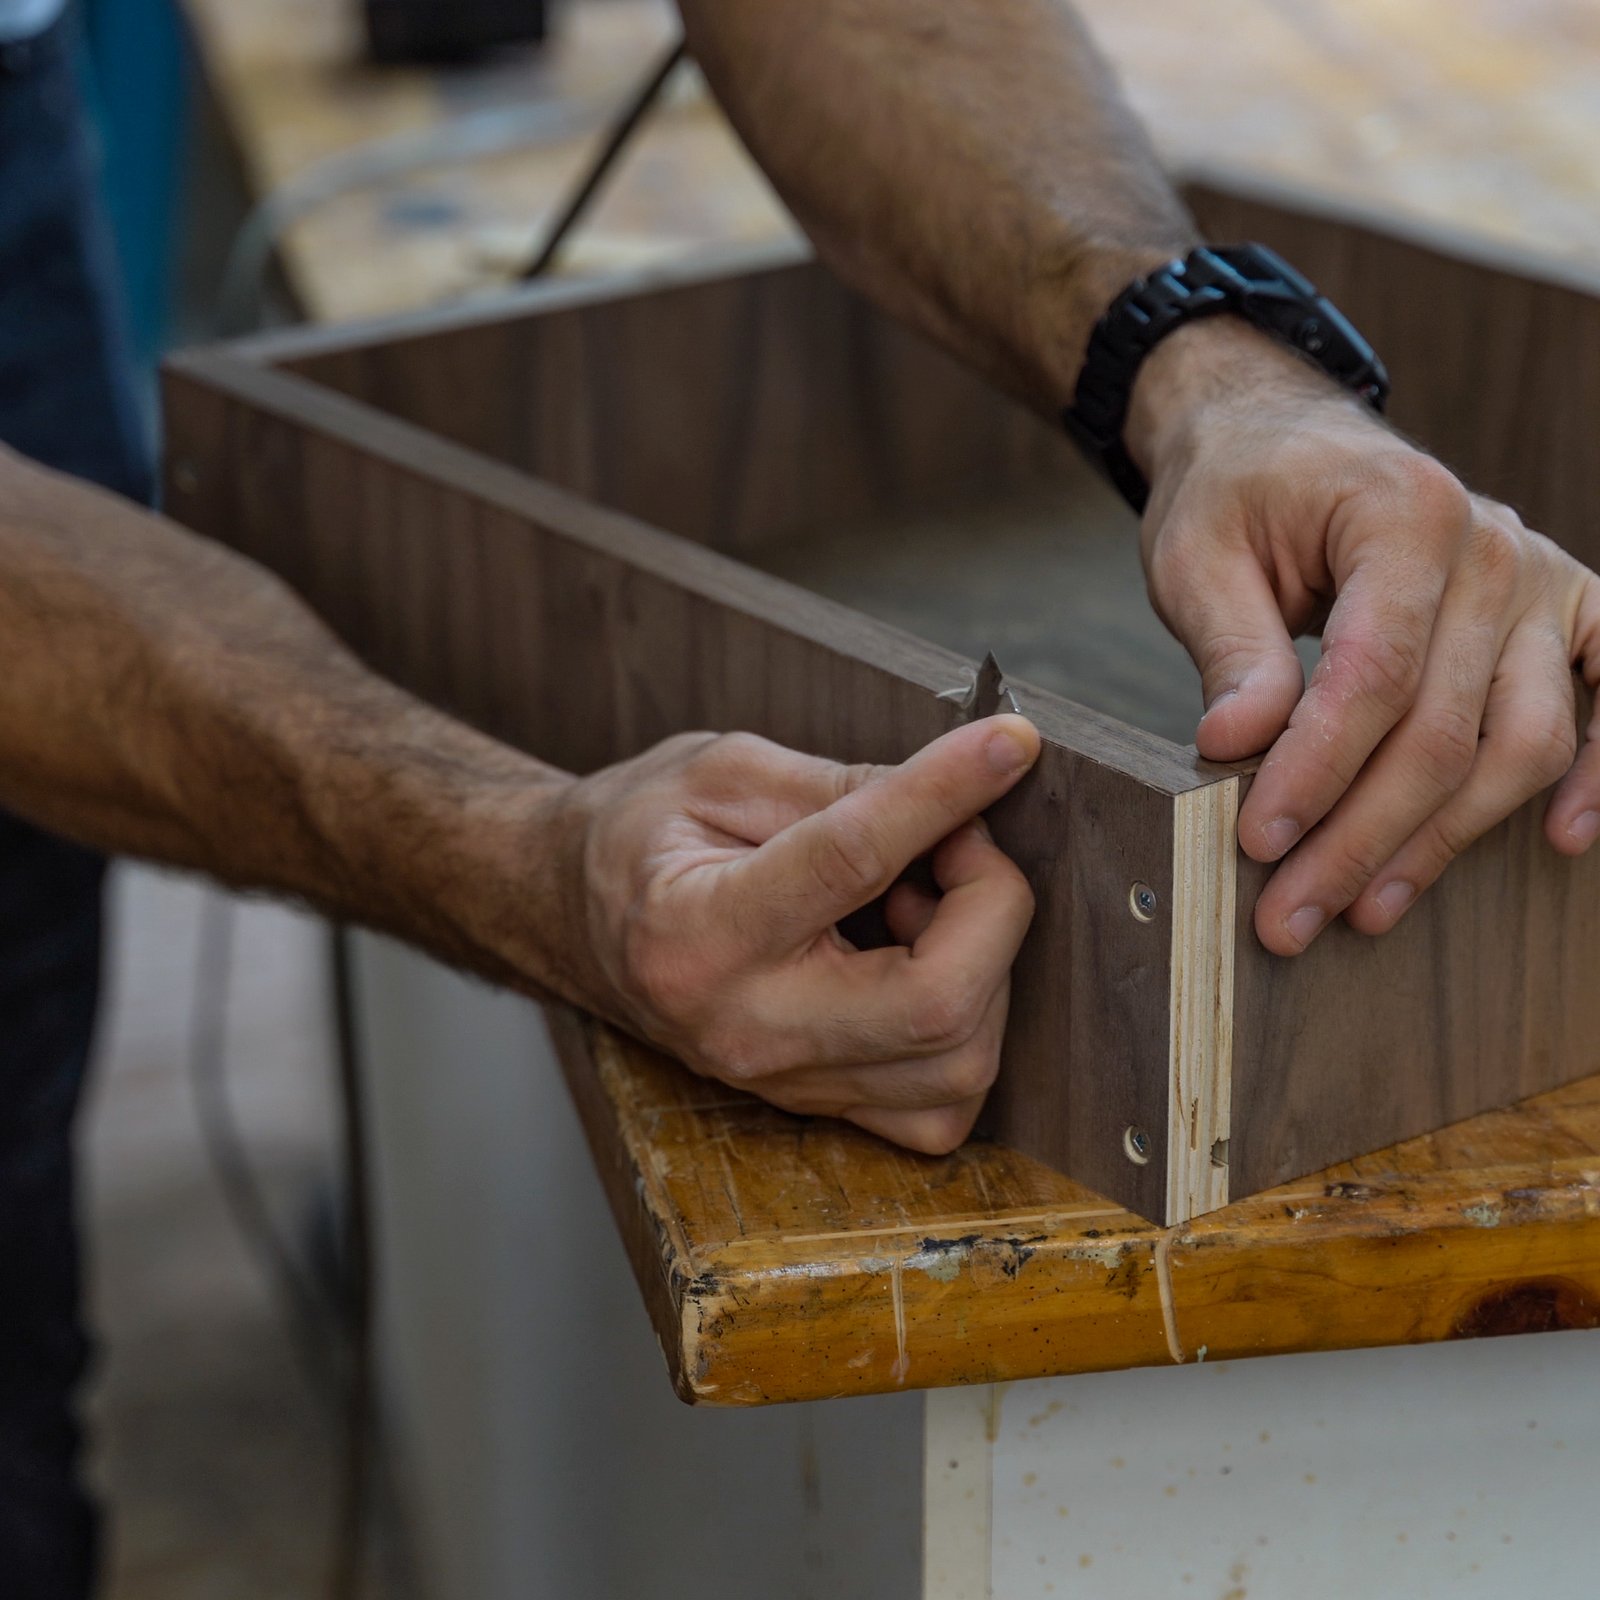
After the glue is dried you can trim off any excess edge banding using a razor blade and a little bit of patience. Careful you don’t cut yourself though!
After you’ve trimmed off any excess I like to take a high grit sandpaper (180-220ish) and slightly round off the hard edges of the banding. It makes for a nicer feeling, and more convincing, finish.
Now that my drawer looks semi-convincingly like it’s made from real wood I can move onto mounting the drawer slides.
I ordered these 12″ drawer slides off Amazon. I think they were $20 a pair and they have the cool soft close function that everyone loves.
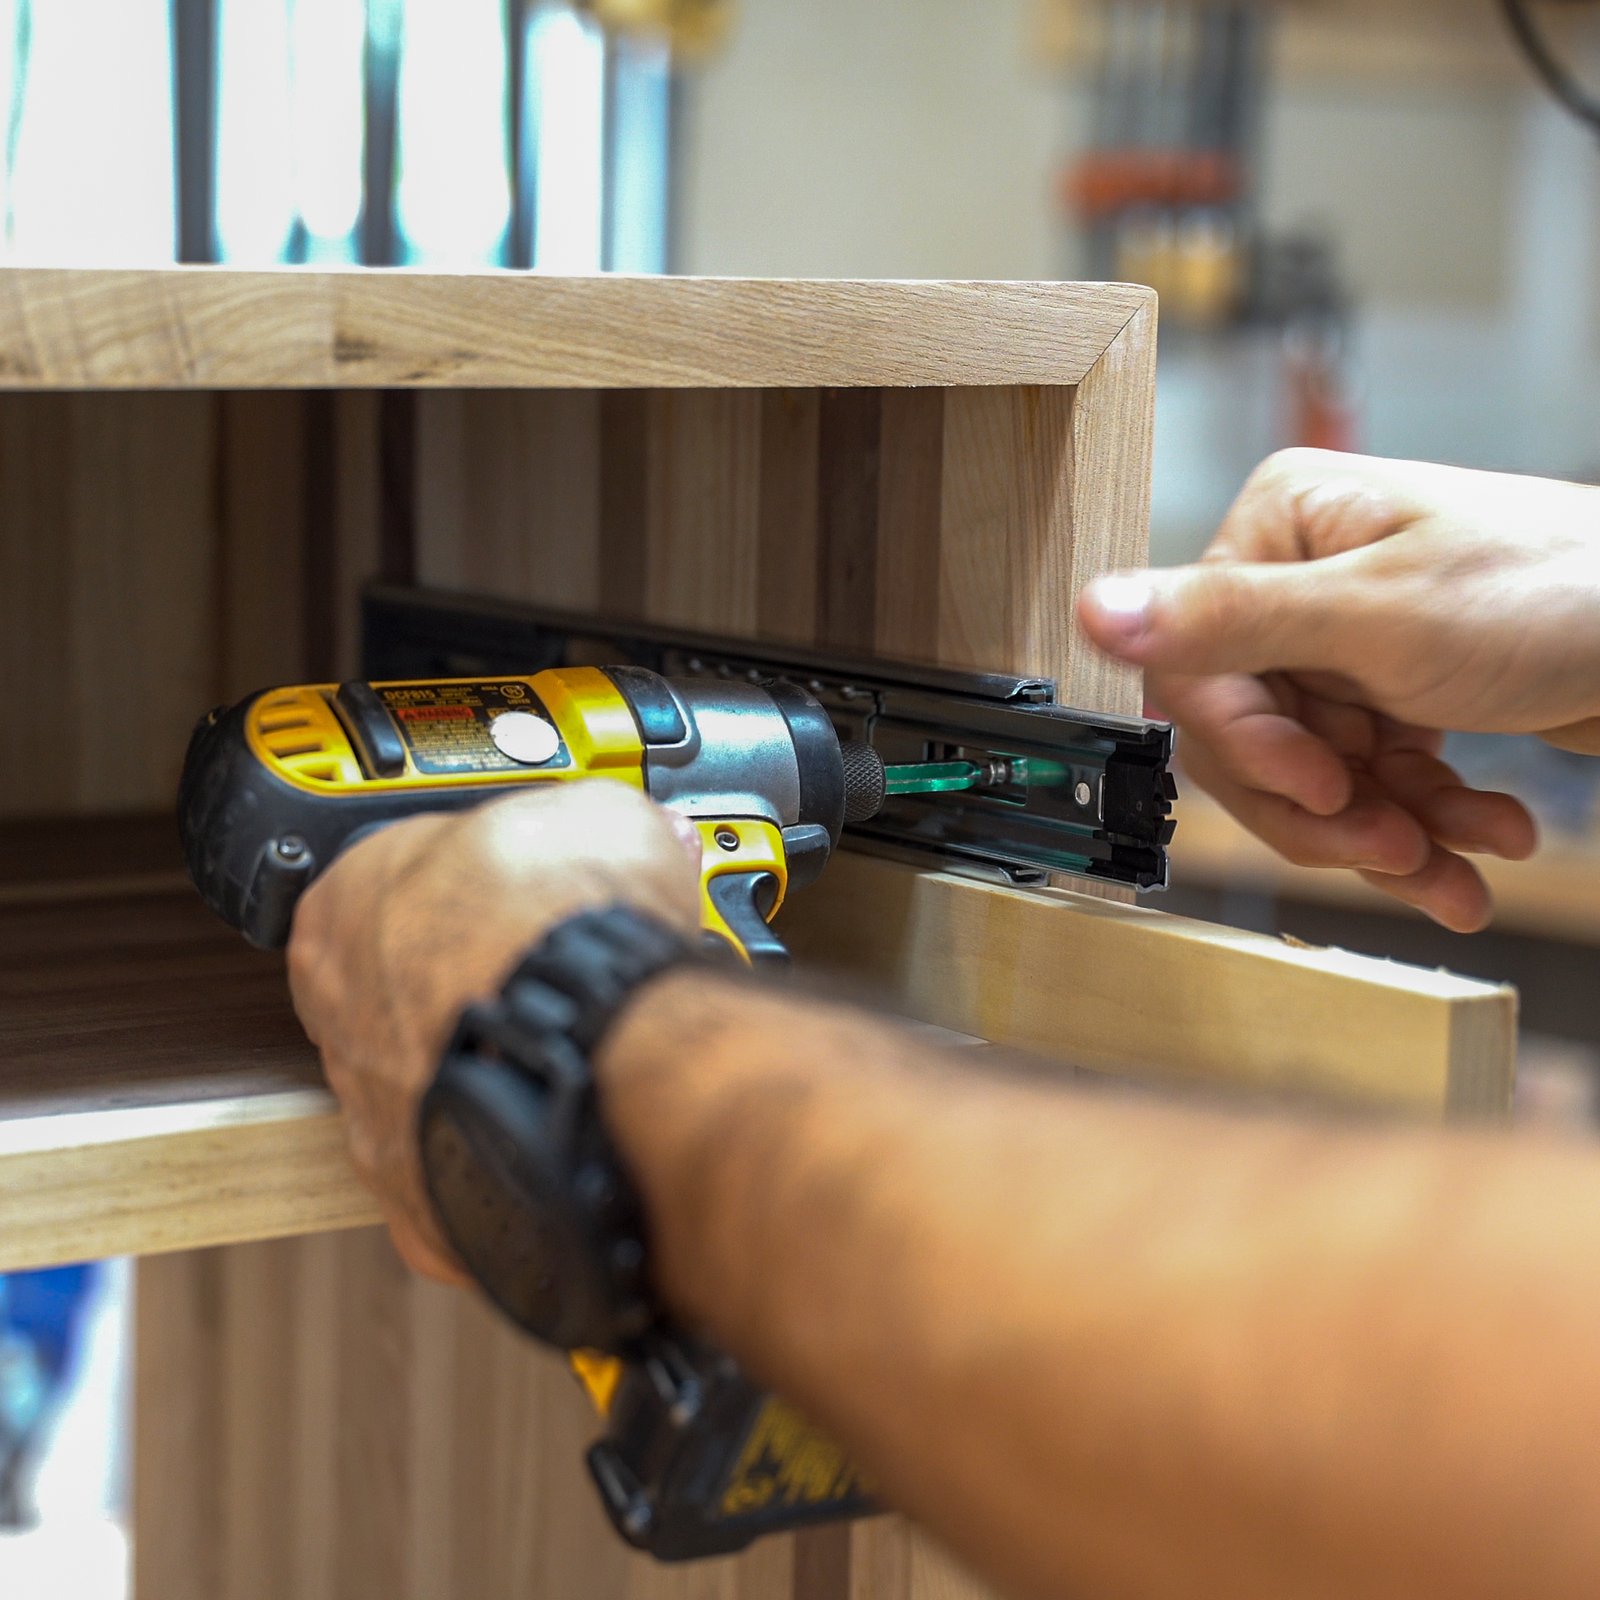
After unboxing the drawer slides I separated them into their two constituent parts. One half gets mounted on the drawer, the other half gets mounted to the body of the nightstand.
I decided to mount them exactly in the middle of the drawer, though the location doesn’t really matter so long as you make sure it’s the same on both sides.
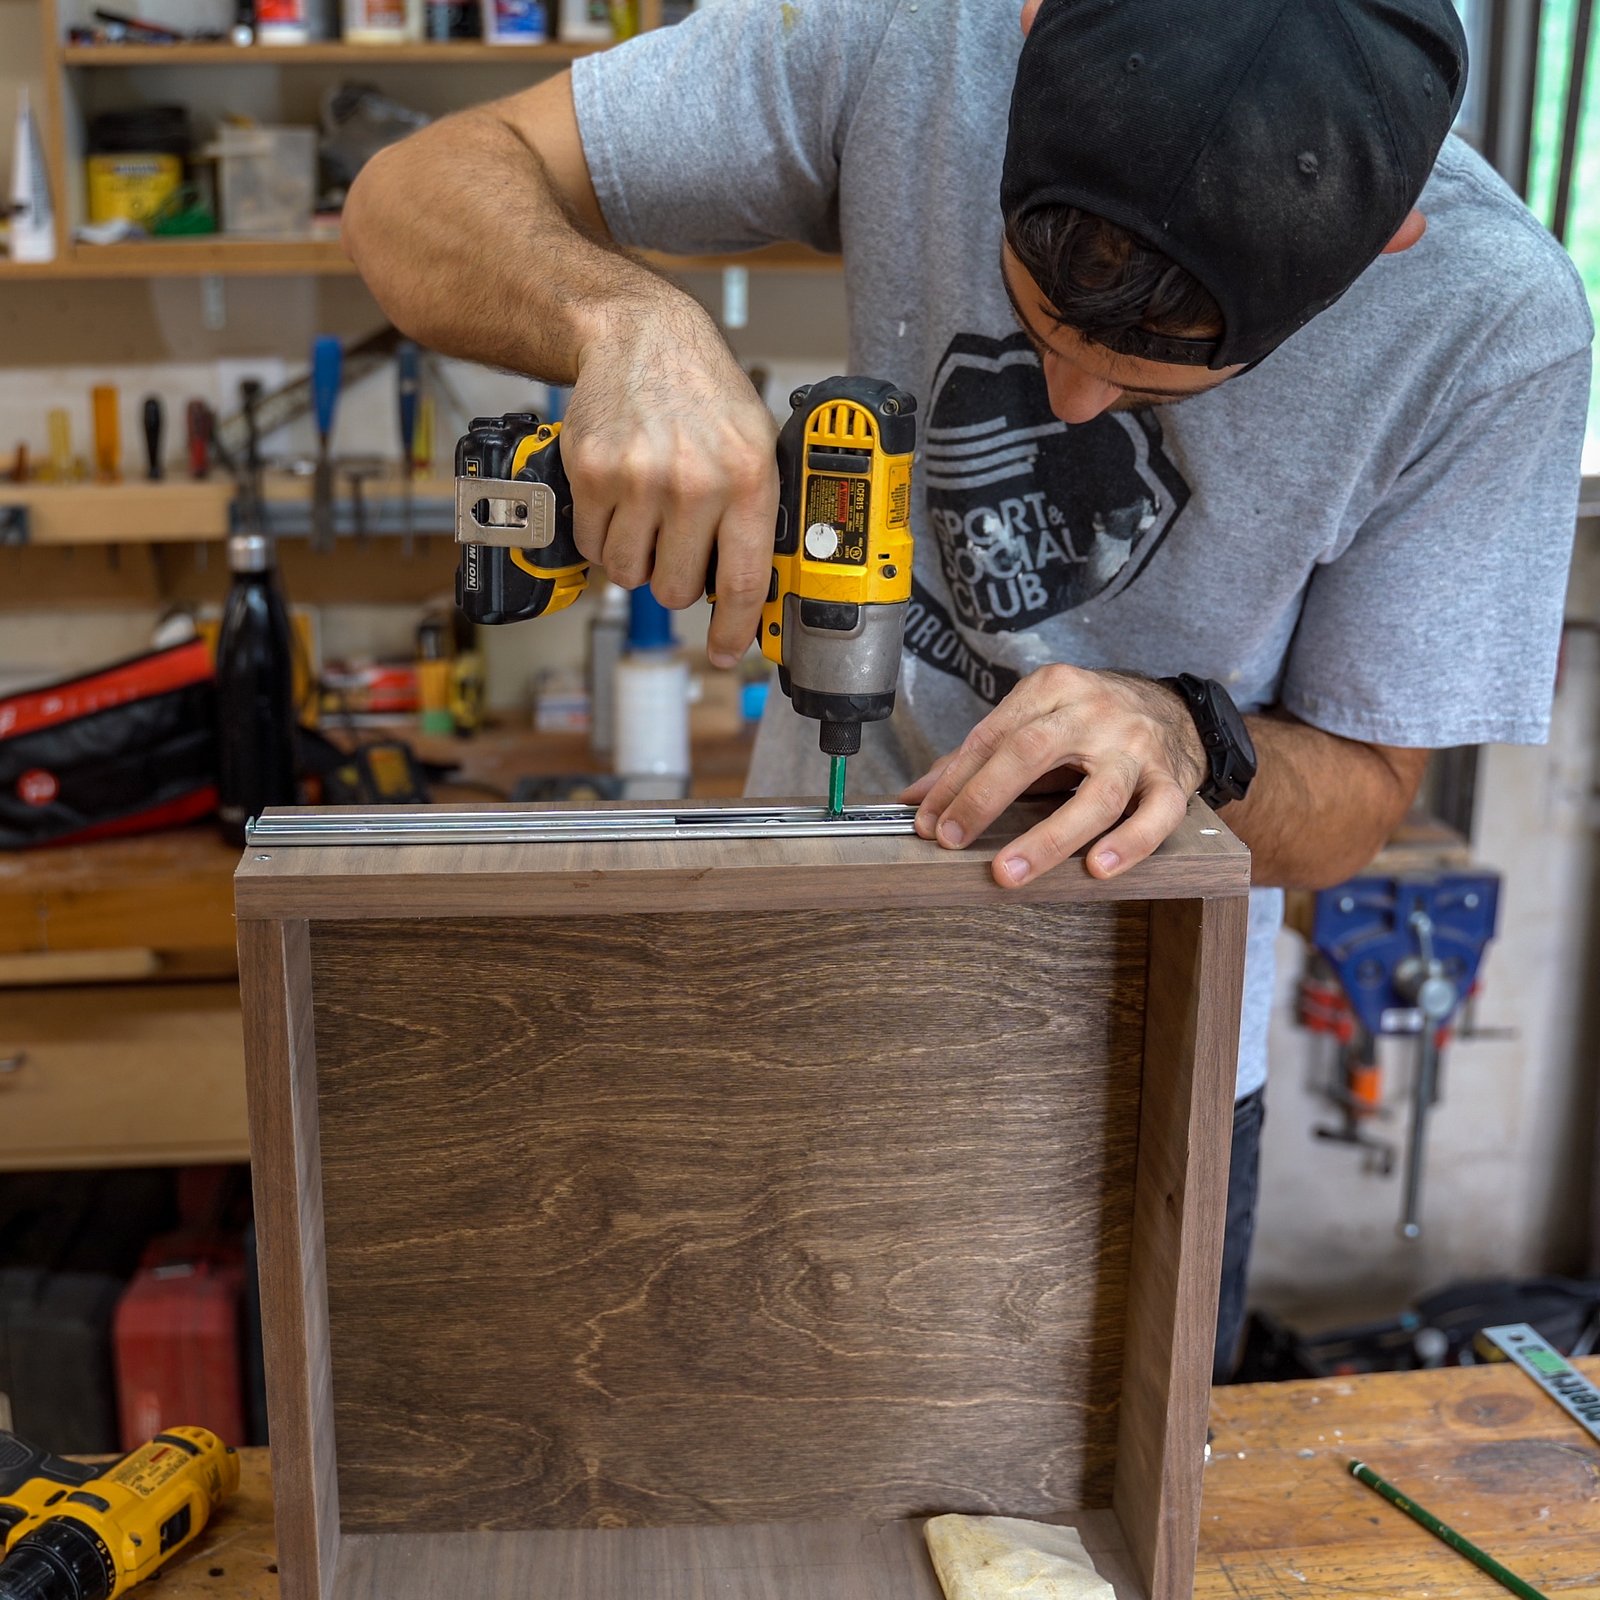
To ensure that I mounted the other side of the drawer slide at the right height inside of the nightstand I cut a block that I could rest drawer slide on while I screwed it in place. This eliminated any guesswork and measuring from the equation.
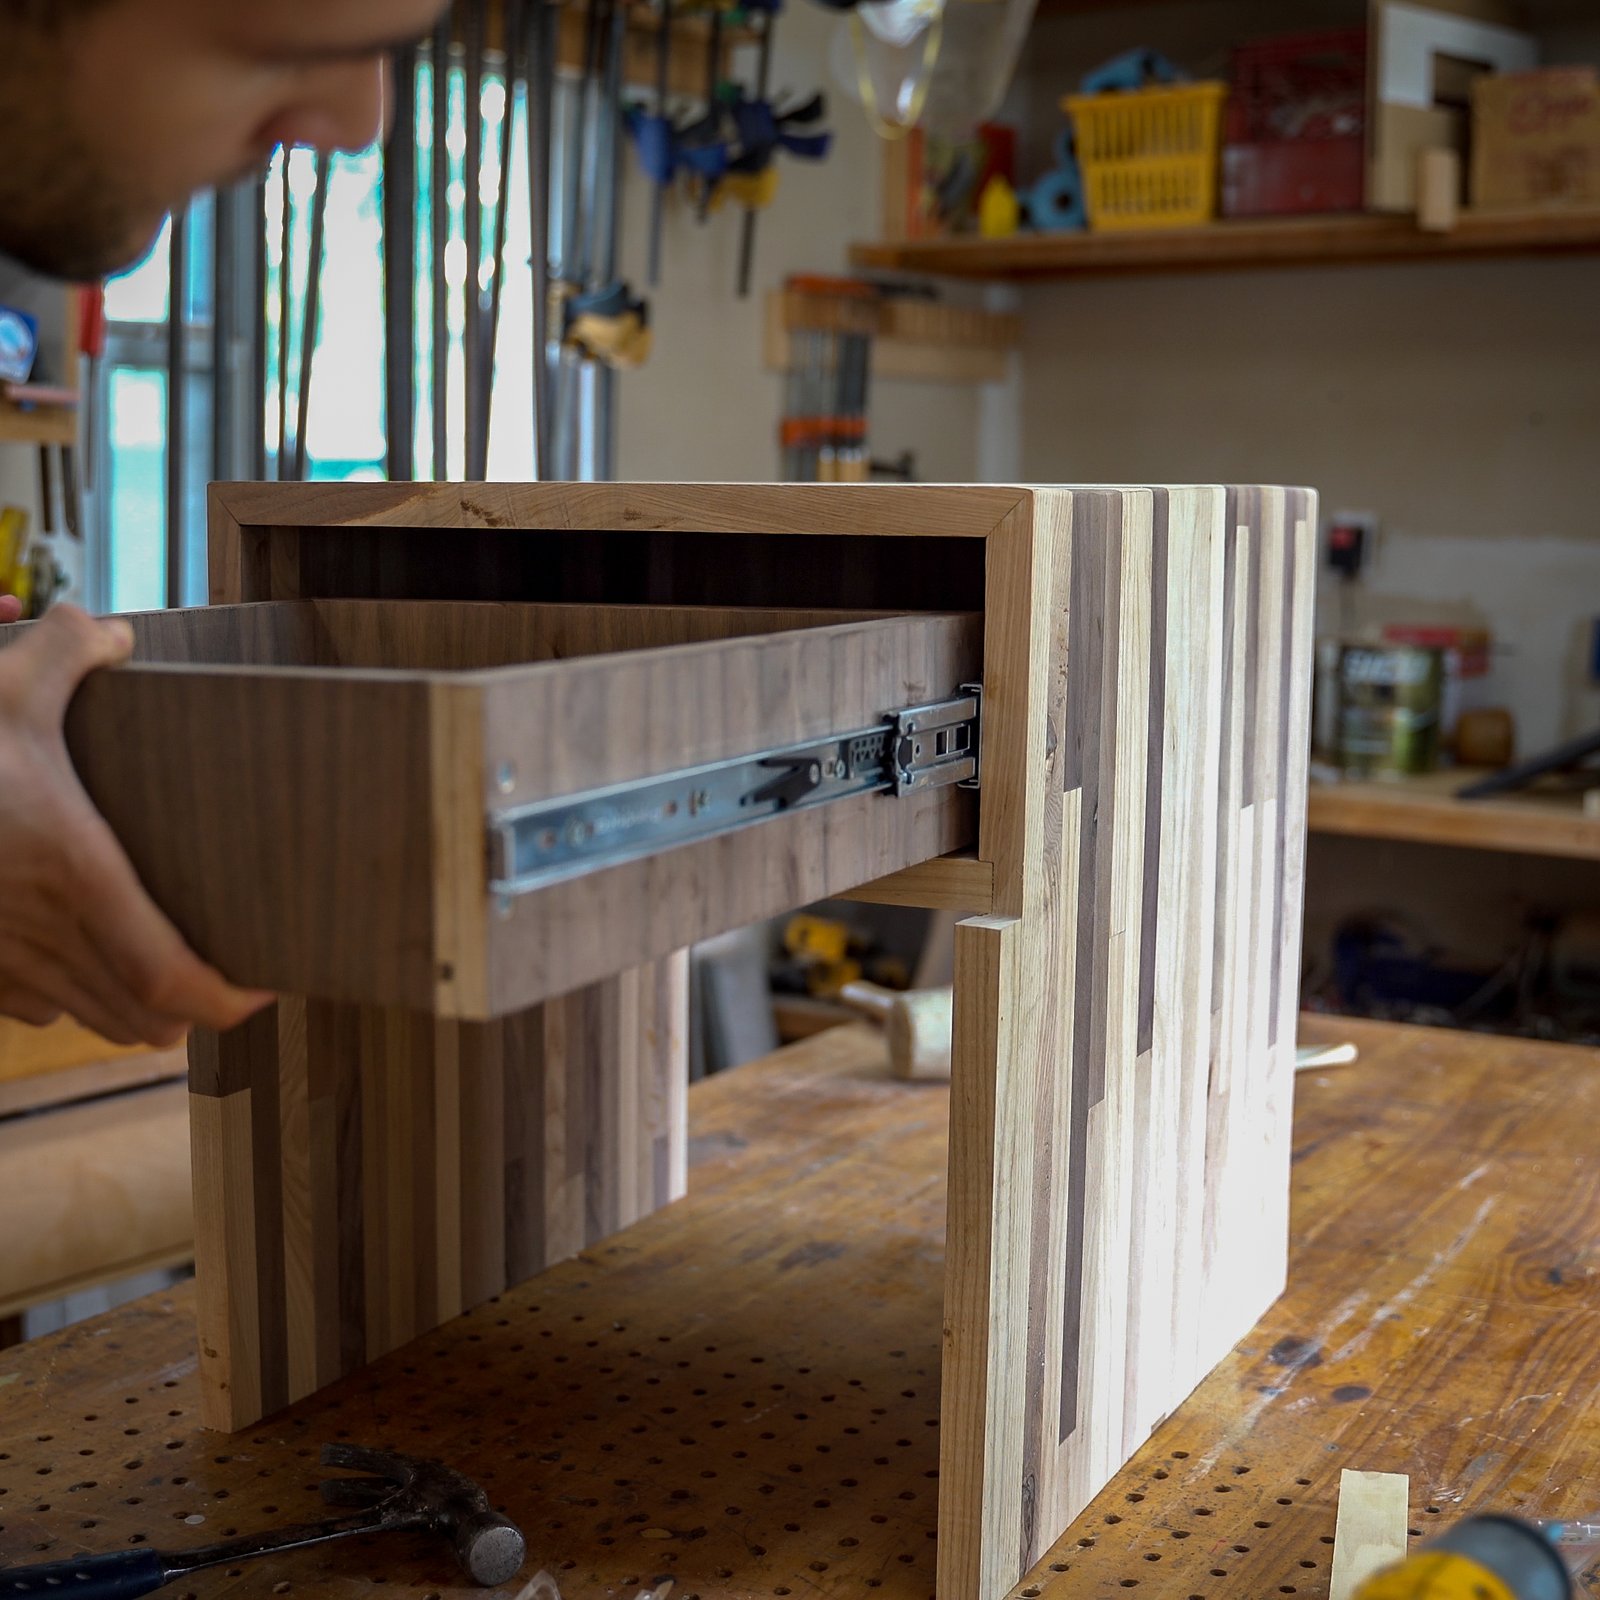
With both halves of the drawer slides mounted it was time for a test fit.
I re-mated the drawer slides back together and tested the drawer a couple times. PERFECTO! The drawer action was smooth and the soft close function worked great.
Let’s mount those drawer fronts!
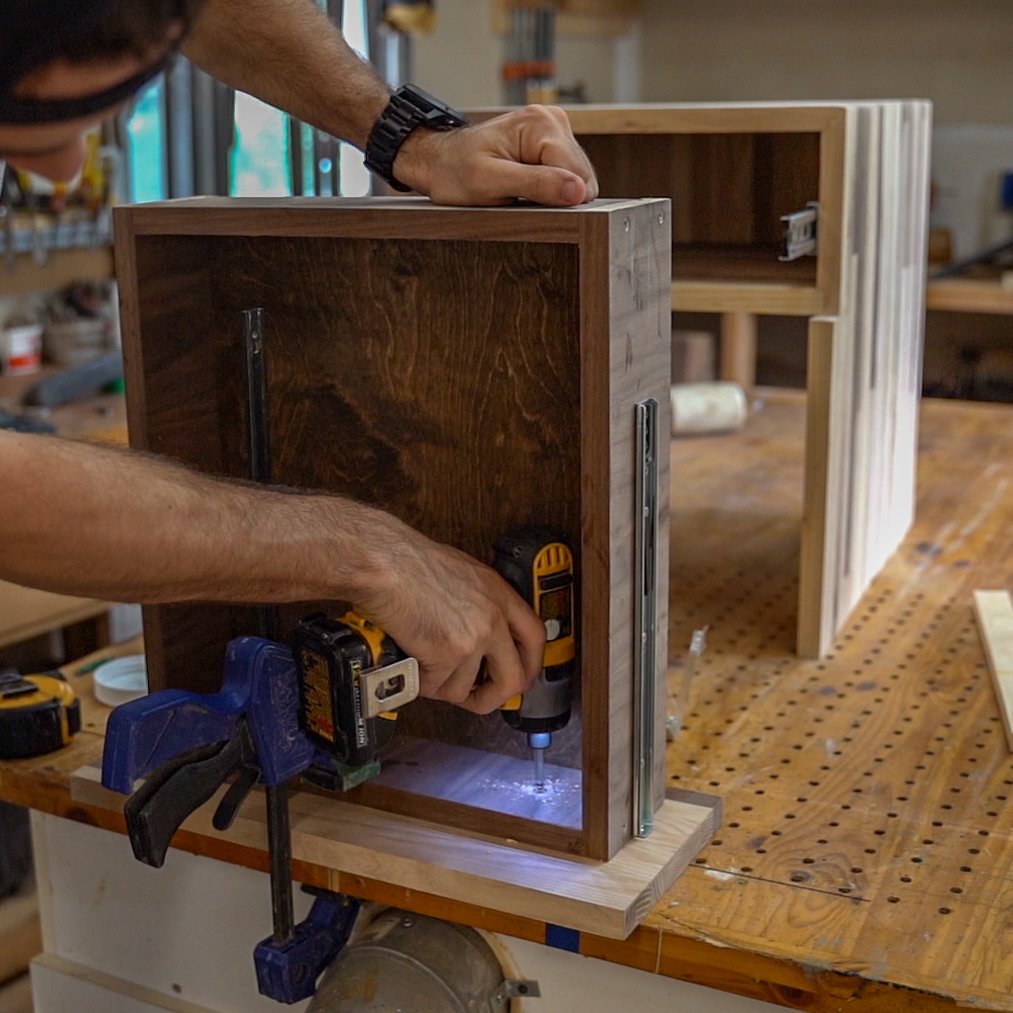
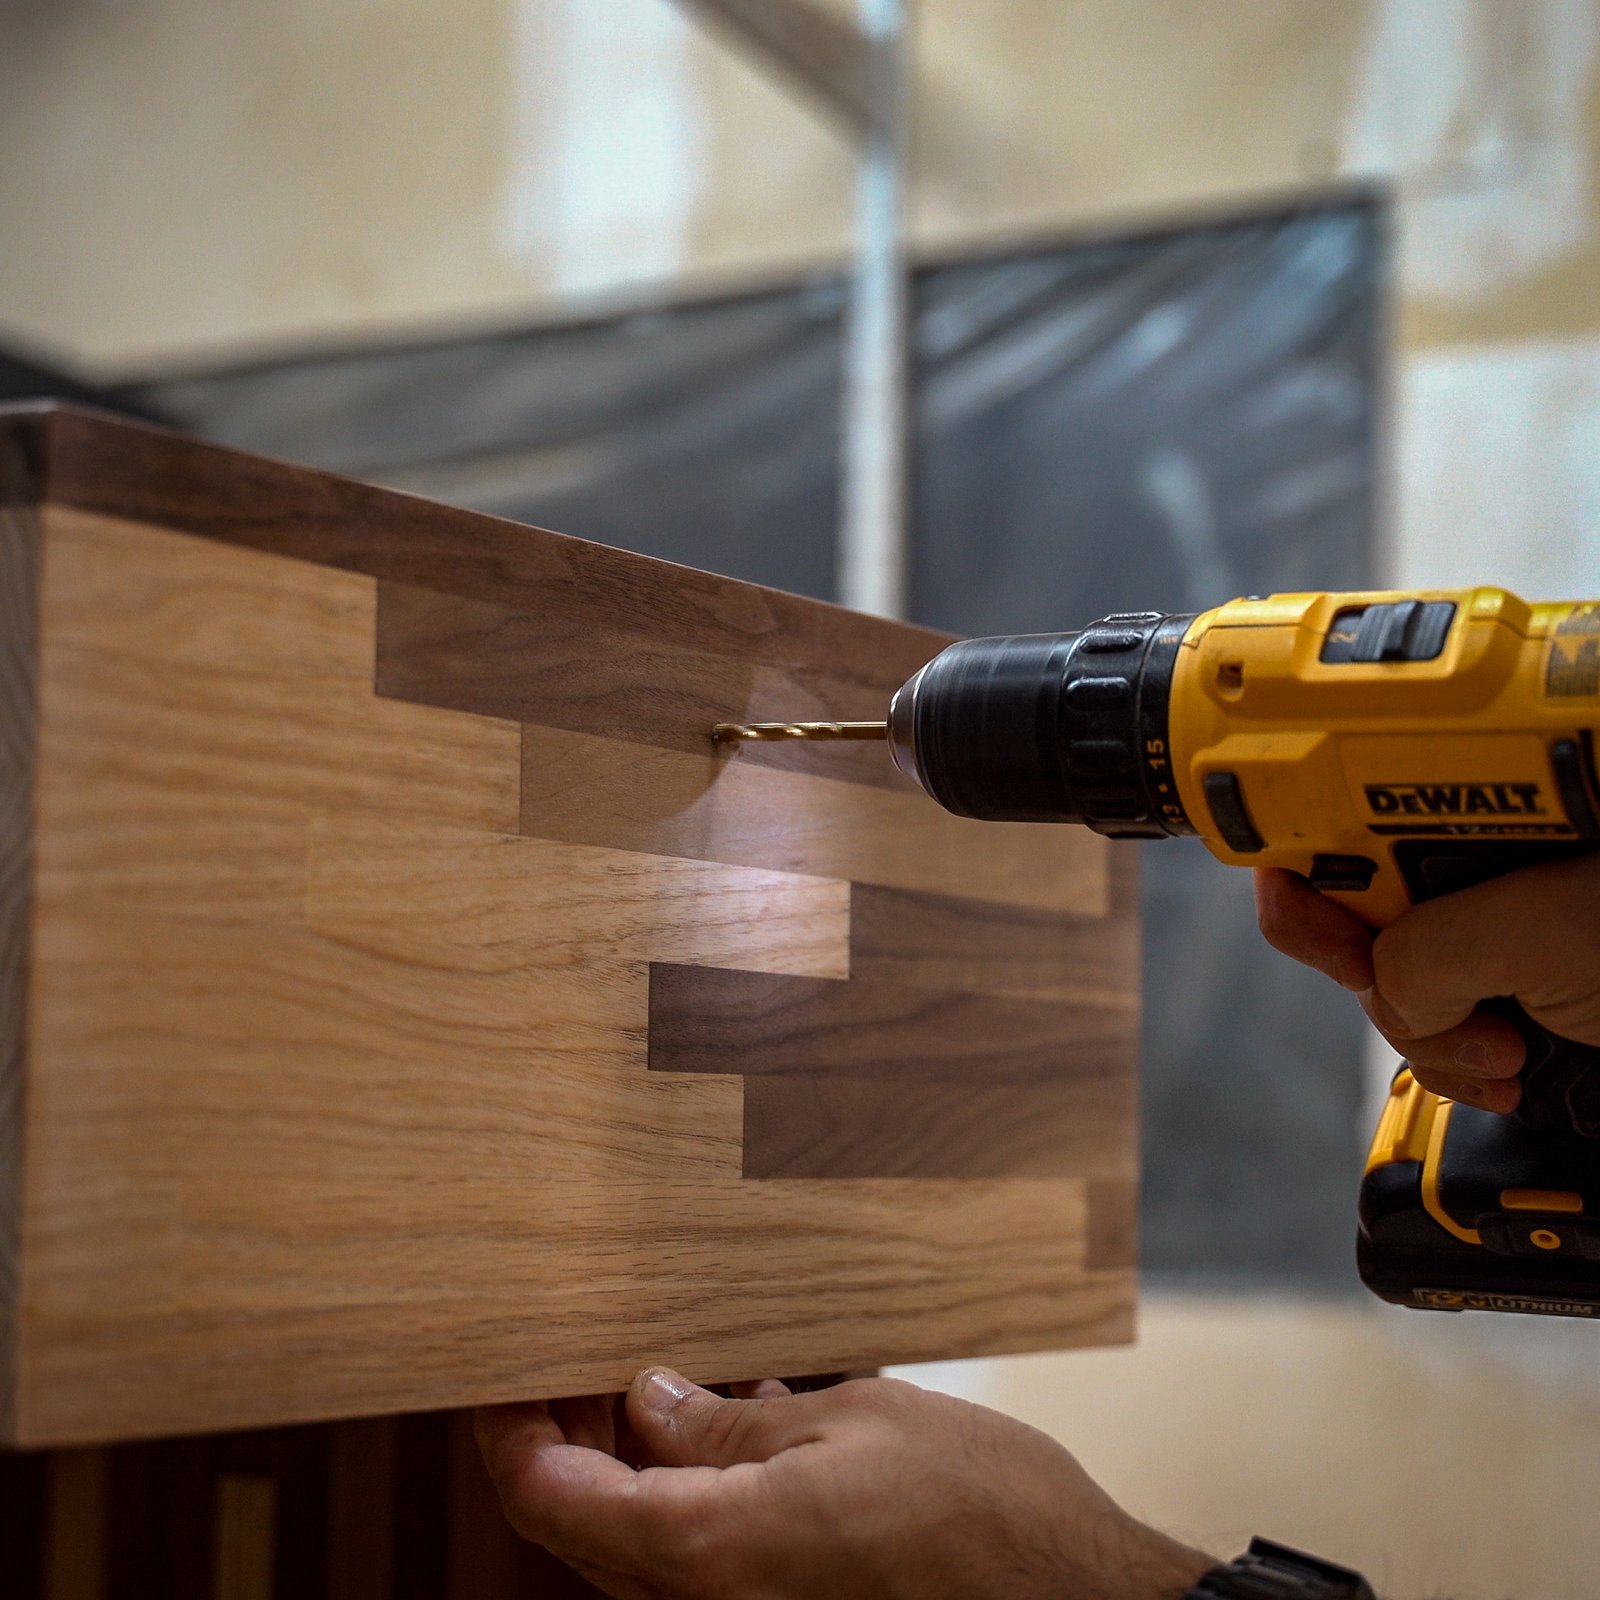
Mounting the drawer fronts was a pretty simple affair. I drilled two screws from inside the drawer into the backside of the drawer front. I used a countersinking bit to pre-drill my holes and clamped everything in place to prevent anything from moving.
The only real trick to mounting the drawer front was getting the alignment correct. I spent some time making sure I had the drawer front in just the right place.
Oh hey! Didn’t see you there. Just rolling on some clear coat.
I used a satin floor varnish as my finish on this project. It’s really tough, owing to it being a floor varnish, and it’s also really fast drying which is great when you’re trying to multiple coats in a short amount of time.
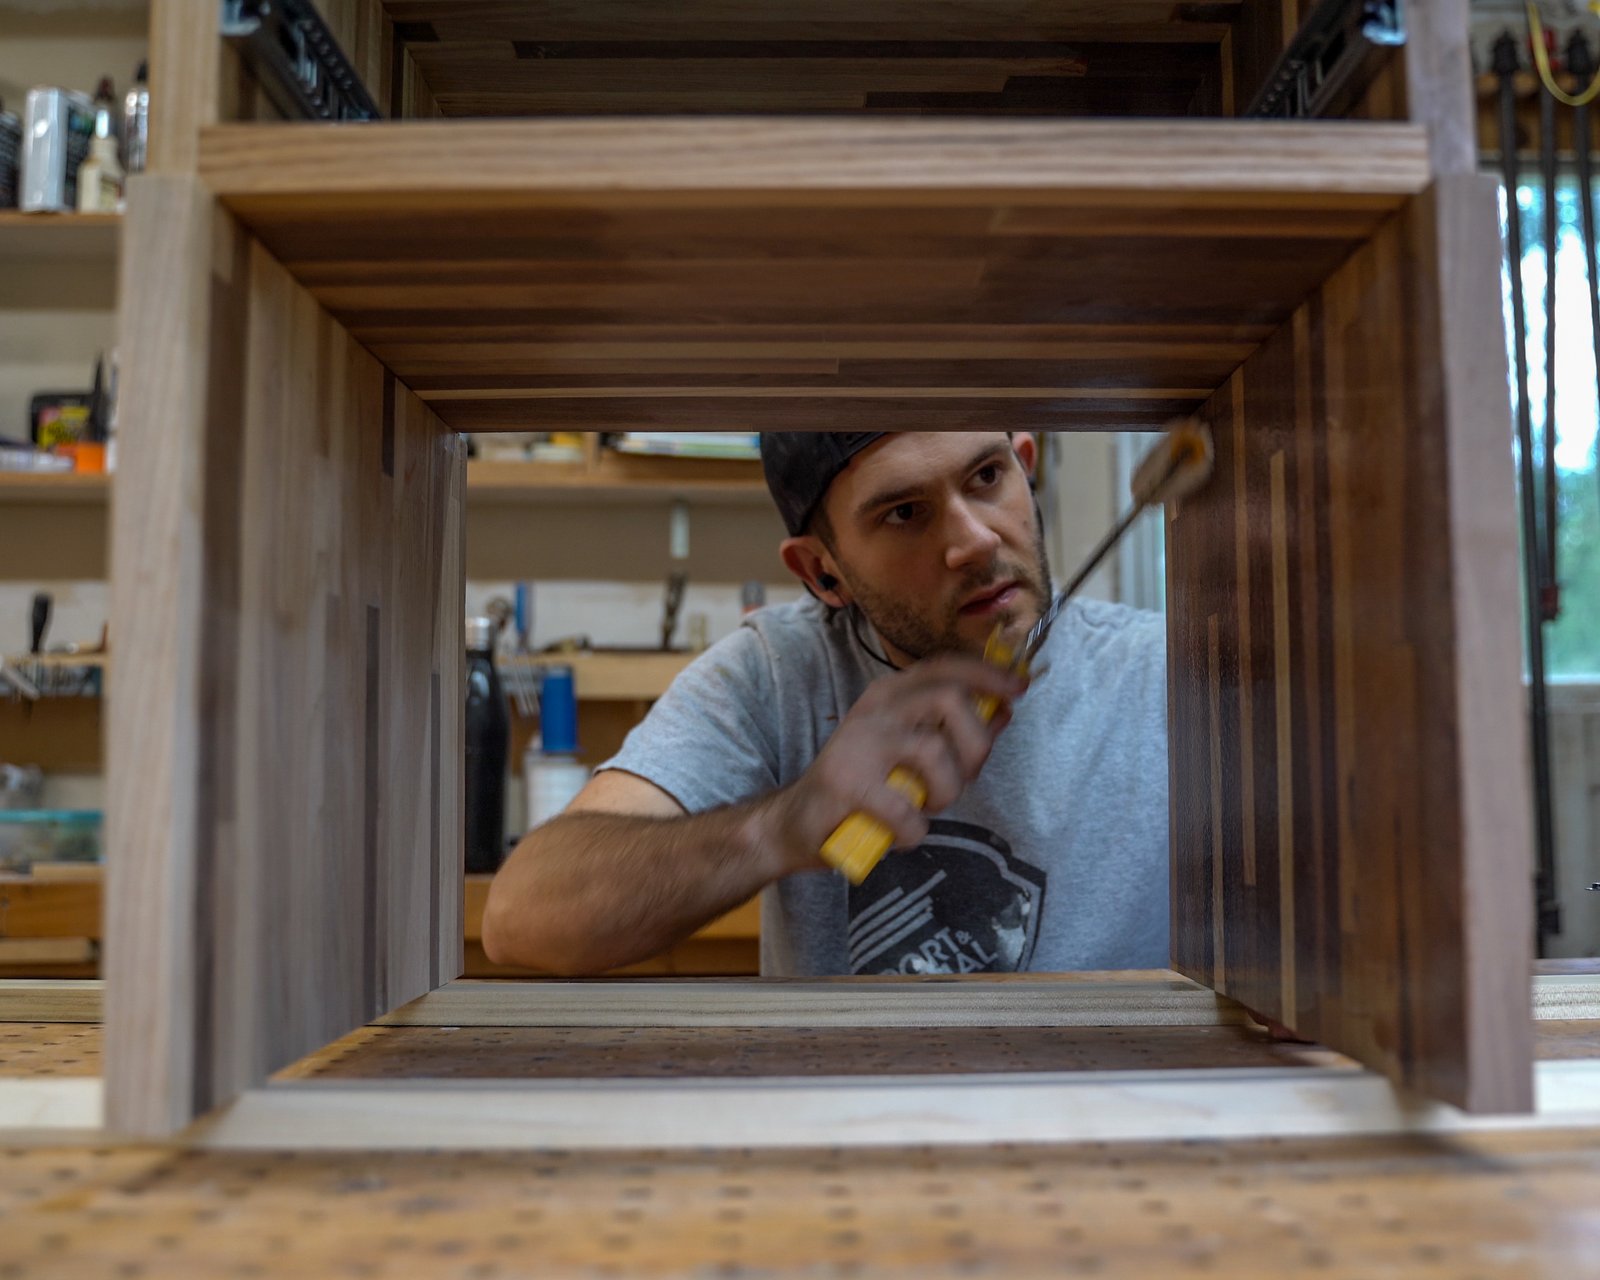
Between coats, I gave the whole thing a sand using 220 grit sandpaper. Sanding it between coats really helps to get an extra smooth finish and helps the clear coat adhere to the wood properly.
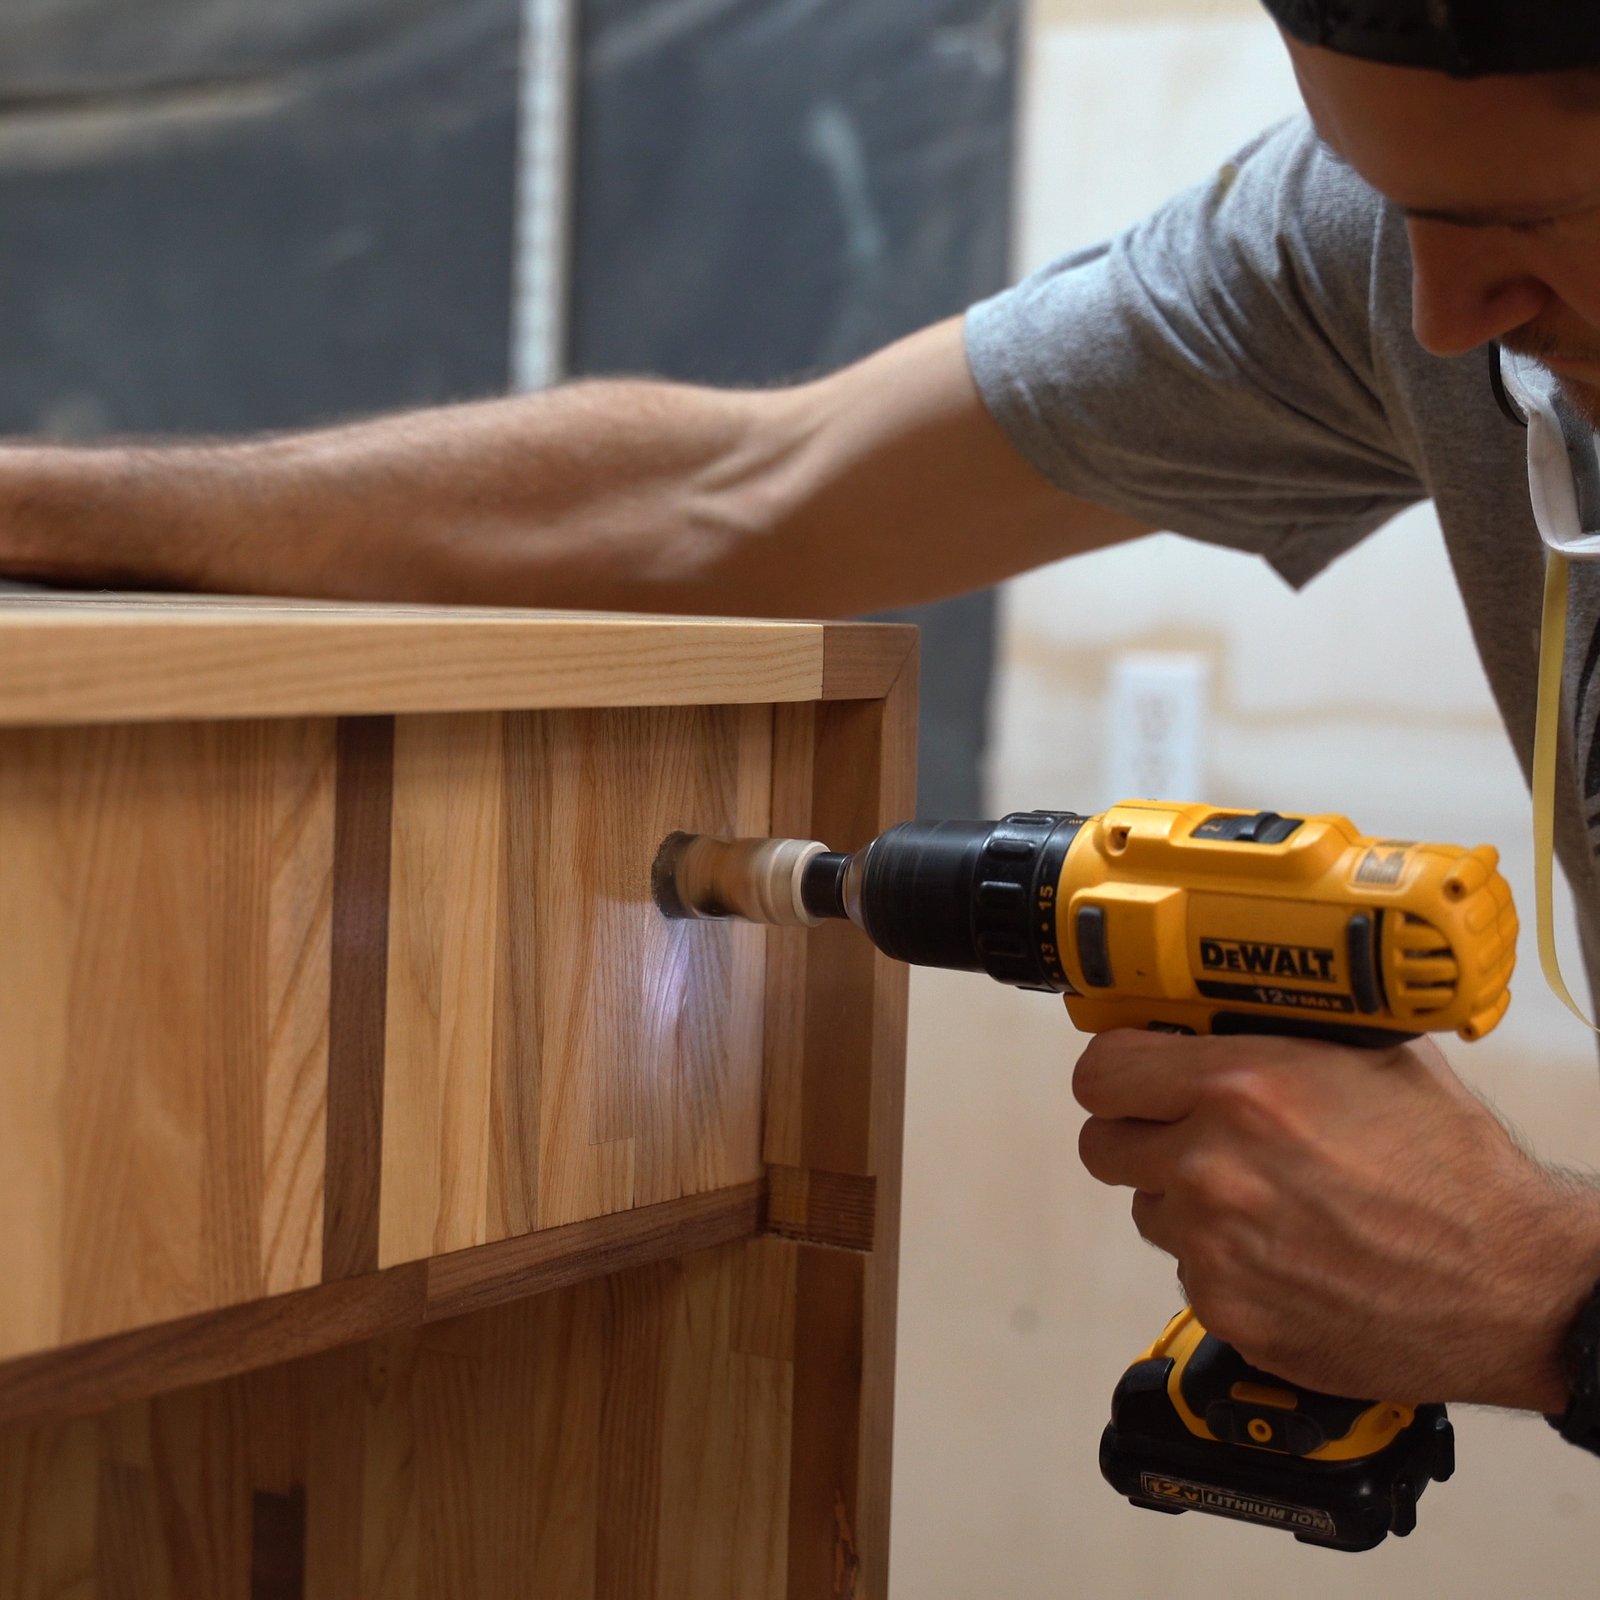
I drilled a small 1″ hole in the back of each nightstand. In order to get a nice clean hole I started the hole on the outside, but, once the pilot bit punches through to the inside I spun the nightstand around and finished the hole from the inside. That way I avoided the inevitable splinters when the bit bursts through to the other side.
You’ll have to wait two photos to see exactly why I drilled this hole 🙂
The last step before I brought the nightstands home was to drill a hole in the drawer front so that I could install a drawer pull.
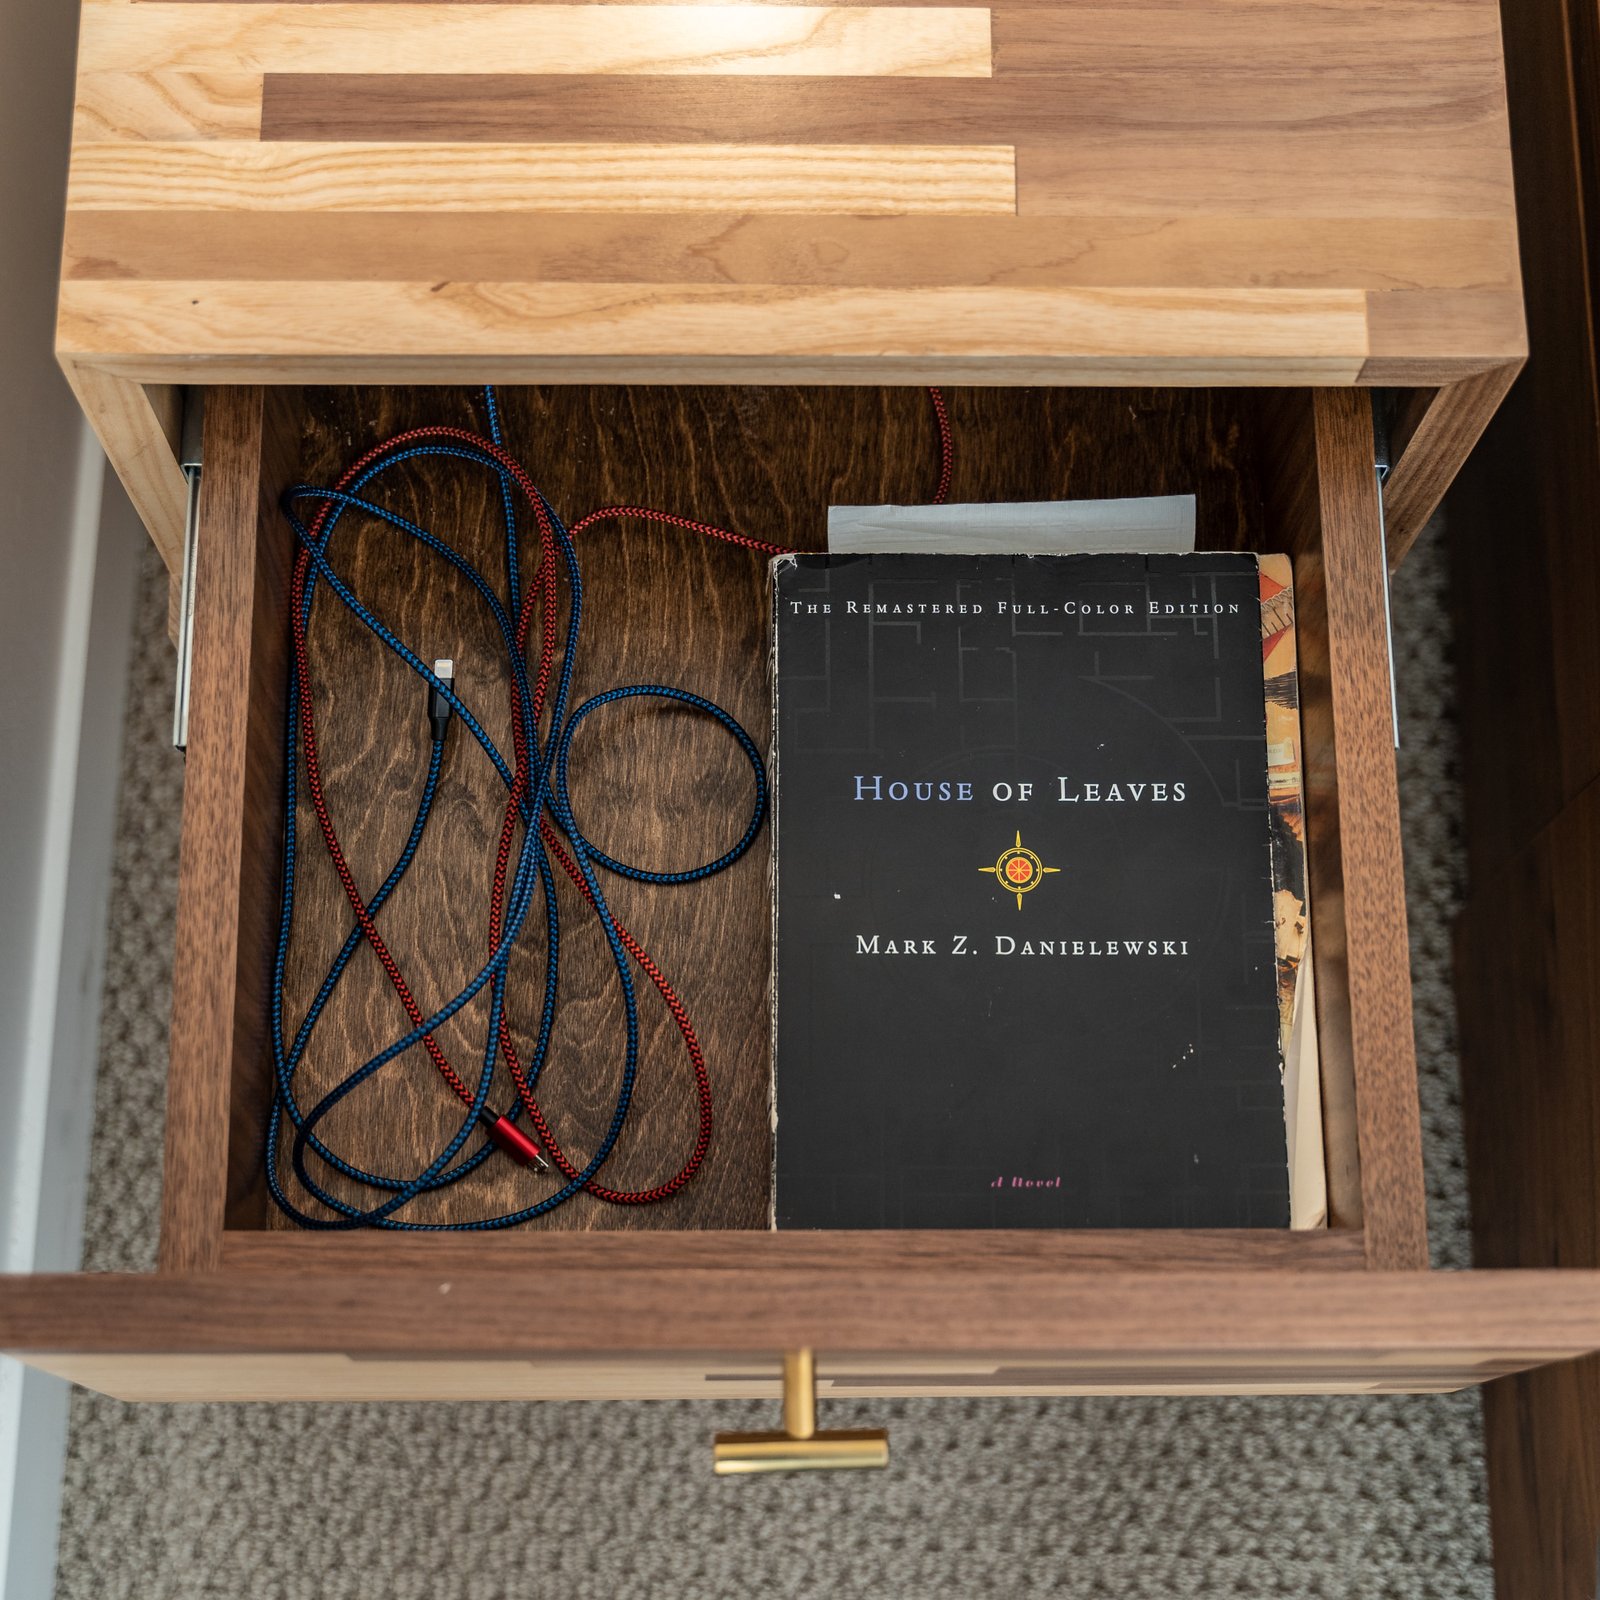
On the backside of each nightstand, I affixed these USB charging hubs. That way I’d only have one cable that ran from the nightstands to the outlet on the wall. Perfect for charging your phone at night and whatever other USB devices you might have.
I just used some simple double sided tape to stick it on there and a couple of adhesive mounted cable management tabs. The 1″ hole I drilled in the backside of the nightstand allows me to pass USB cables into the drawer area.
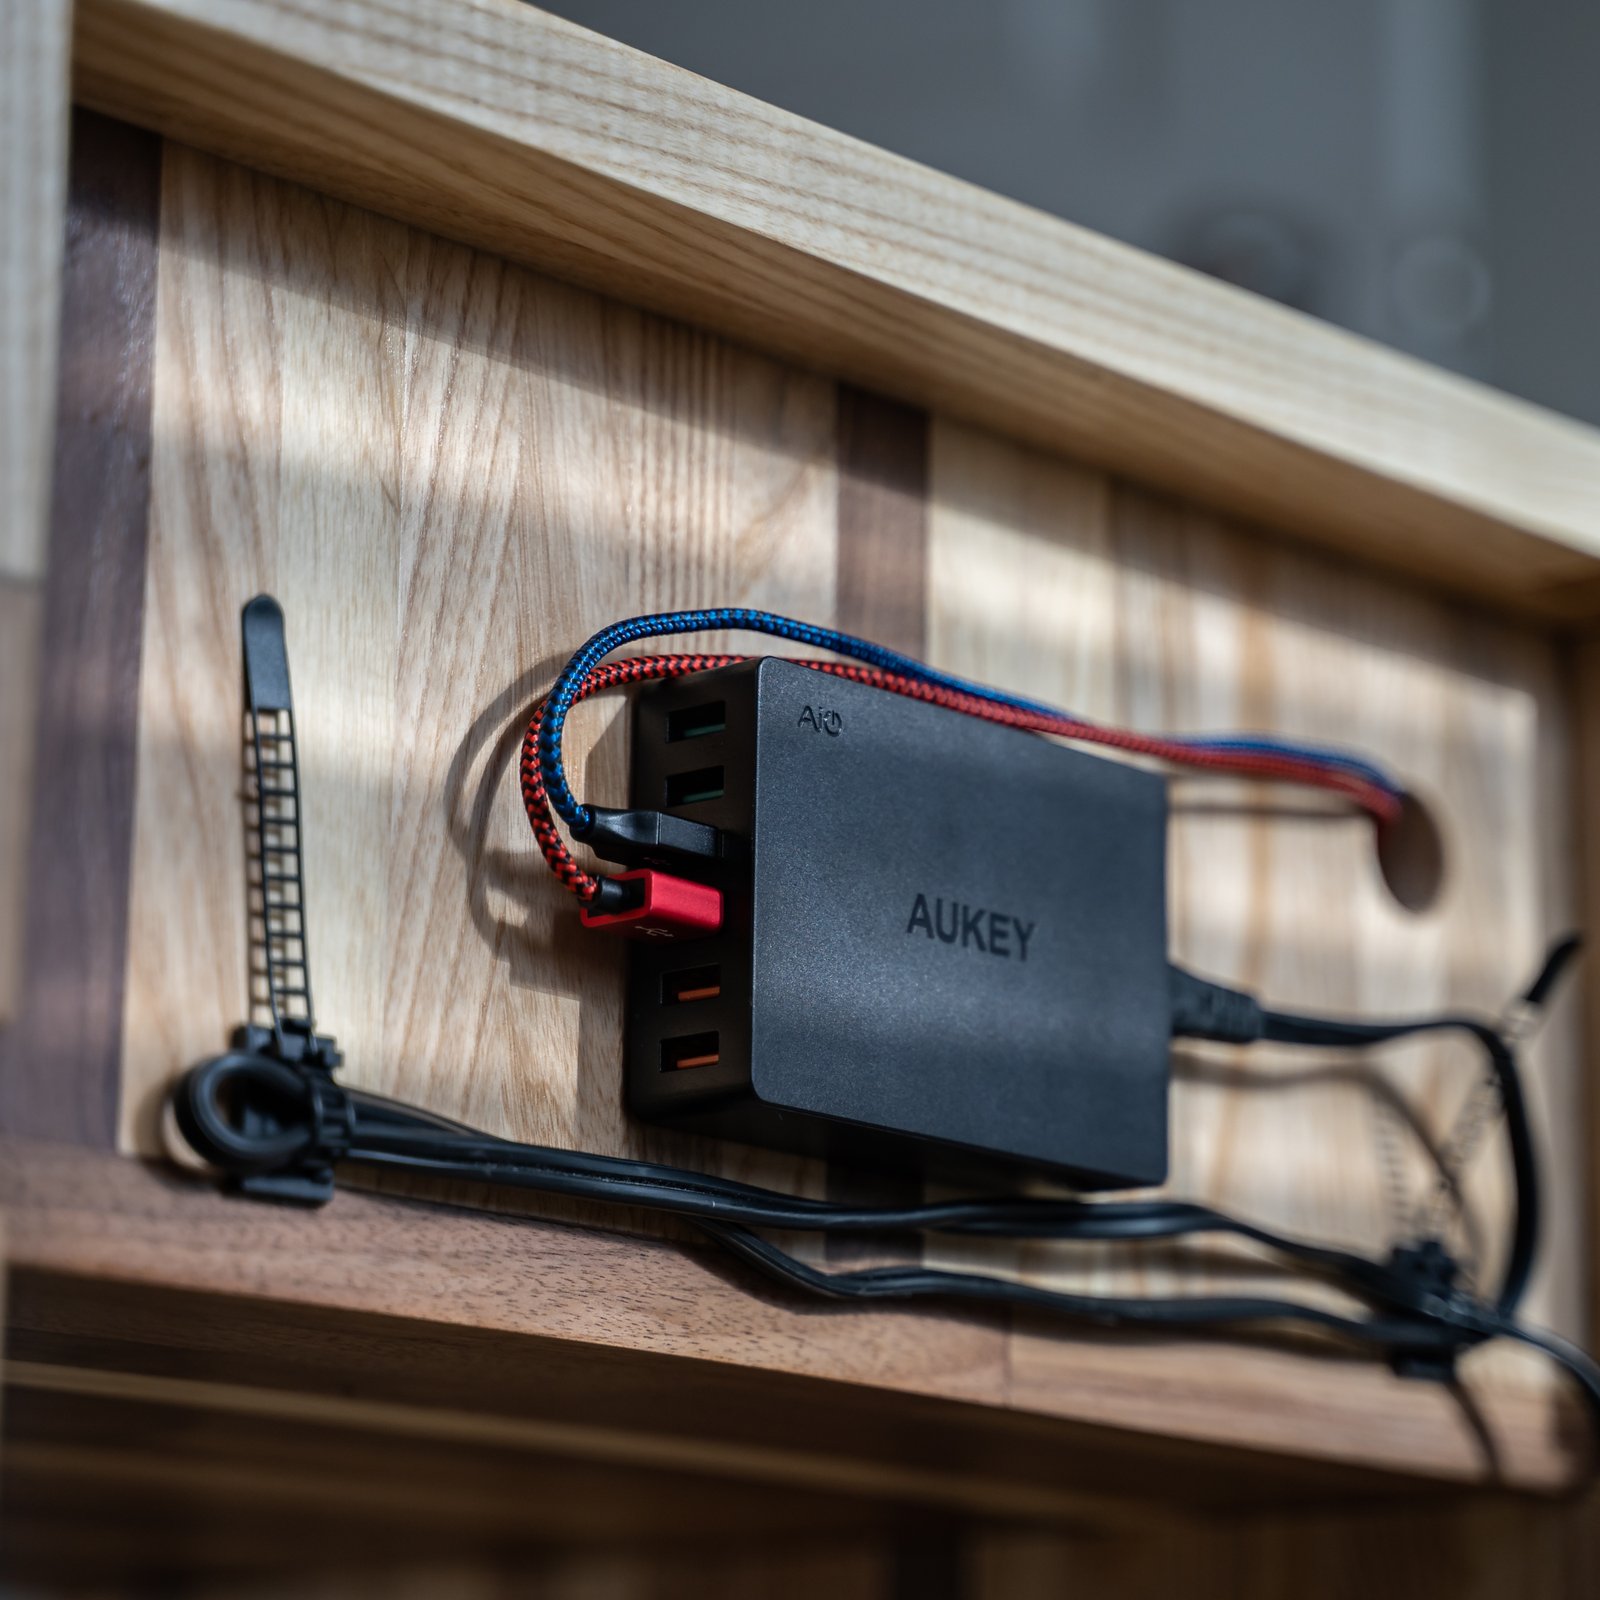
That way I can charge things inside the drawer and keep clutter to a minimum.
I’m a crazy person so I colour coded my USB cables. Red is micro-USB, blue is Lighting, and I have a black one not pictured for USB-C.
Also, I sometimes read regular books when I’m not listening to audiobooks. I’m currently trying to work my way through House of Leaves. Progress is slow because I don’t have much time for analogue reading, but this is a great book! Super weird and creepy.
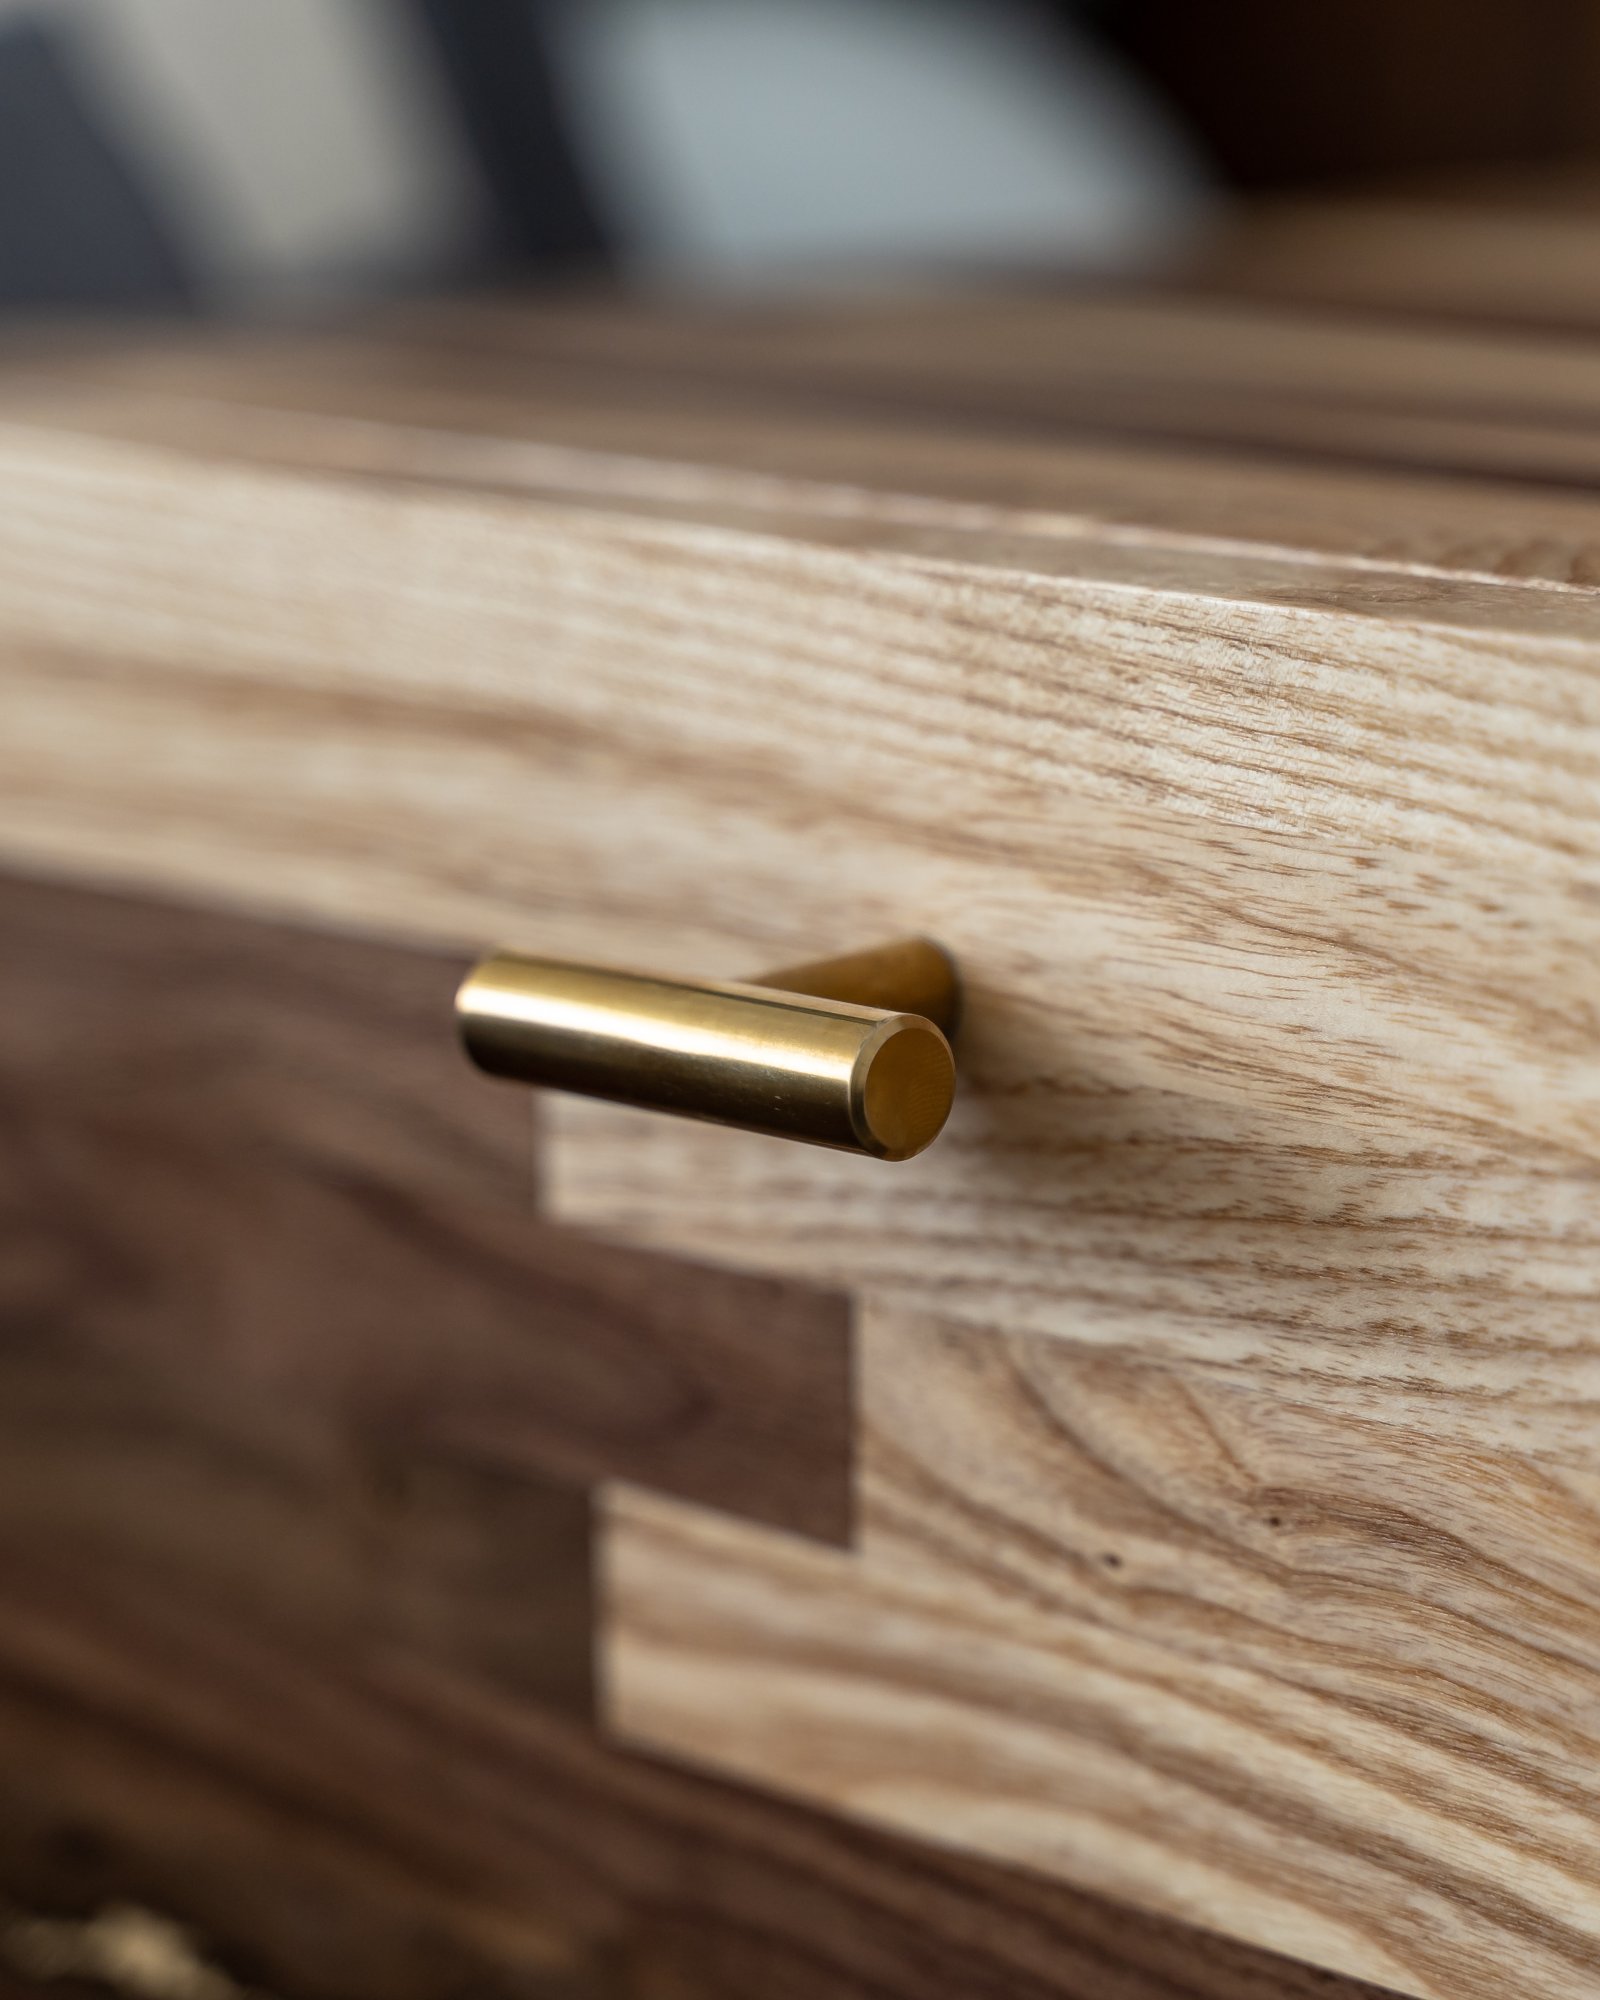
These are the drawer pulls I used. I actually ordered like 20 of them off of Amazon for some ridiculously low price and I’ve used them in more than one project. They’re clean and simplistic so they don’t distract too much from the rest of the nightstand.
As an added bonuses they also almost perfectly match the lamps my girlfriend picked out to go with our new nightstands!
Like most parents, I don’t have a “favourite” child”. That being said, this one is definitely my favourite.
Too bad it sits on my girlfriend’s side of the bed. This one has a cool piece of walnut with a big crack in it that I filled with a contrasting wood filler. I think it looks pretty badass 🙂

She found these desk lamps at Structube.
They’re simple, look cool and most important they’re made of solid gold….. Ok, that’s not true.
But a man can dream, can’t he?
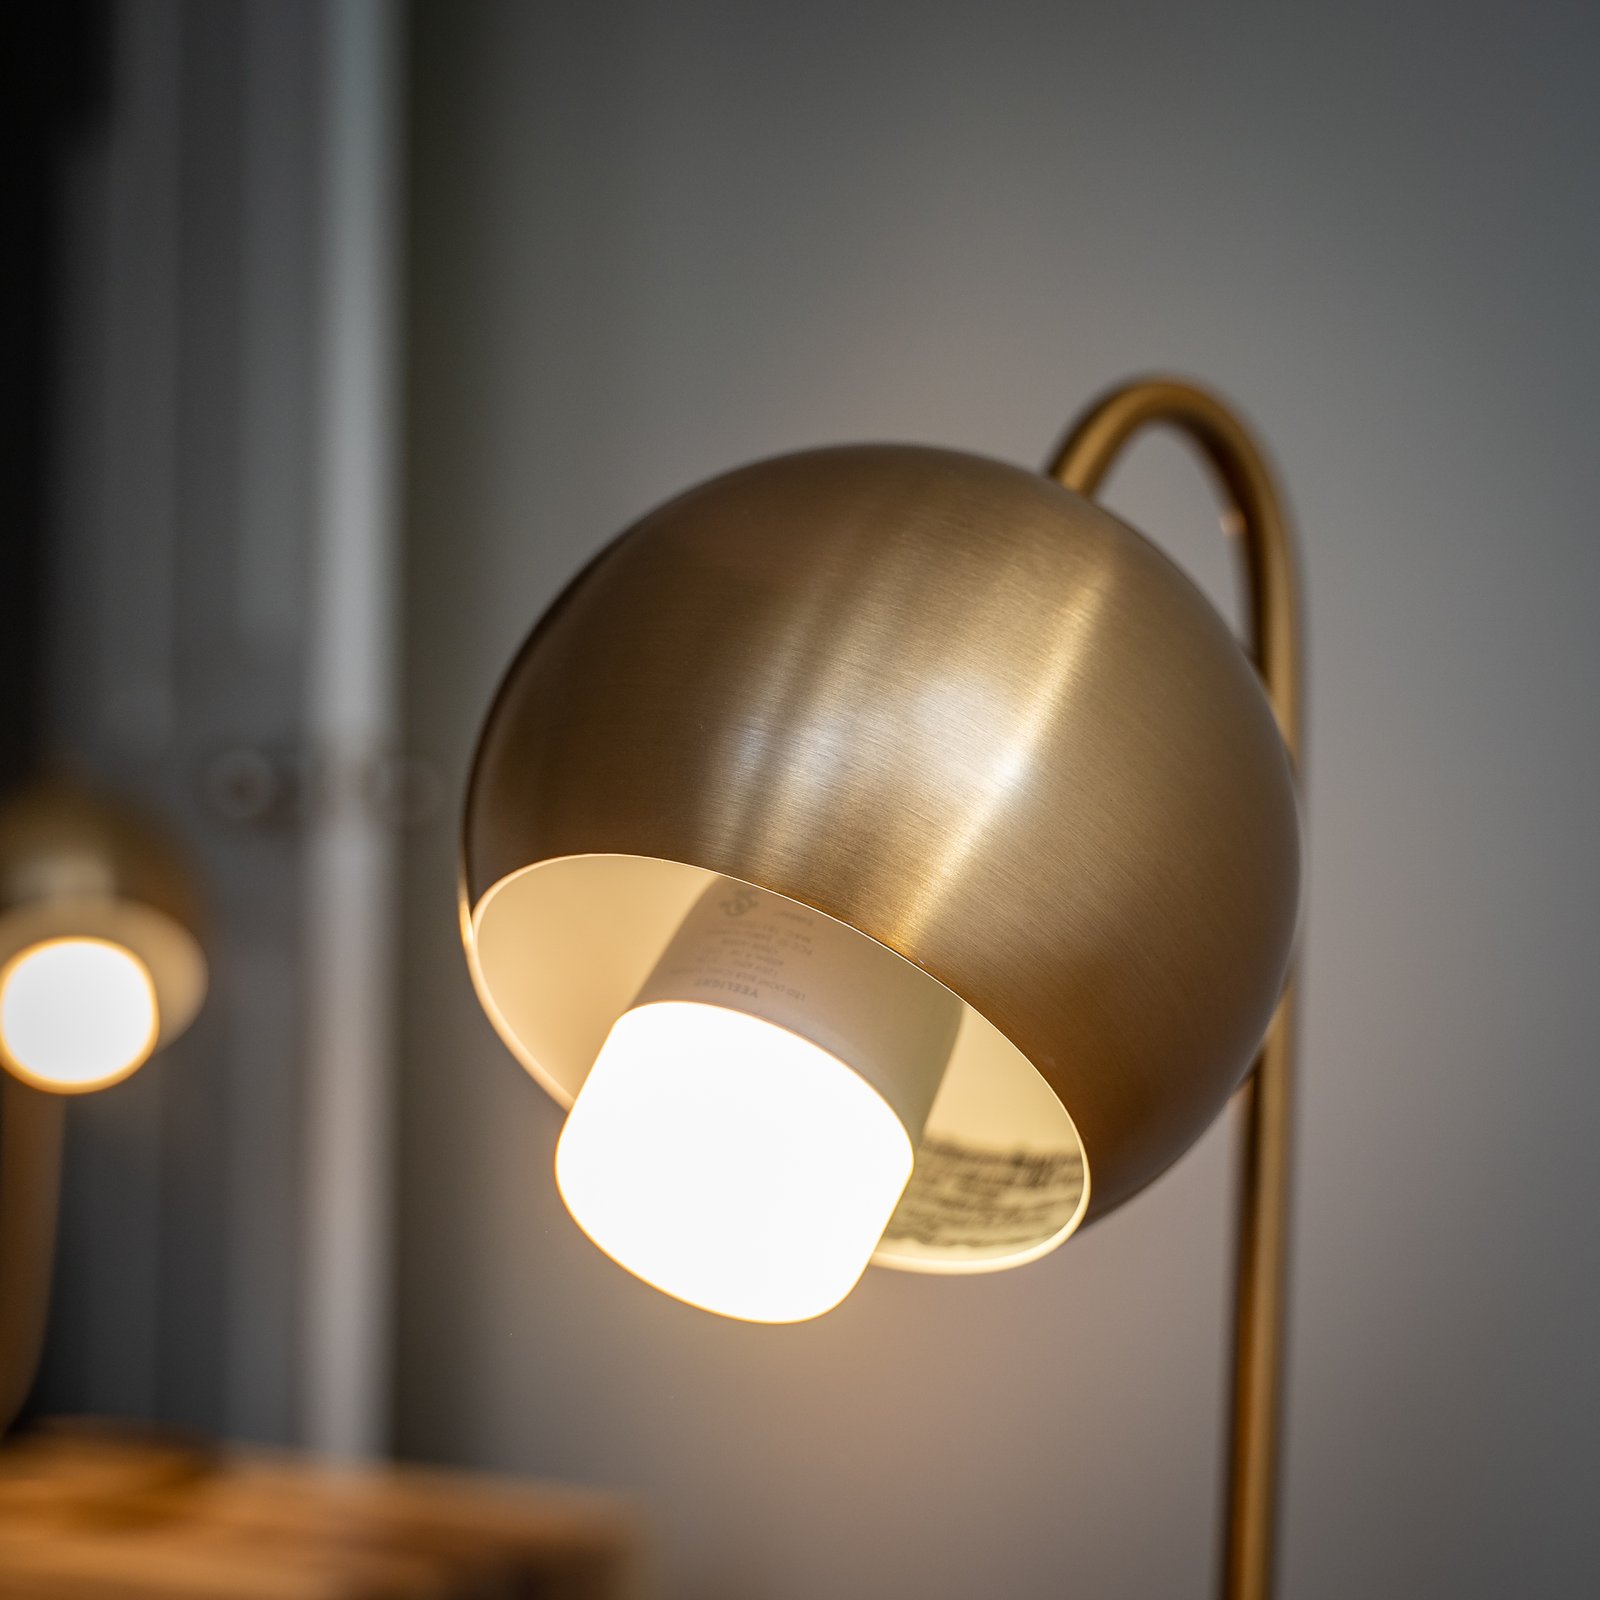
Most importantly they were pretty cheap. I think each one was $50 CAD. I threw a couple of Yeelight smart bulbs in them and all of a sudden we had a set of high tech lamps that we could control with our phones and Google Homes.
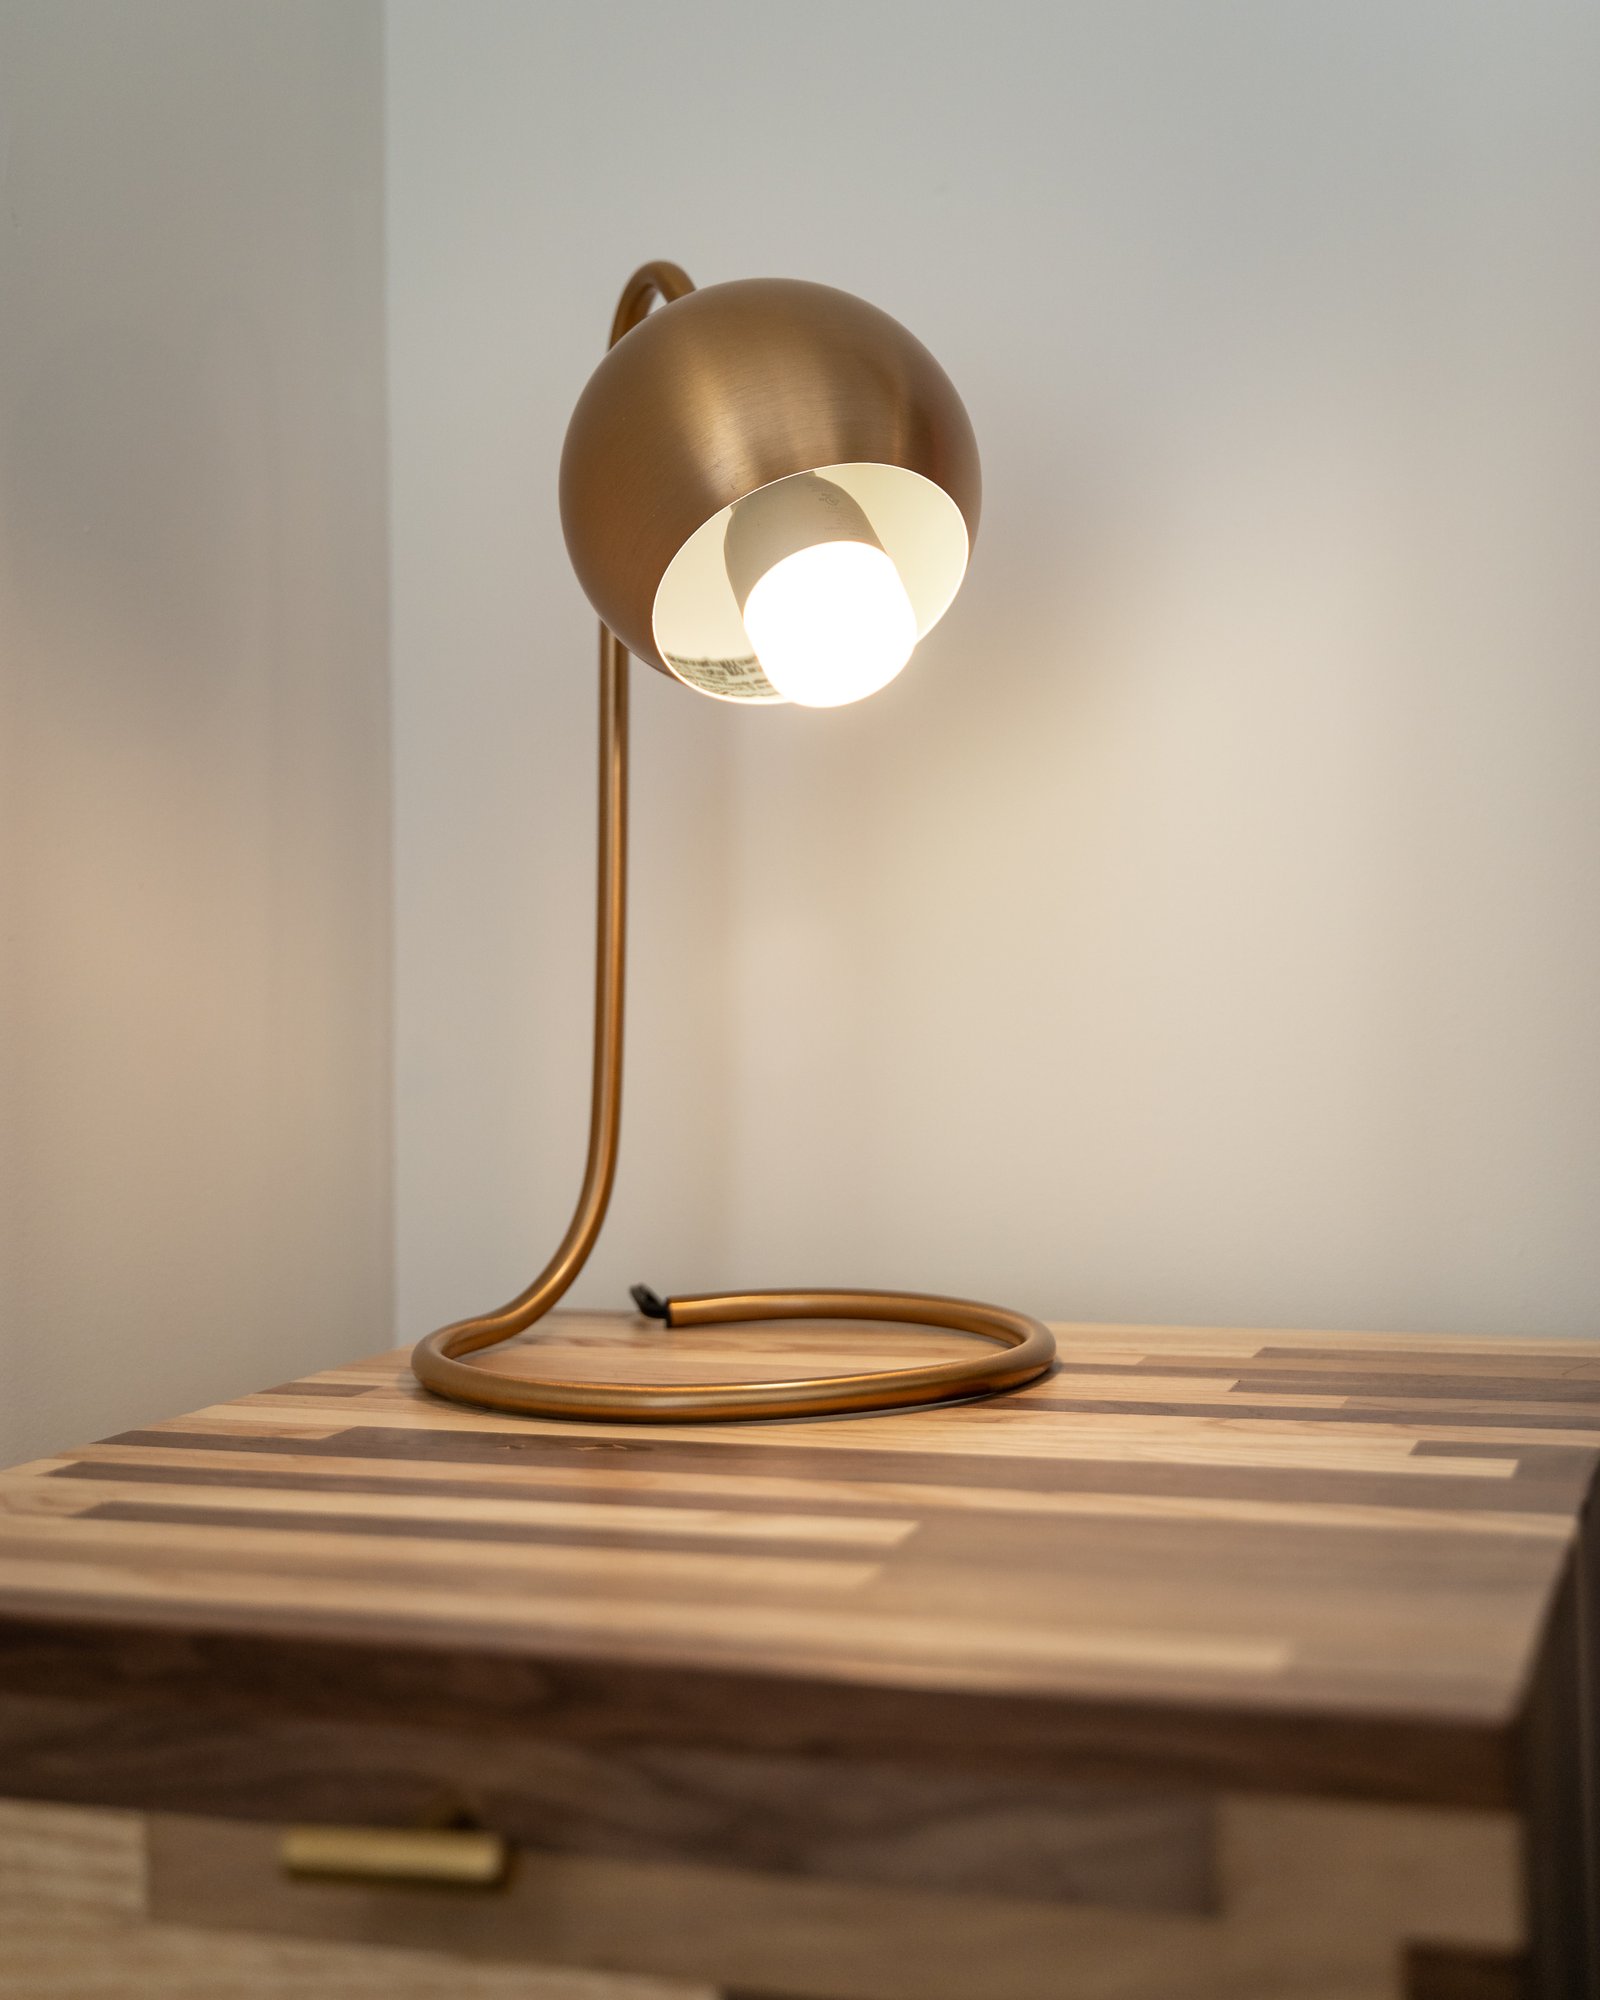
The drawer pulls and the lamps even share the same brushed texture. I’d love to say we planned it like this, but that was just a happy accident!
These soft close drawer slides are great, but, be forewarned if you’re the type of person who likes to slam a drawer to make a point during a speech you will not like these drawers. No matter how hard you try to slam them, they always slide softly back to the closed position.

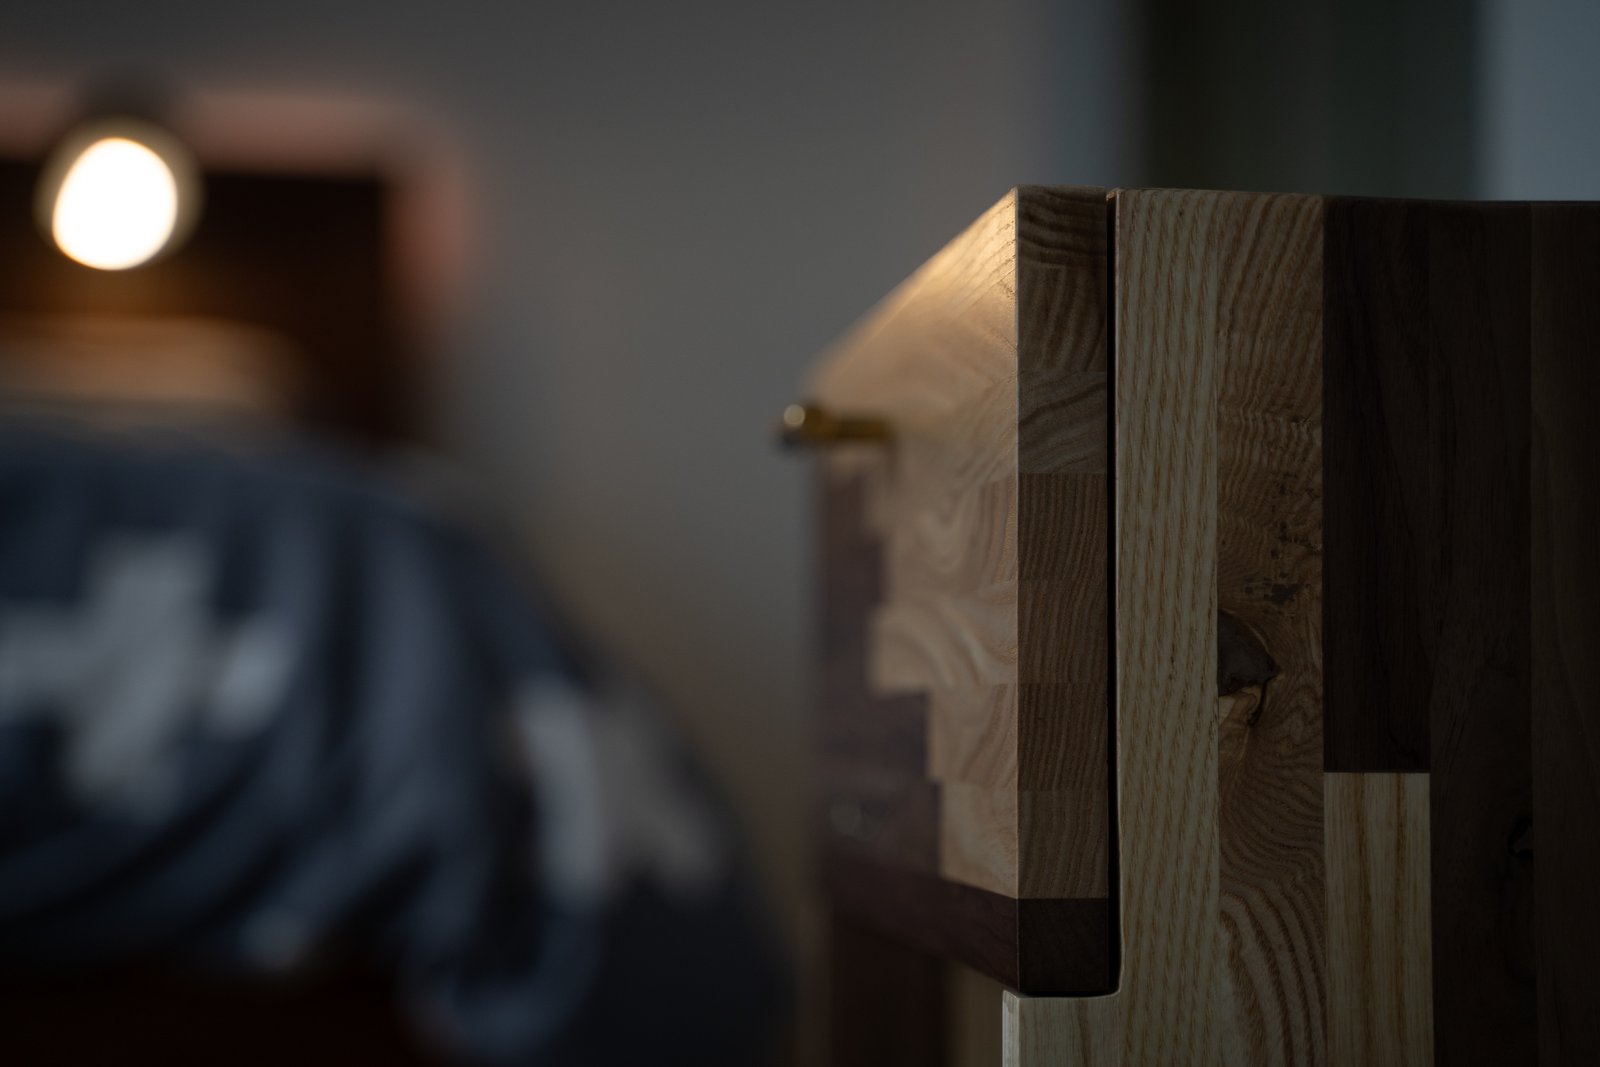
Mmmm wood grain, I love all of the different patterns and textures in the surface of these things.
For nighttime reading and getting settled into bed, these lights provide tons of light. In fact, we’ve really almost completely stopped using our overhead lights.
In the future, I want to get them set up so that they slowly turn on in the morning just before our alarms go off and gently wake us up. As we head into winter here in Canada the days get real short. Most of the time I’m up for work a couple of hours before the sun rises. My hope is that simulating a sunrise inside will help my morning routine.
Sometimes I worry that the mosaic pattern and waterfall edges aren’t fully appreciable when the nightstands are tucked into the corner of my room. I’ll keep this photo framed on my desk to remind myself.

I thought about adding a frame around the drawer fronts so that the grain pattern would be preserved when you were looking at the nightstands from this angle, but in the end, I decided against. It might’ve looked good from the side but I think it would look dumb from the front. I actually don’t mind how the drawers look now truth be told. It’s a nice bit of definition and shows that the drawer front is a separate element.
Here’s my best attempt at an artistic shot.
Honestly, I’ve been learning just as much about photography and videography as I do about woodworking with every one of these builds I do. I didn’t know anything about photography or cameras when I started and now I’m almost not complete shit.
It’s been a real eye-opener for me and given me a lot more appreciation for the craft. Shout out to all the photographers and videographers out there!

Bing thanks for you for stopping by, but she’s got some sleep to catch up on. So do her a favour and close the door behind you while you’re on your way out.
Seriously though, thanks for checking out my build! If you have a chance, do me a favour and check me out on Instagram!
Let me know if you have any questions or comments below!