Smart Bedside Cabinet
This is my new beside cabinet I just finished making. Calling it “smart” might have been a bit of a reach, but it’s got some cool features you might not see in your average nightstand.
Inside there’s a motion sensing LED light that turns on as soon as the door opens. Concealed behind a false panel in the top of the cabinet is a USB hub. I can charge up to 6 USB devices without cluttering my room with cords and cables. It can even do USB fast charging!
Last but not least it’s got a self closing door. No more slamming doors. Get the door within 10 degrees of being fulling closed and the hinges guide it in for a soft landing.
Lets check out some of it’s features more in depth and then I’ll show you how I made it!
I wanted to create a clean and organized space where I could keep a lot stuff that was cluttering up my room. Books, toys, chargers and etc. You know the typical night stand stuff.
In total I spent about $270 CAD on this thing. Not exactly cheap, but to me it’s worth it. Some of the items I already had from other projects too, so it felt a bit cheaper.
Walnut Plywood – $150
Edge Tape – $15
Adjustable Feet – $20
Headphone Hook – $14
USB Hub – $40
Motion Sensing LED Light – $17
Drawer Pull – $13

Because it’s something I’ll be frequently using at night before bed I thought it would be handy if there was a motion sensing light inside the cabinet. Nothing like a little light to help you find what you need in the middle of the night.

Here’s the charging hub with all of the various USB cables plugged into it. Not bad, but still a little too cluttered for my taste. Better cover that up.
You can find it here. Nothing special, but it has USB fast charing on 2 of the 6 ports. So that’s cool.

Ahhh that’s better. This piece just pressure fits into the space and has two finger holes, one in each corner, that allow me to grab it and pull it out if I ever need to change the cable setup. The finger holes also allow me to route some USB cables into the top shelf of the cabinet.

This slot in the back of the cabinet lets me run USB cables to the outside world. Right now I only use this for charging my phone, but who knows maybe I’ll have other stuff in the future.

This slot allow power to come into the cabinet and power the USB hub.

I have the bad habit of watching youtube videos before bed, so I keep a pair of wireless headphones in my nightstand. I ordered this handy headphone hook off of Amazon so that they would have a dedicated place to be put when I’m not using them instead of just floating around my room. If I need to charge them, there’s a USB cable for that 6″ above them.

This is a wireless charger I made recently. Simply place your phone on it and, if it’s wireless charging enabled, it’ll begin charging. It’s also made of (solid) walnut and matches the cabinet quite nicely.
I have a build guide for how I made it which you can find here.

Here’s where it all started. A blank slate. This is a 4′ x 8′ sheet of walnut veneer ply. For those of you who don’t know veneer ply is like regular plywood except the two outside layers are made of a nice wood, in this case walnut. You can get veneer plys of basically any type of wood. It’s a great option when you’re looking for something that’s a BIT cheaper than solid wood and thermally stable. I don’t have to worry about expansion and contraction over time with plywood.
It’s still quite expensive though. This sheet cost me about ~$150 CAD. Thankfully I have enough left over for one more project!

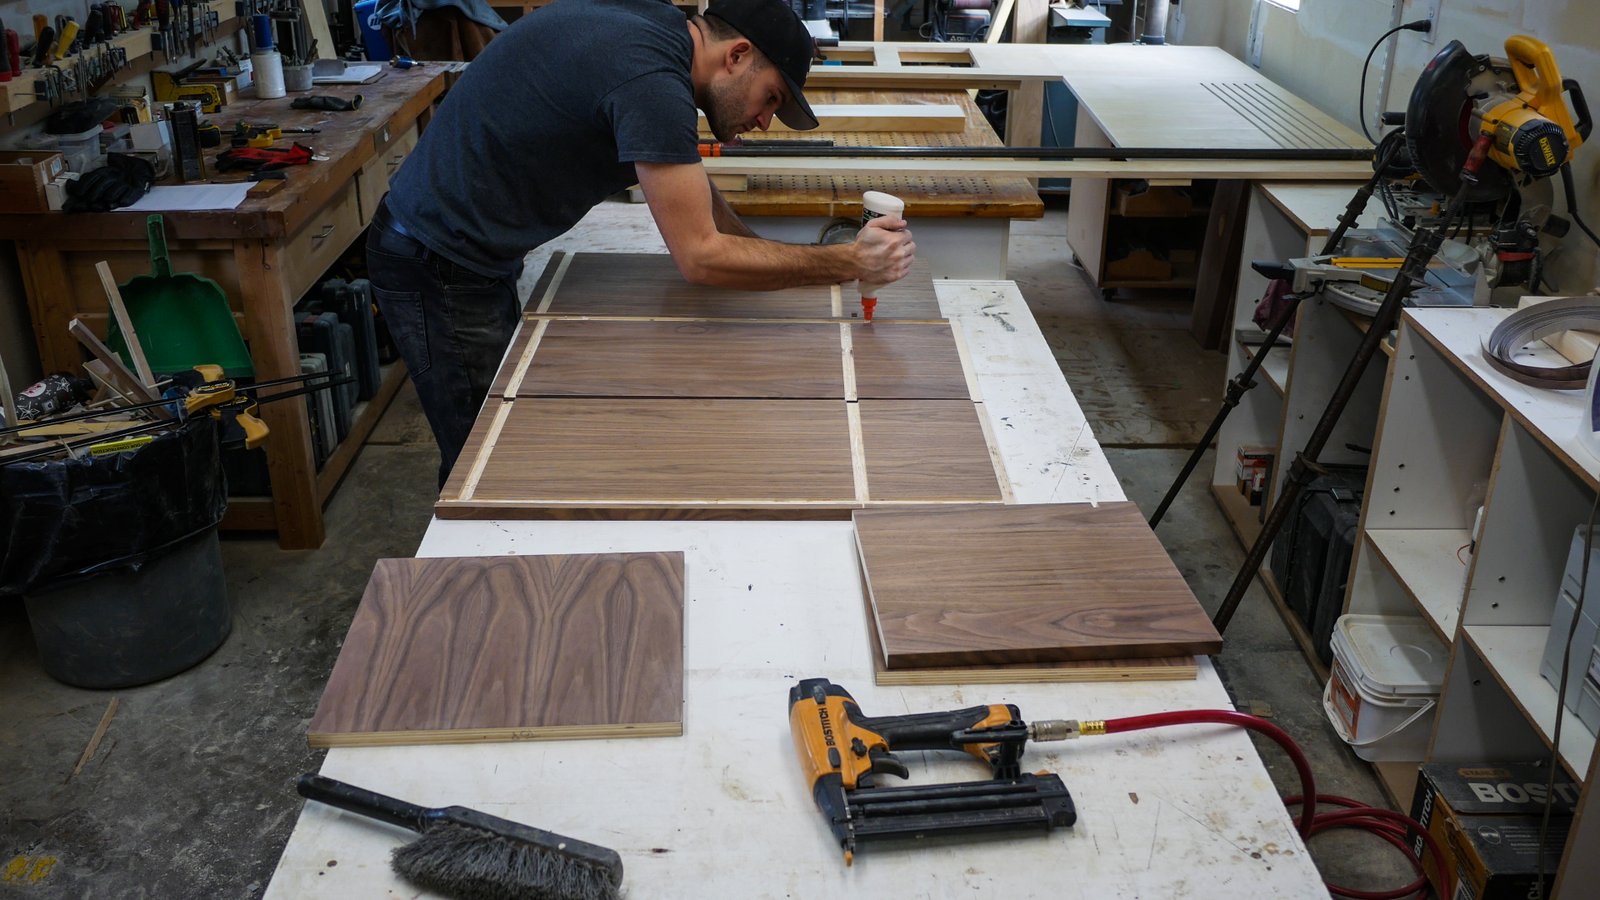
I started by cutting the plywood into some more managable pieces. It’s a real pain to push a 4′ x 8′ sheet of plywood through the table saw, so I actually cut it in half before I started on the table saw.

Starting to get there. Now I’ve got all the main pieces cut. It’s important to label things as you work with a project like this, I had a lot of piece that were very close in size to one another so it would be really easy to accidentally mix them up.
The three large pieces are ~16″ x 32″. The smaller pieces are ~16″x16″

Here I am planning out the next step. Because I didn’t want to have any external hardware on this build I decided to cut channels in the plywood, fit the whole thing together and secure it with glue. In order to know where to cut the channels I traced lines onto the plywood with a pencil.

I set the table saw 1/4″ above the surface. This allowed me to cut 1/4″ channels in the plywood.

I did this about a million times for this project. I would push a piece through, resetup the table saw a fraction of an inch to the side and do it again until I had channel wide enough to fit a piece of plywood in.

It ended up looking like this when I was all done. The channels are exactly 3/4″ thick, which is the same thickness as the plywood. I made sure to keep the channels very tight. When I was on the table saw I had a scrap piece of plywood next to me that I would try in the channel after every cut.

Not quite done with the table saw yet. I still had to cut a few more channels in the pieces. These are the slots for the various USB cables.

Because veneer ply isn’t solid wood all of the cut edges you have exposed layers of lesser quality wood. Not to worry though, there’s a product for that. It’s called edge tape, and it’s basically a thin layer of wood with an adhesive backing.
You apply it with an iron because the adhesive is heat activated. It’s slightly wider than the plywood as you can see in the picture, simply trim the excess off with a razor blade.

Now that all the exposed edges are covered it’s time to apply the finish. I used wipe on poly which is a polyurethane coating that you can apply with a rag. It really brings out the colour and helps protect the wood against moisture. I did 2 coats of this in the end, but I’m thinking about adding a third. It’s really easy to work with. Best to give it a quick sand with a high grit sand paper between coats.

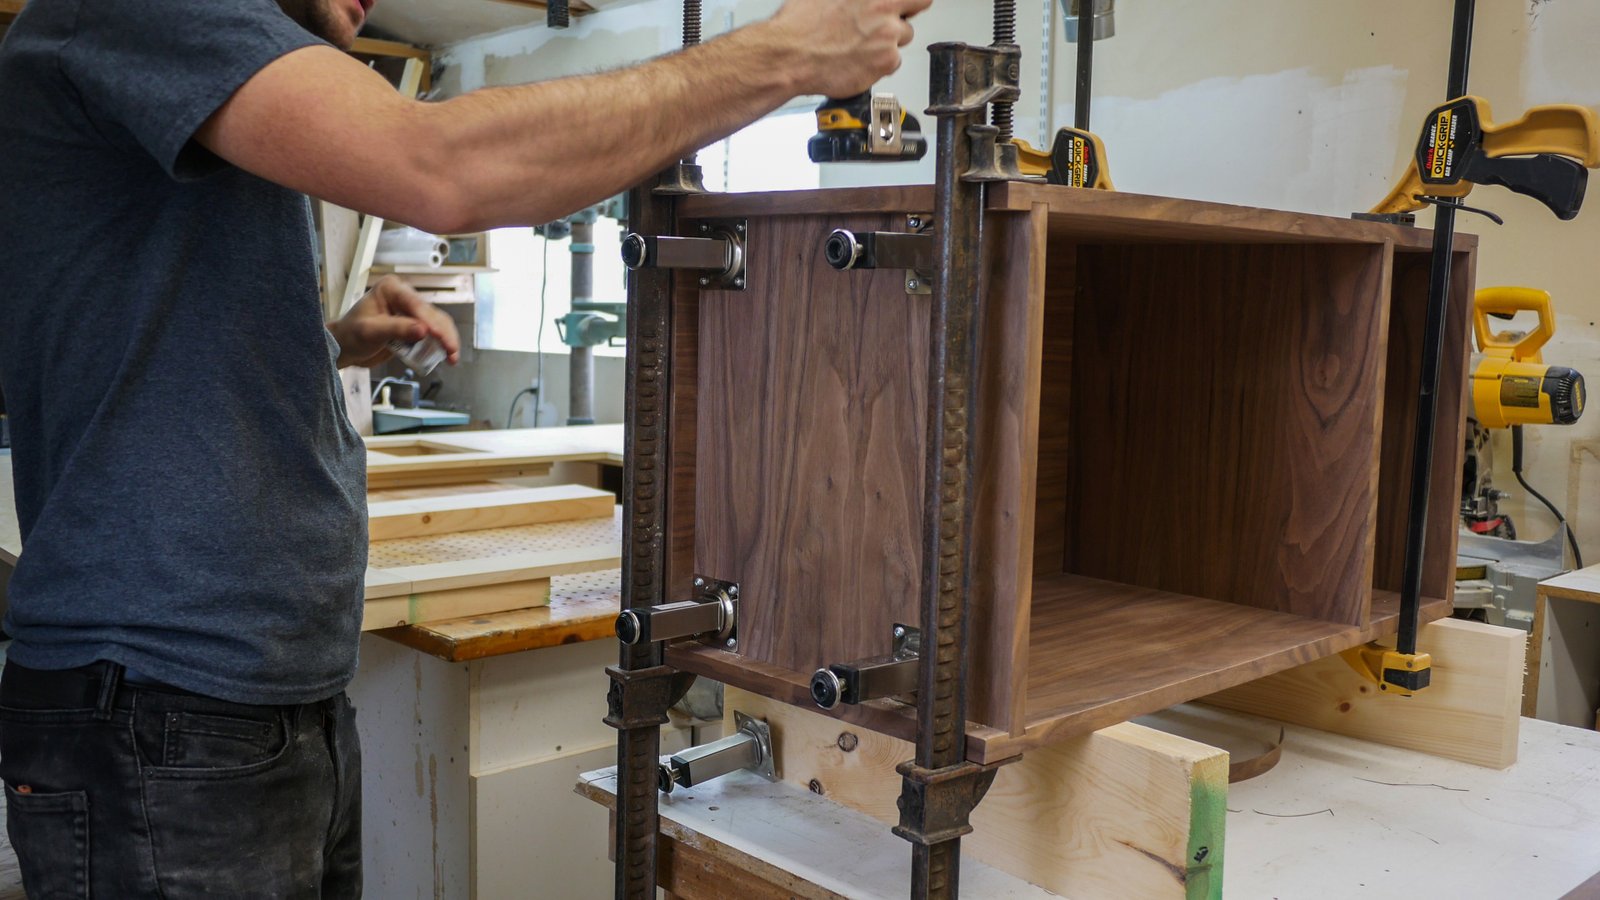
Assembly time! Carpenter glue in all of the channels. Be generous! You want to make sure everything is good and strong and you only get one shot at this part.
I used a rubber mallet to tap everything together and make sure all the pieces were fully seated.
For the drying process clamps are going to be your best friend. I clamped it and left it over night to let the glue fully cure. Protip: Before you assemble everything with glue, set you clamps to close to the right size so you don’t waste any time adjusting them while the clock is ticking on the glue.

Oh wait! One more thing, better add some feet to this thing! The floor in my bedroom are.. uh… less than level lets say.
These adjustable legs I had left over from another project are perfect. At $5 each the price is hard to beat too!
Ok it’s the start of a new day. Do you feel well rested? I do! To mount the USB hub inside of the cabinet I simply used double sided 3m tape. This is the same type of tape that they use to mount car emblems. It’s surprisingly strong .

I pressed it onto the back of the cabinet and fished all the wires through. Wow that was easy.

Here’s the motion sensing LED light I installed in the cabinet. First I cut a 45 degree cant strip out of the veneer ply. Then I drilled a hole in it just large enough to fish the micro USB cable through.
The LED light came with an adhesive backed metal plate that I attached to the cant strip. The LED light itself has magnets in it, so all you have to do is place it on the metal plate and it holds itself in position. Really convenient if I ever need to replace it or want to upgrade.

To install it inside the cabinet I simply held it in position and fired 2 finishing nails into it using a nail gun. I was careful to select nails that weren’t so long they’d poke through the back of the cabinet.

Door time! Because I hate clutter, but I have a lot of crap, I wanted to put a door on this thing in order to cover its contents when I’m not using them.
The first step was to mark a couple of locations for hinges.

Most hinges actually come in two pieces. The main hinge and some sort of quick release plate. I started by mounting the plates inside the cabinet. Mount the center of the hinge 1 1/2″ from the outside edge of the cabinet.

Next I marked two corresponding spots on the door itself. Your measurements dont have to be EXACT because there is some adjustment in the hinges, but dont count on anything more than +/- 1/8″.
Also, make sure you properly focus your camera when taking photos.

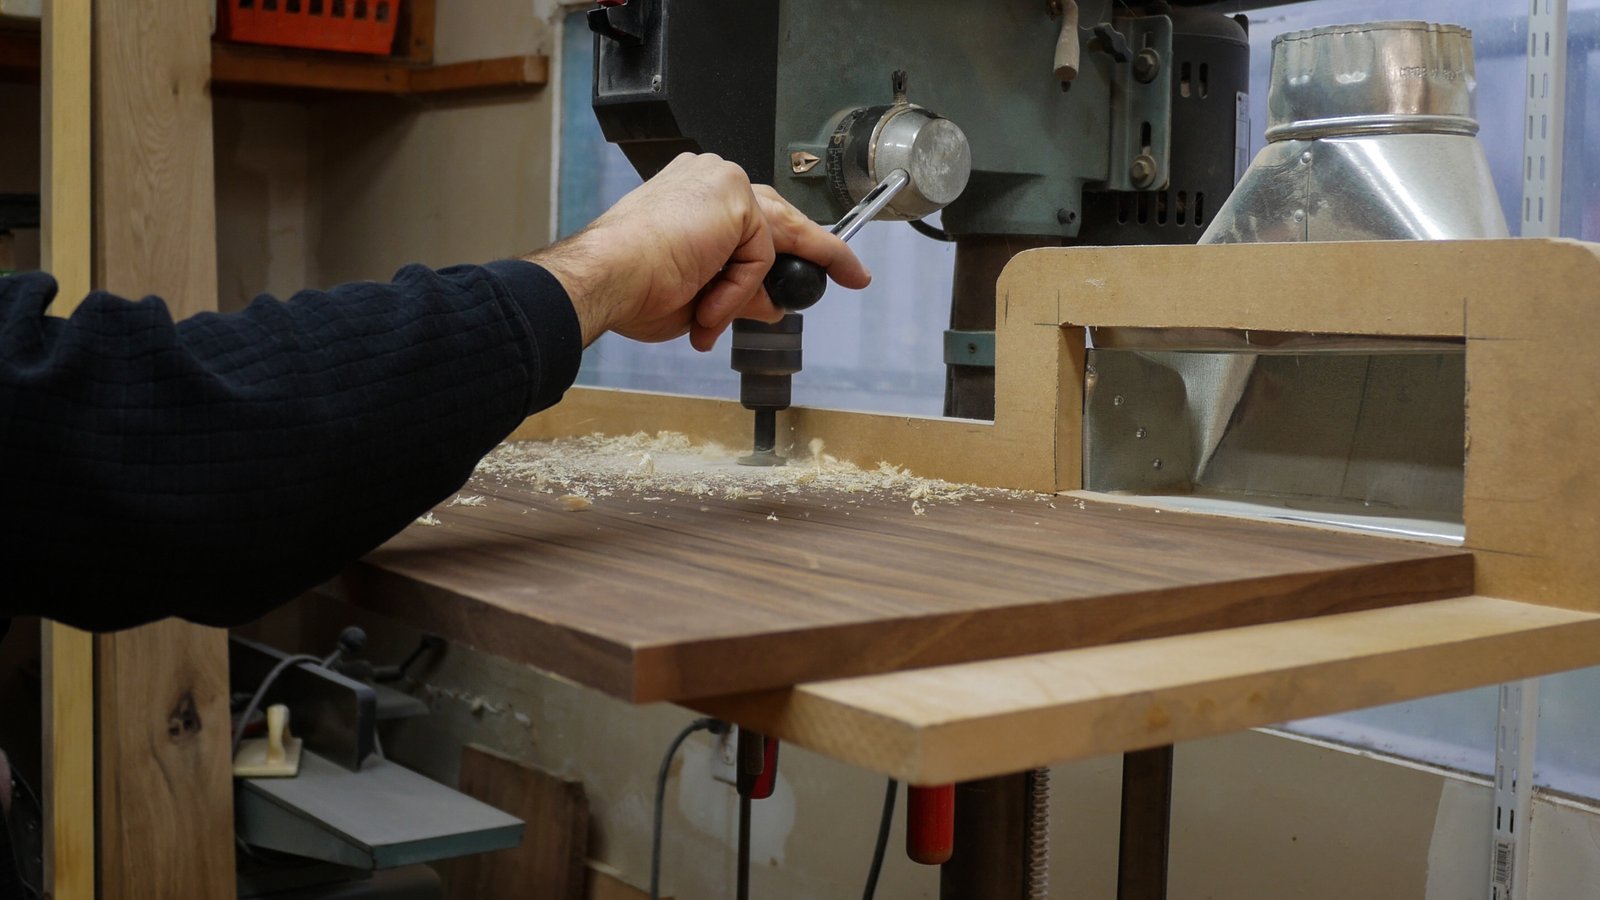
I used the drill press to carve out two holes in the location I marked. I was careful to set the drill press so that it wouldn’t go all the way through the plywood. This is important because it’s a really easy way to fuck up an expensive piece of wood.
These hinges mount without tools to the door. After you’ve cut the hole in the wood you simply press the hinges into position and lower an arm on the base and it locks it into position. Super simple and easy to do.
Concealed in lower portion of the hinge is the mechanism that allows for the self closing functionality. It’s incredibly compact and well engineered.

Every door needs a handle. I drilled 2 holes to allow me to screw the handle to the door. I found a handle I like at home depot for $12. I’m pretty sure it was meant for kitchen cabinets, but it’ll work just fine for this application.

The screws go through the door and into the handle. If you’re using a big strong impact gun like mine, make sure you don’t over tighten the screws because you’ll damage the wood or strip the screws. Best keep it on a slower speed and take it easy.

In order to cover the top of the cabinet and create an overhang so the door sits flush with the rest of the cabinet I created a top cap. It overhangs the sides and the back of the cabinet by 1/4″, it overhangs the front of the cabinet by 1″, but with the door on it all lines up perfectly flush.

In order to attach the top cap to to the cabinet I fired 4 screws up through the top of the cabinet into the top cap. I used a clamp to prevent the top cap from moving around while I worked.

Thanks for checking out my build guide! Hope you enjoyed it. Let me know if you have any questions and I’ll be happy to answer them!

Time to go enjoy this thing!