Pressure Treated Bench
Ok here’s the second part of my deck overhaul series. As you may have already read my plan is to make an outdoor living space that I truly enjoy. Part of that vision is having a ton of outdoor seating so that I can entertain for big groups. How do you easily sit a lot of people? That’s right. You make them sit on a bench.
Love em or hate them, they are the corner stone of a utilitarian outdoor seating and they are indestructible so we’re stuck with them forever.
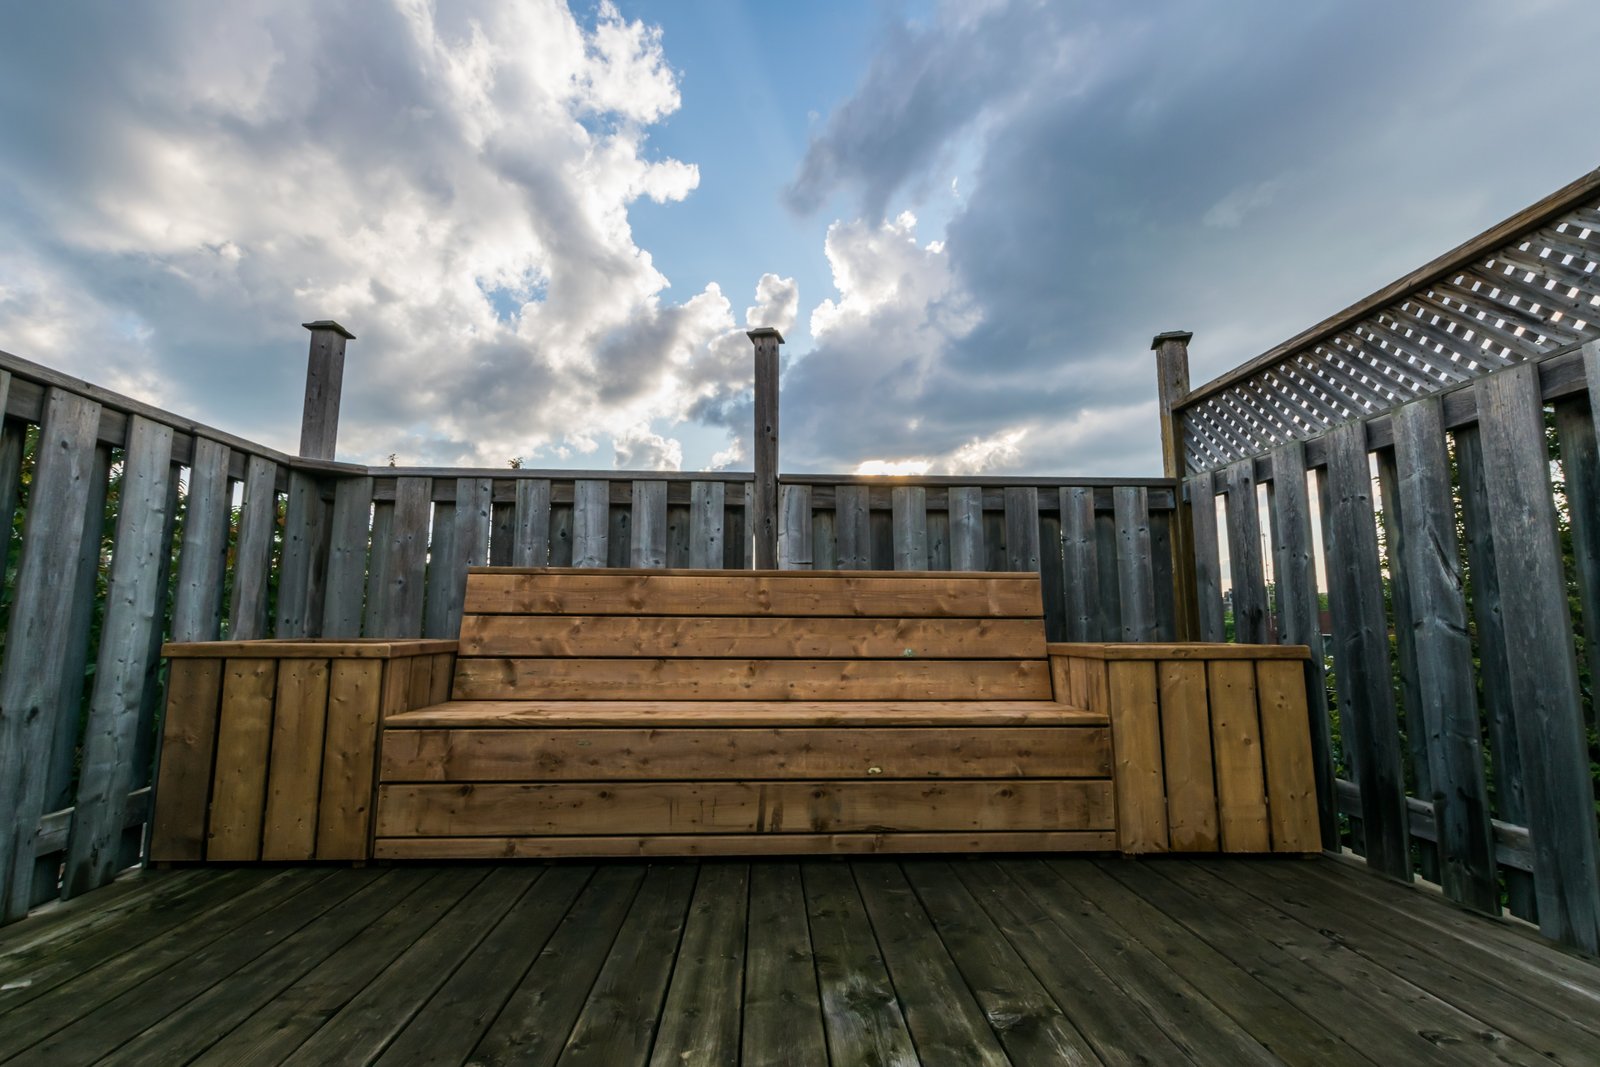
So here’s all the supplies I used to make this bench. I only used 2 materials (4 if you include different types of screws). Brown pressure treated 2x4x8’s and 5/4x6x8’s. My total cost of materials (not including the screws I already had) was $100 CAD. I wanted my bench to be 82.5 inches total so it would fit between the two planters. Really this bench could be made as long as you want, I’ll add tips along the way so you can adjust your length as necessary.
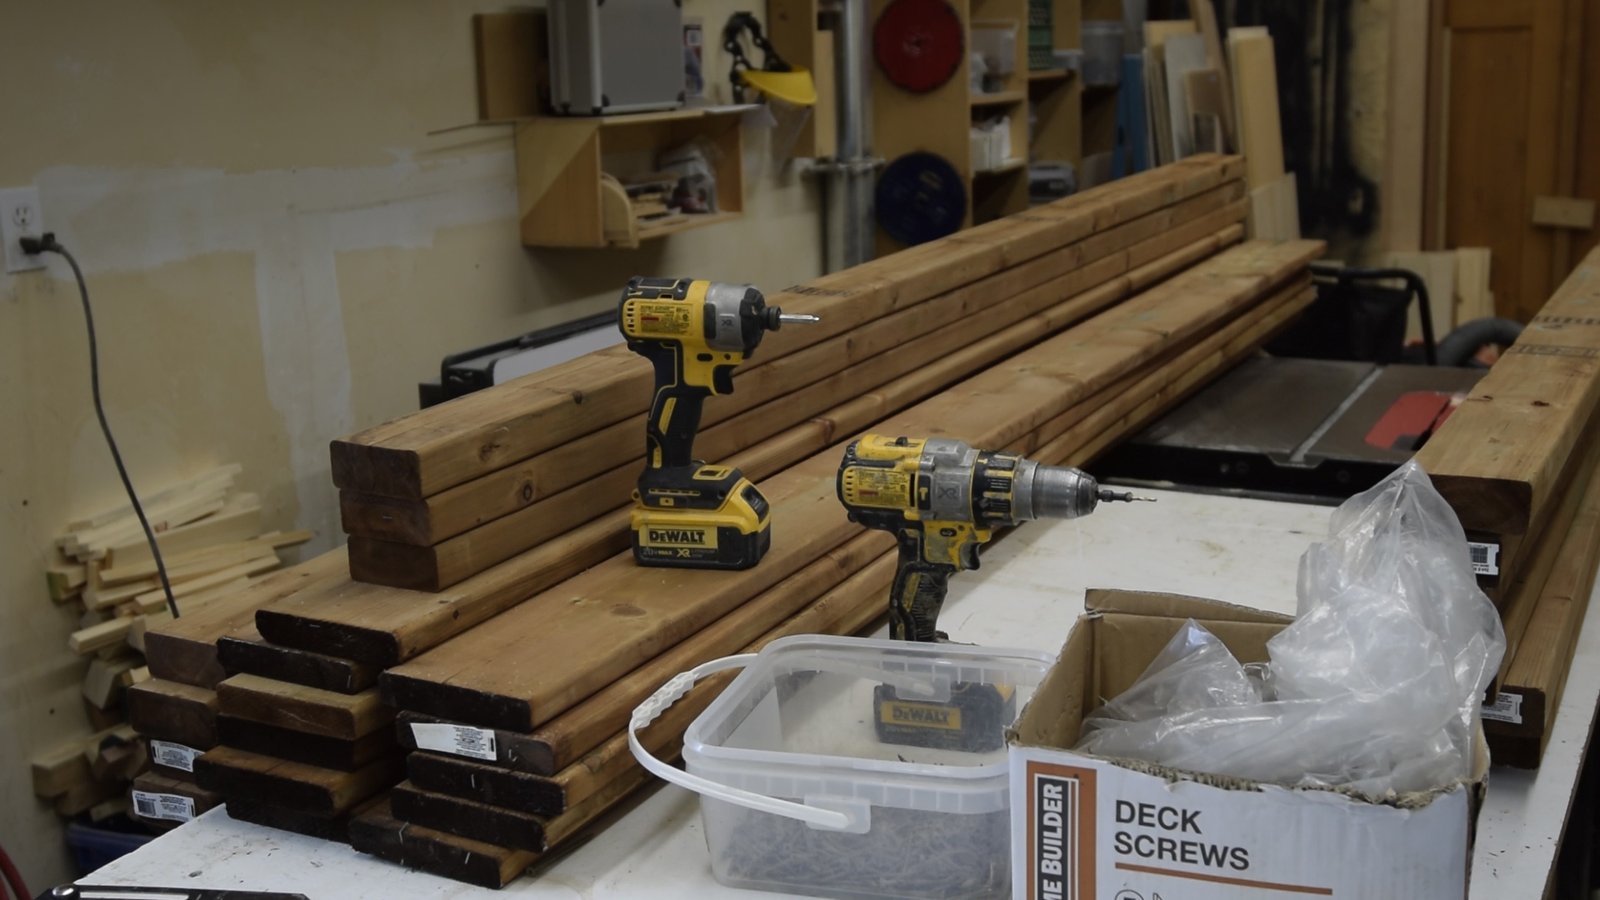
First I started by cutting all of my lumber to the right length and arranging it into piles. Technically, that’s a lie, I prebuilt a few components of the bench to make sure everything would work, then I cut everything to length. I’m not a complete idiot.
I started by cutting the 5/4 x 6 boards to 82.5, the same as the total length of my bench. These boards define the overall total length. If you want your bench to be shorter or longer cut these boards accordingly.
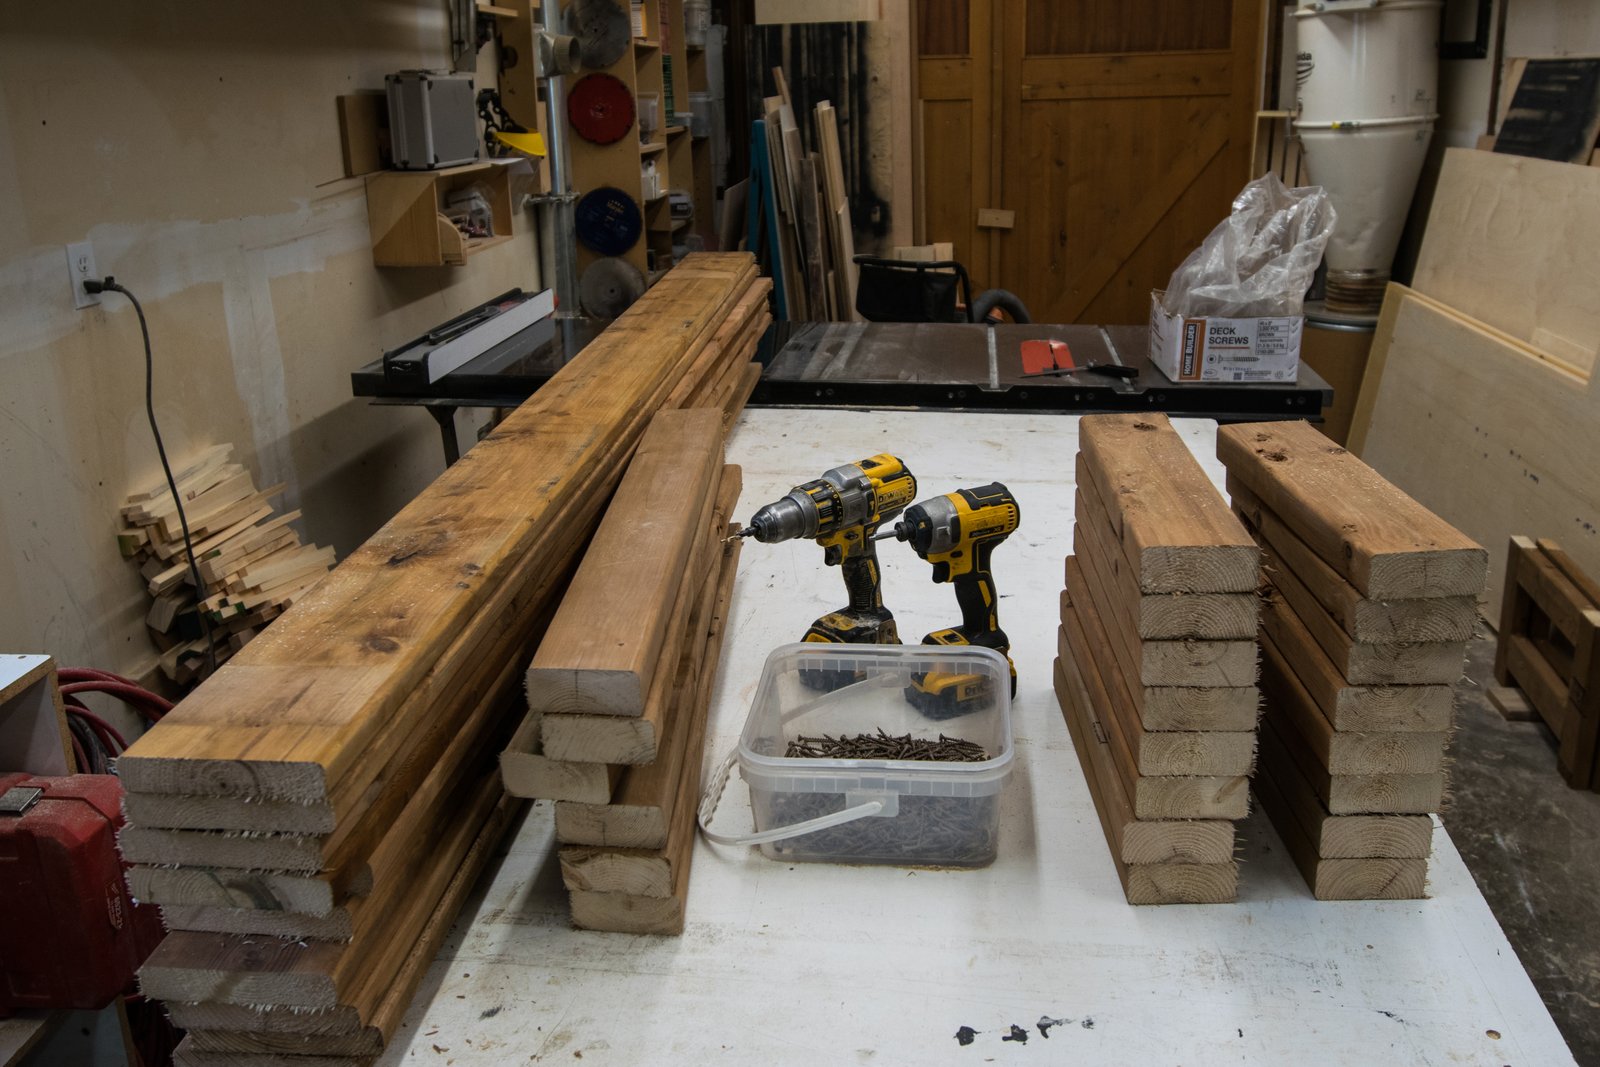
Once you’ve got all of your measurements figured out it’s nice to get all of your cuts out of the way early on, that way you can just worry about assembly. Helps keep the work area organized.
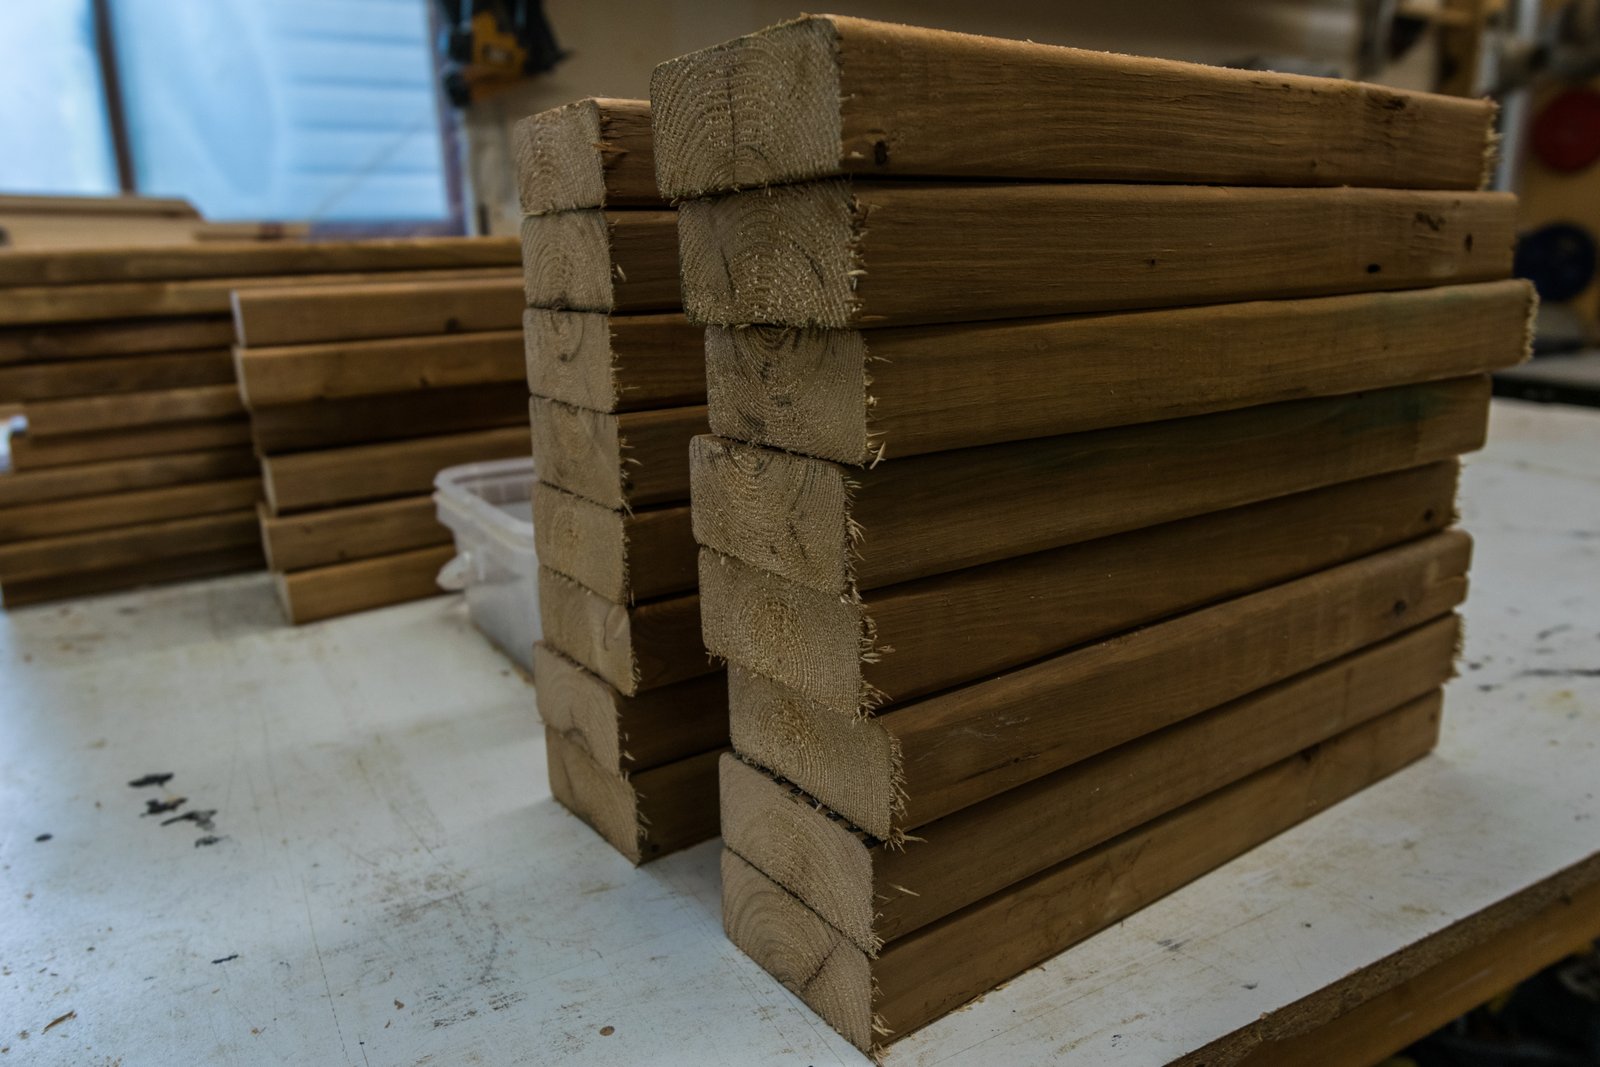
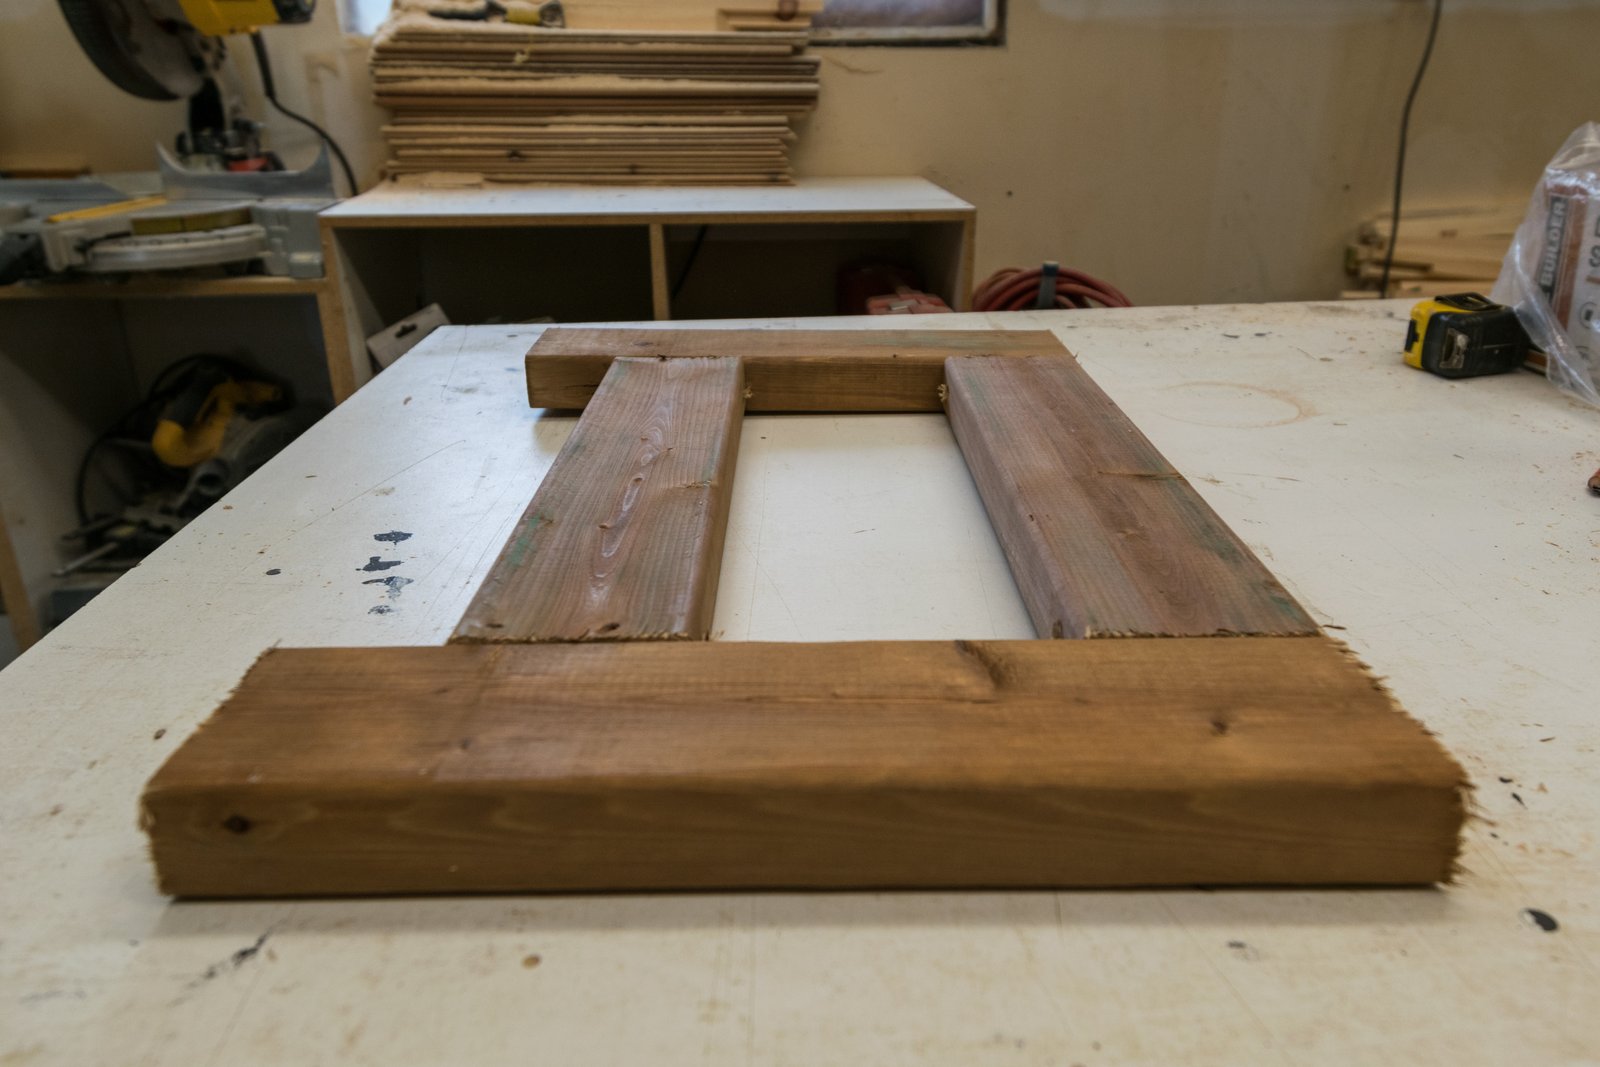
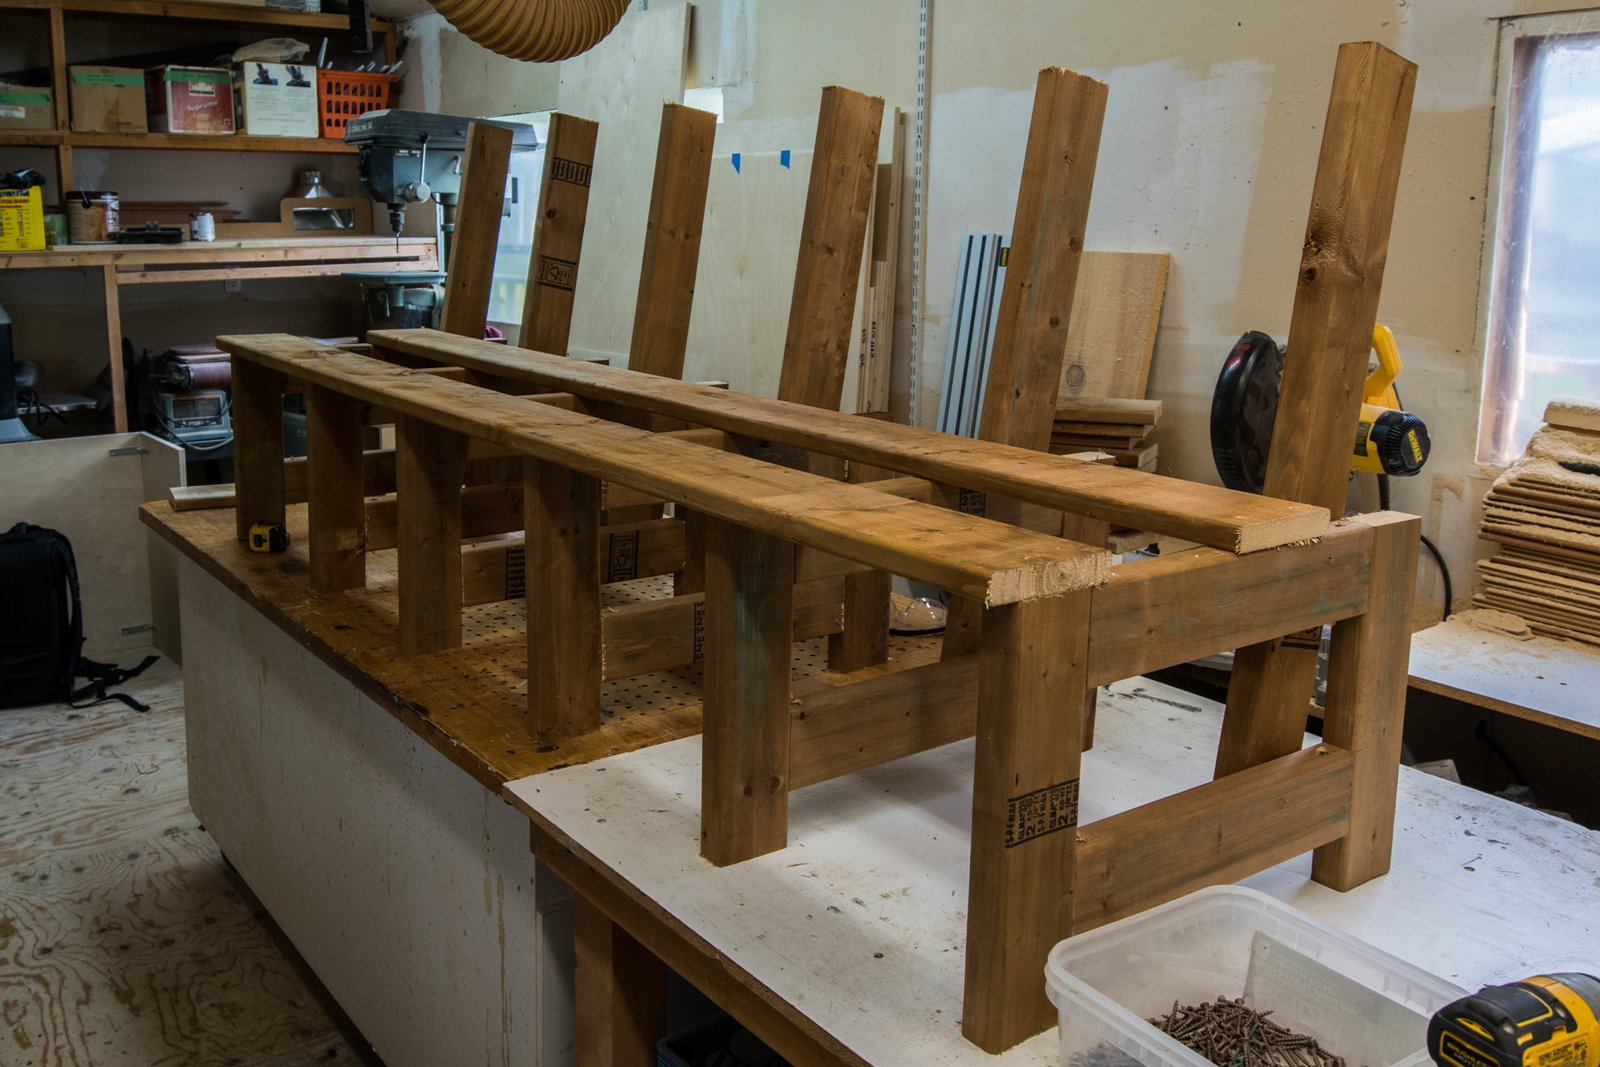
The structure of the bench is made up out of bunch of these frames. I built 6 total. One for every 16 inches of total length. If you wanted to make the bench longer, you’d need to add more of these as you go. Each frame is 15 inches high, this measurement plus 1 inch effectively becomes you seat height, so adjust it as you see fit, I find 16 to be pretty comfortable. Each frame is 23 inches wide, the horizontal 2x4s are 15 inches each. You’ll see how they all fit together soon.
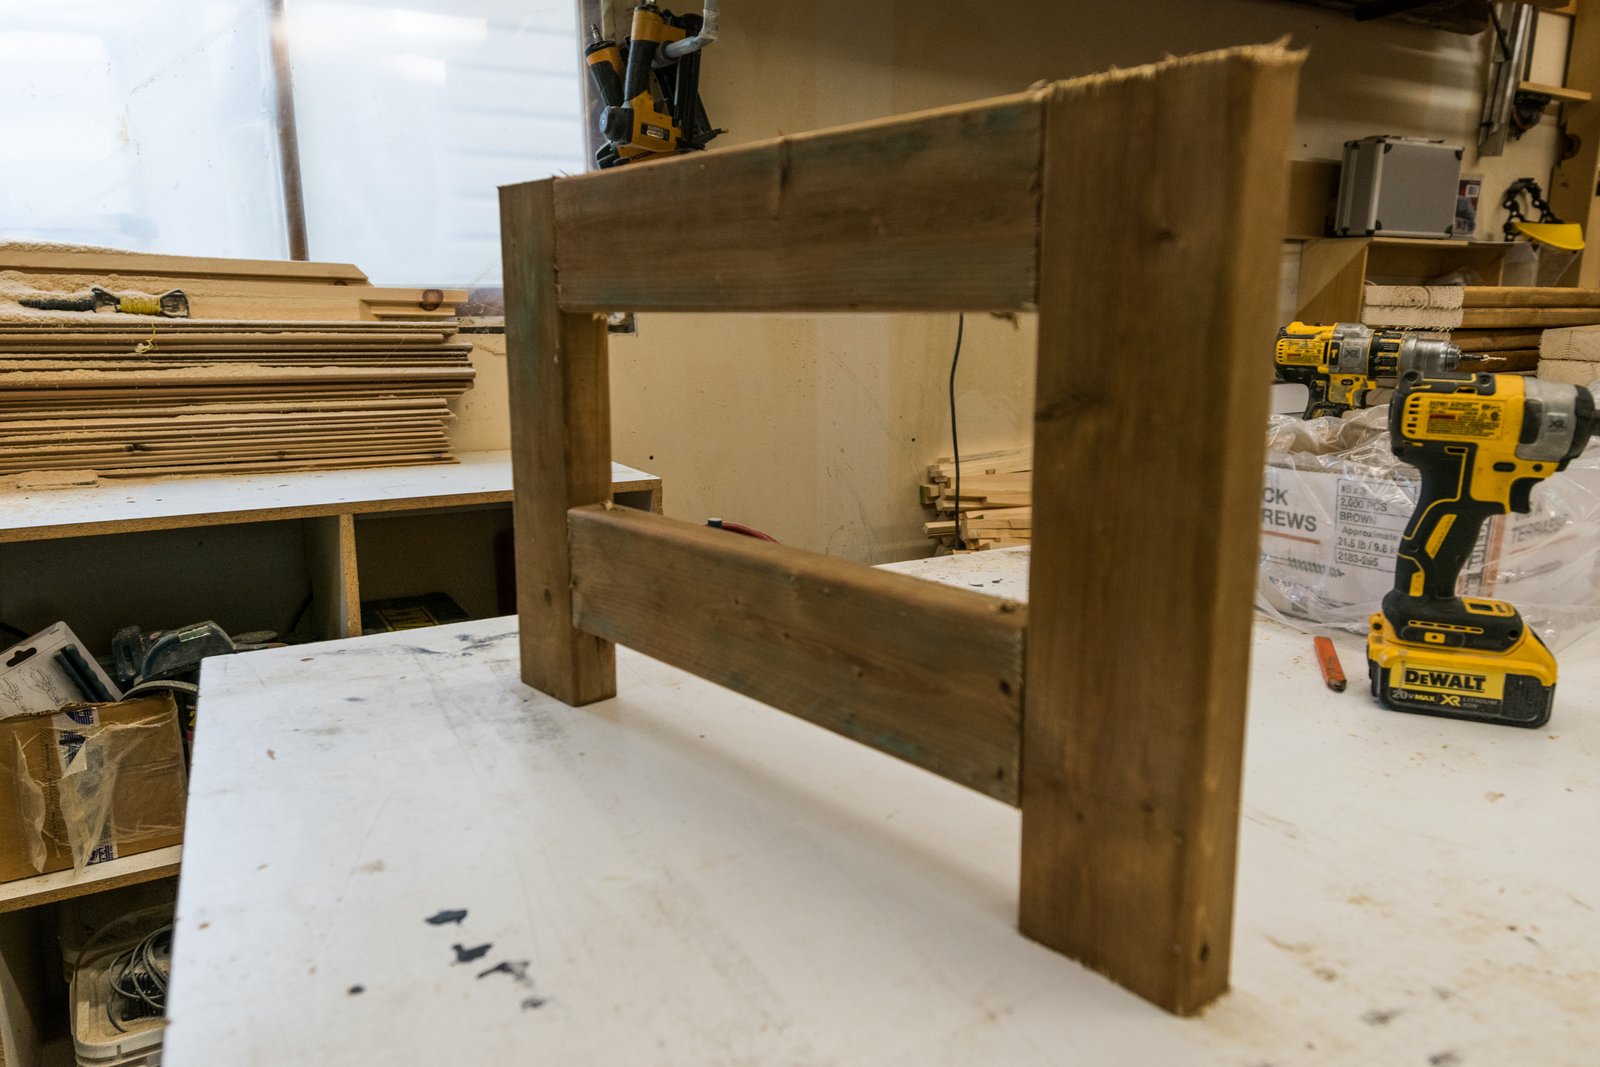
In order to keep everything square and flat I like to keep everything flat on the table while I assemble it. To screw the frames together I free-handed a krieg joint. Just pre-drill with a counter sinking bit and then screw the 2x4s together with a 3″ deck screw.
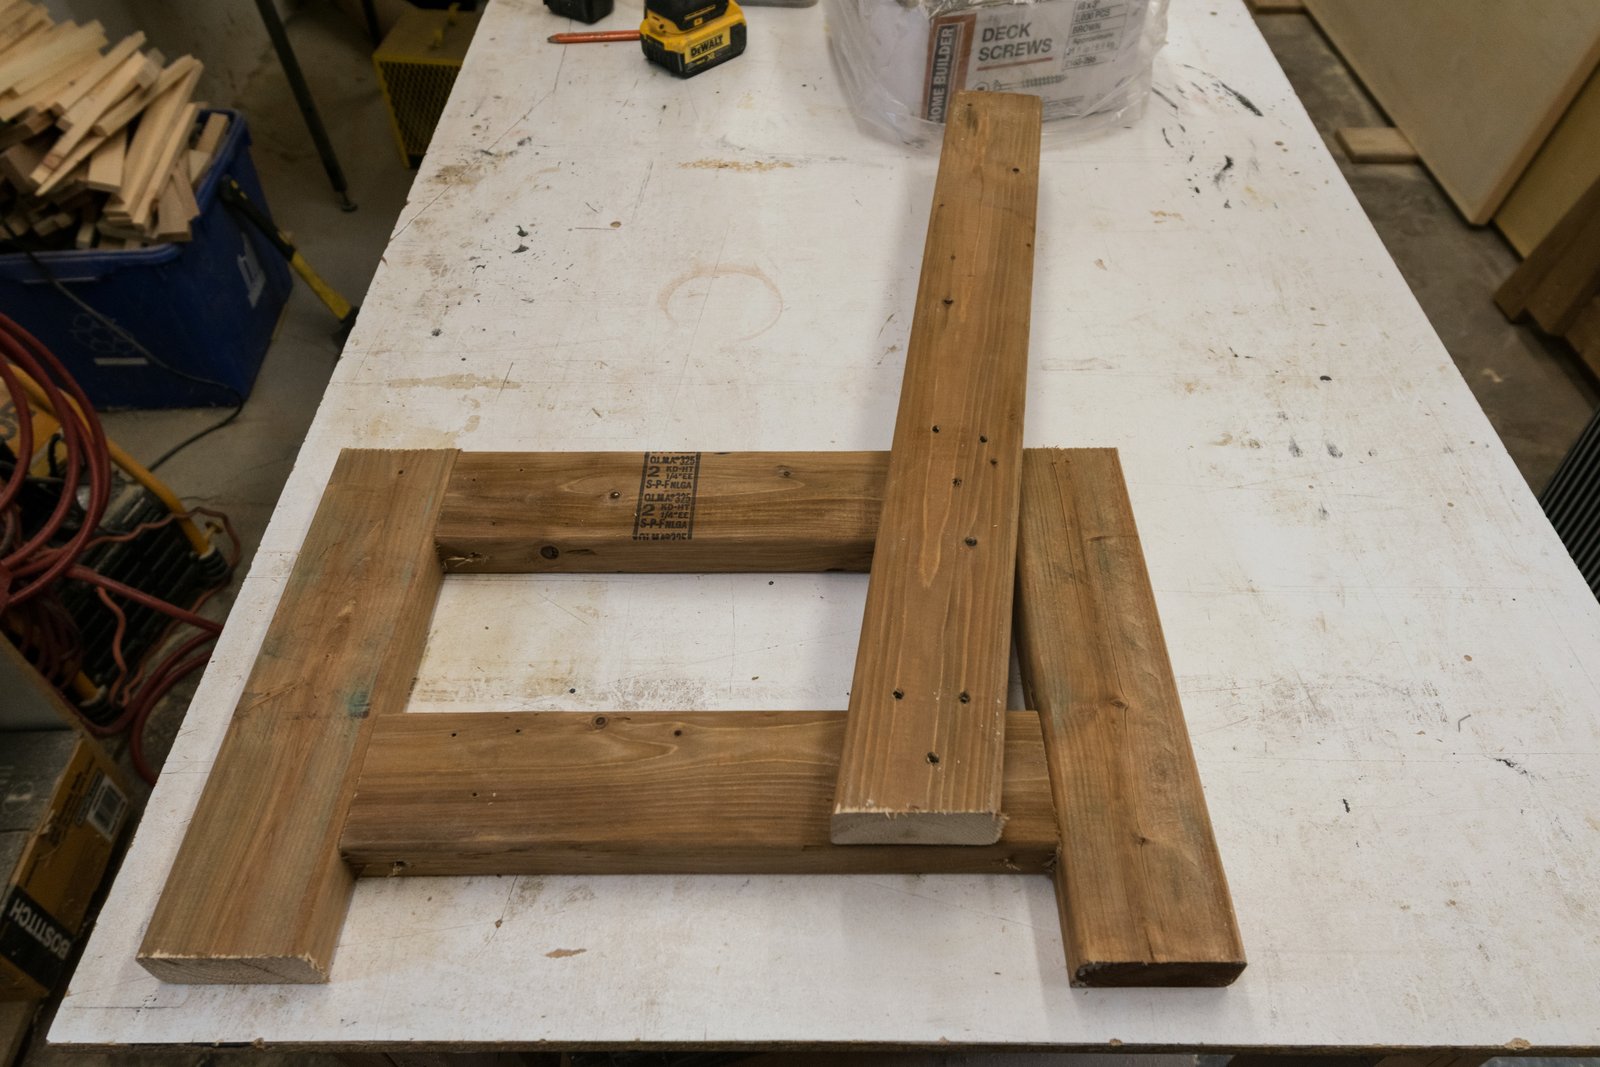
Here’s all 6 assembled together. This is the point where I do a bit of quality control and make sure they are all roughly the same size. Because this bench is going to be outside all year round I’m not really going to sweat small variations as long as it’s with a 1/8 of an inch I’m ok with it, this wood is going to expand and contract a lot throughout its life.

Next I attached a 31 1/2″ long 2×4 to each frame. These 2×4’s will serve as the structure for the back rest. I spent some time here trying out various angles. I prototyped a few different angles and got my girlfriend to pick the one she found the most comfortable. I immediately ignored her choice and just did the one I liked the best.
Because the bench is going to be sitting directly against a wall, I made sure that the outside edge of the frame lined up with the outside edge of the back support at it’s highest point.
Here’s all 6 with the backs installed. The one on the left is mirrored because I wanted the bench to look symmetrical when someone is looking at it from the outside. Which no one ever will.

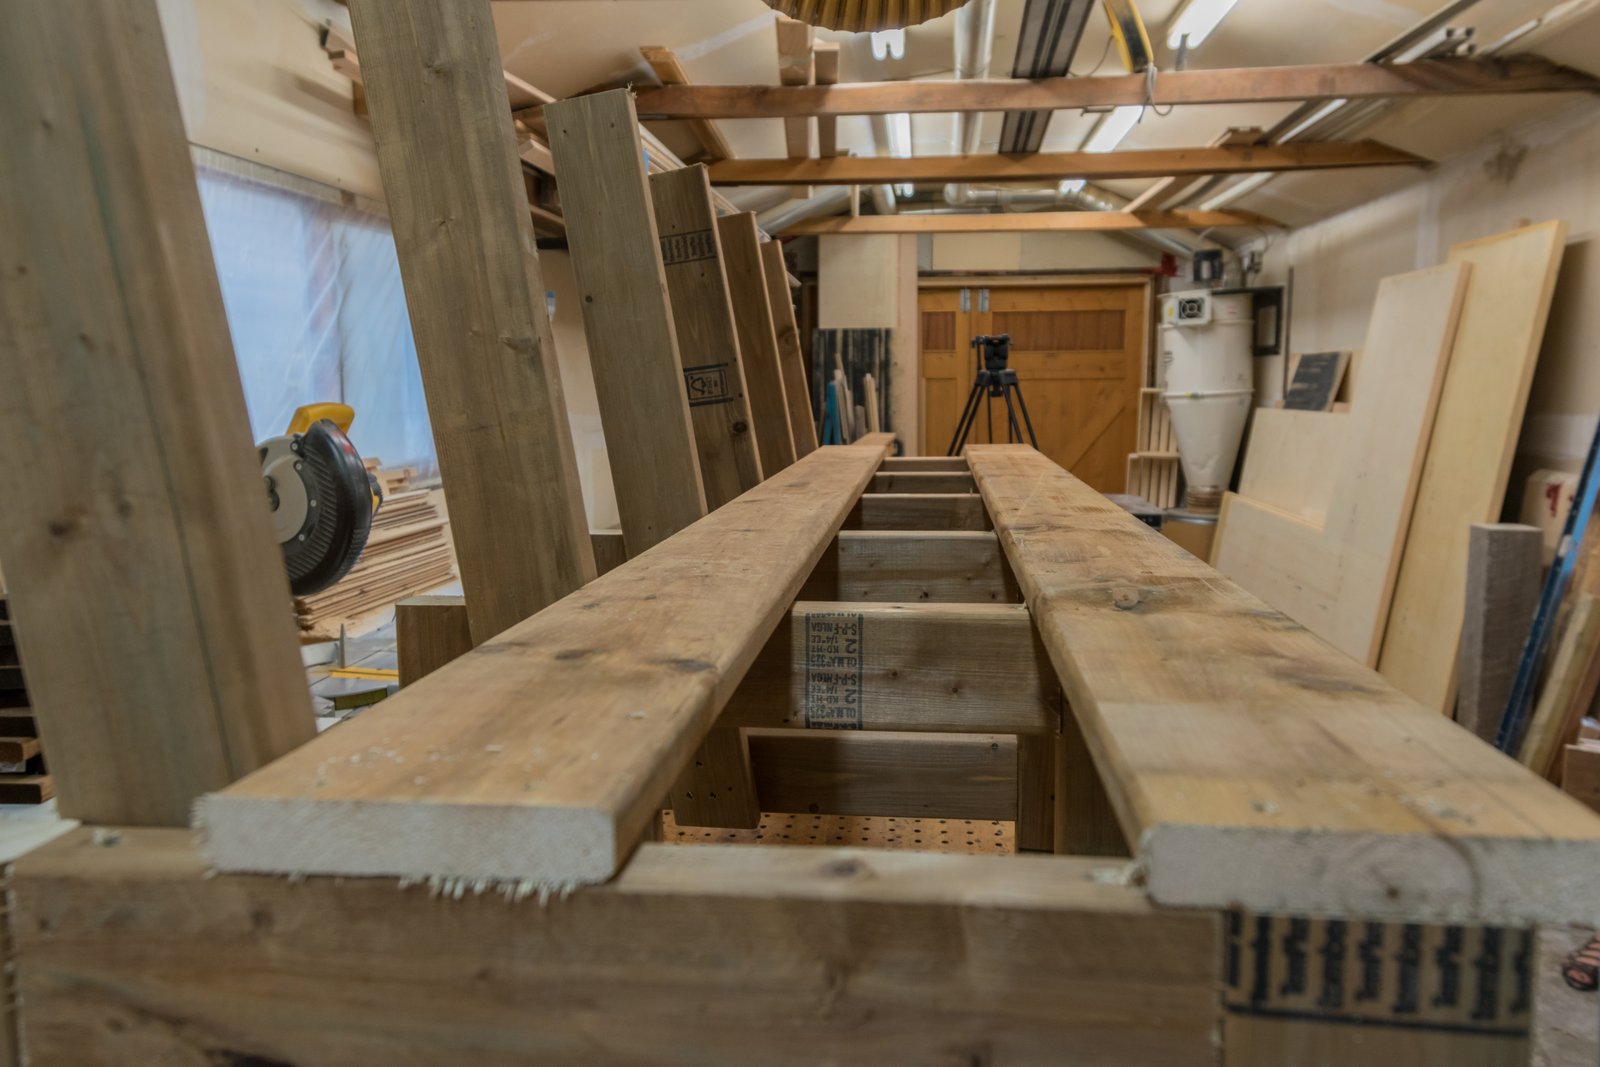
If you haven’t been able to visualize how I built it before, you should probably see it now. Remember how I said the 5/4 boards are going to define the overall length of the bench? Also, if you wanted to save some money you could probably build this bench out of 1×6’s, 5/4 boards however are much thicker and as a result much stronger.
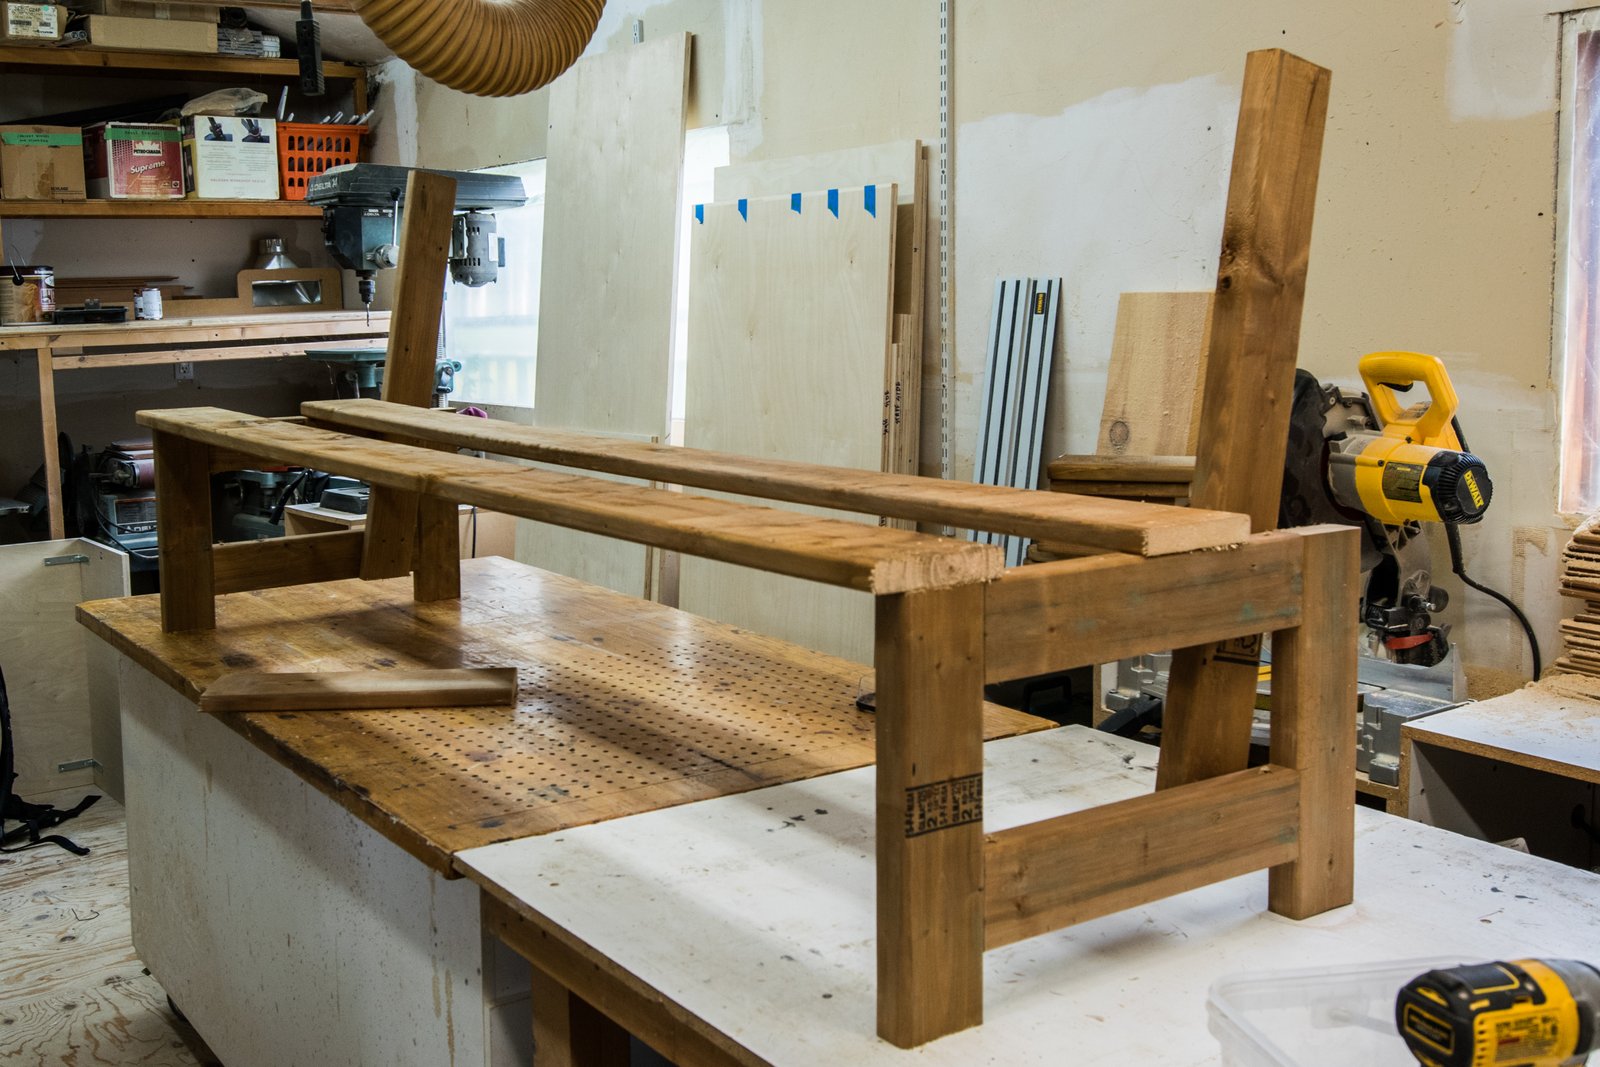
Because I was working alone I setup the two outside frames first and used two pieces of 5/4×6 to tie them both together. Once I had the two 5/4 boards screwed in it was already pretty stable.
Next I added a frame every 16″ and screwed them to the 5/4 x 6 boards. In retrospect, this was probably overkill. This thing is crazy strong and crazy heavy.
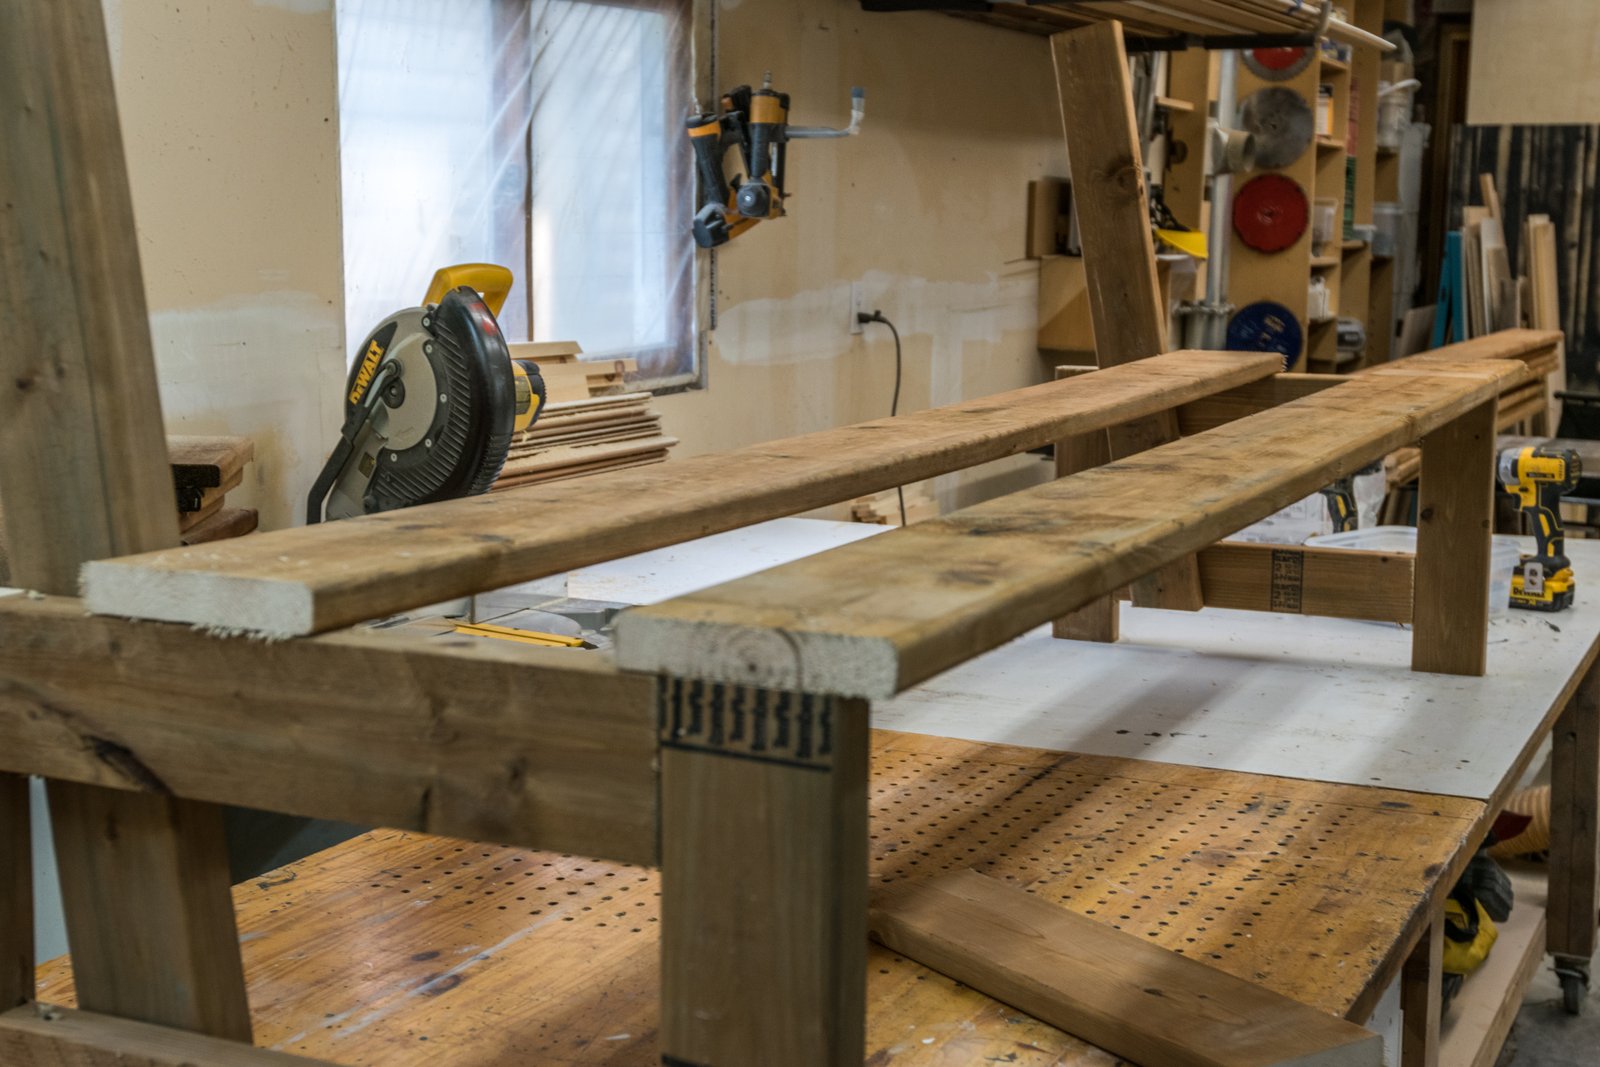
If you’re going to follow along at home make sure you use nice straight 5/4 x 6’s. If you don’t, your bench will have the same curve or bow as your 5/4 boards.
Next I screwed more 5/4 boards to frames. Notice I used 2 screws per frame per board. I try to keep my screws about 1 inch away from the edge of the board when screwing them to the frame. This helps keep the boards from cupping and keeps everything straight. At this point I tried lifting the bench a few times and realized I was going to have a lot of fun getting it onto my third floor deck.
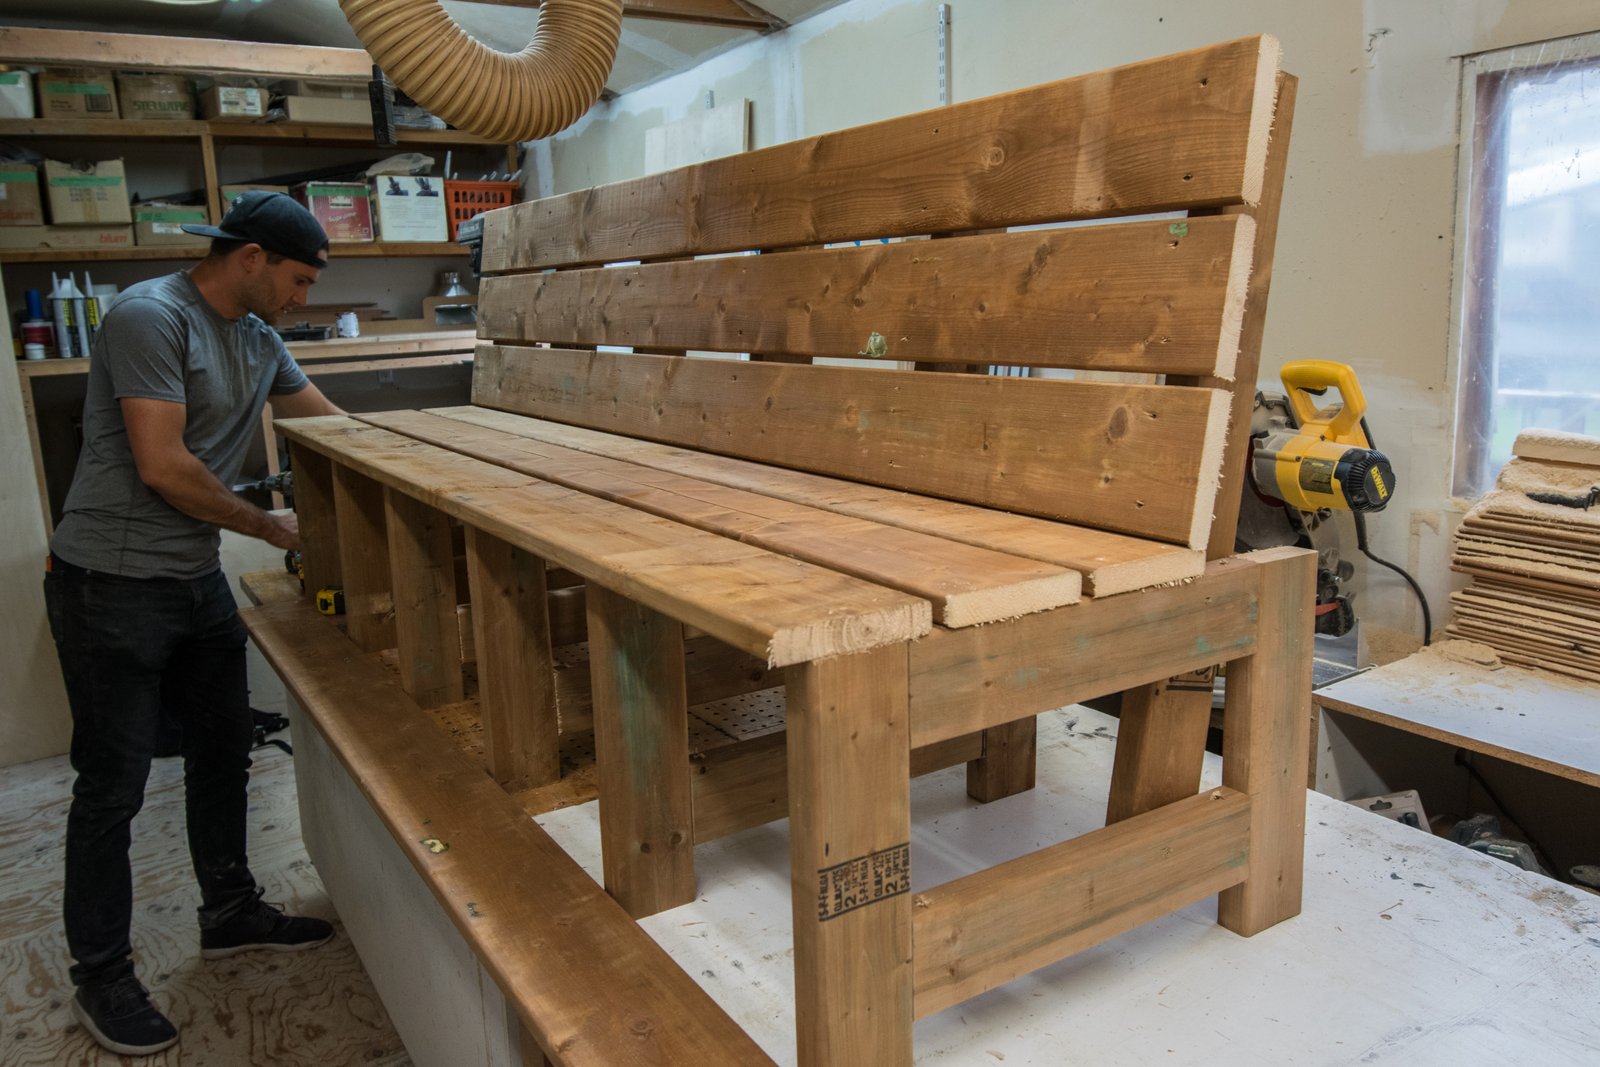
Almost done! Next I had to rip a couple of boards on the table saw to finish off the front face and cap the top of the bench.
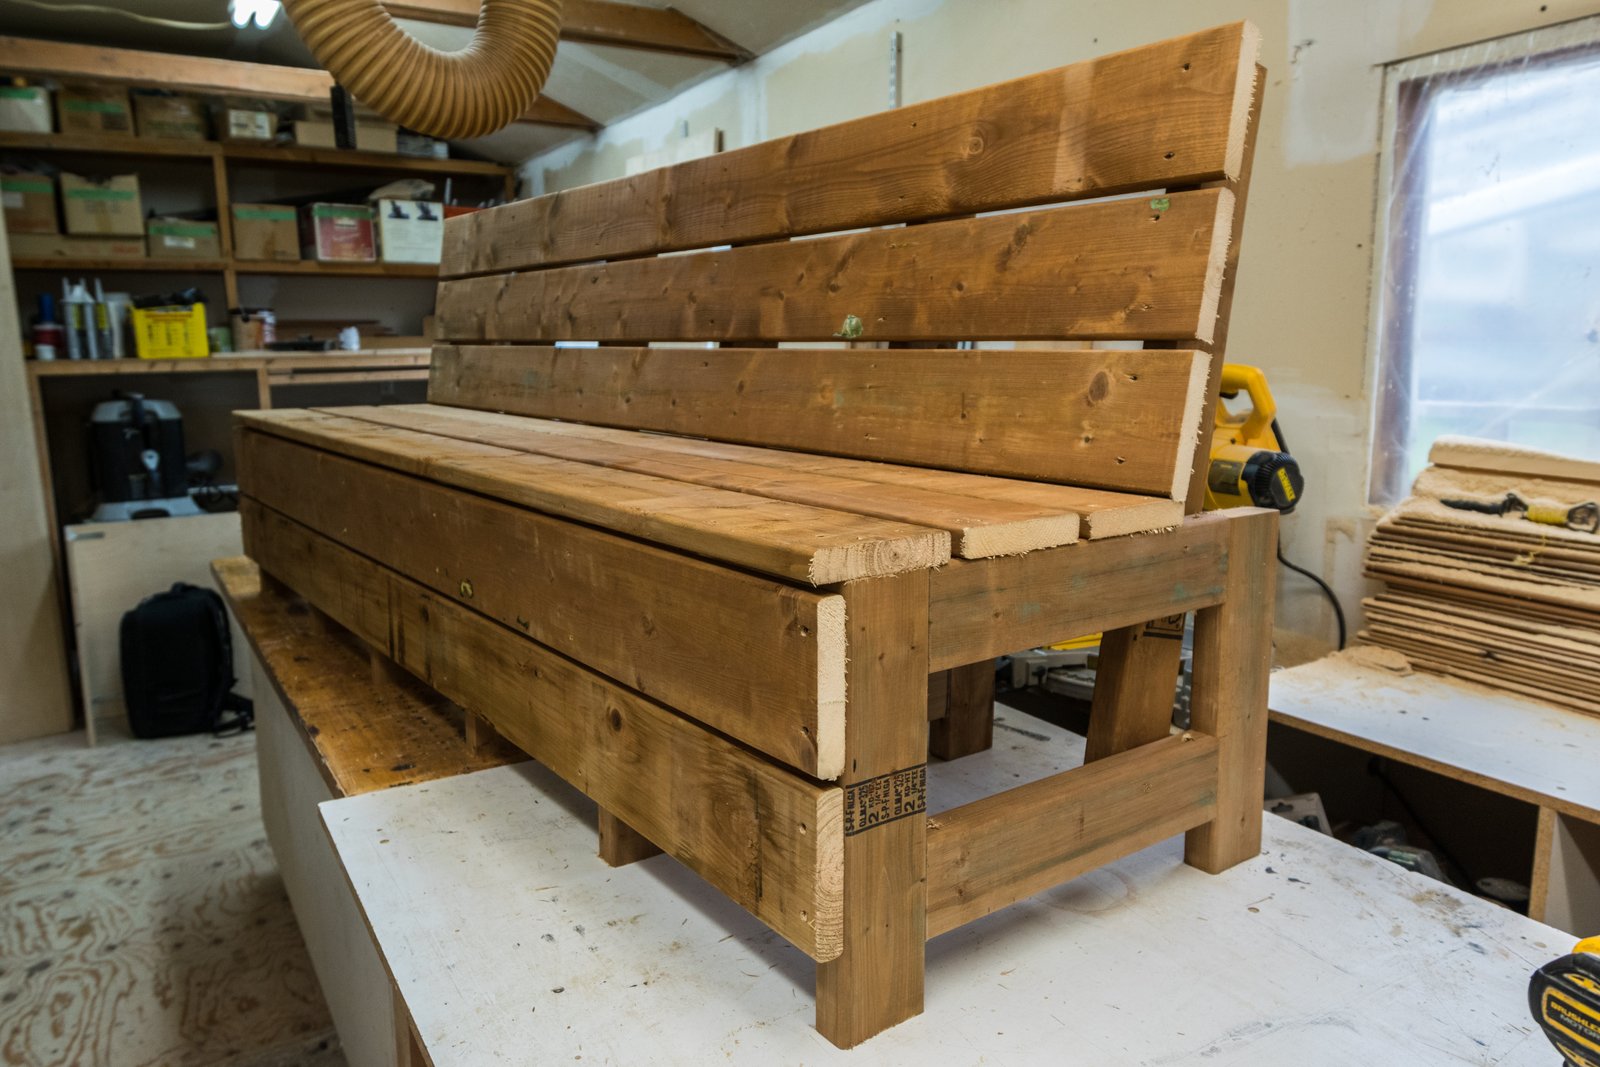
Finally finished! The last two boards are screwed on and this thing is ready to go home. The bottom board was ripped to 2 inches, and I left a 1 inch gap along the bottom edge that I mirrored on the planter boxes.
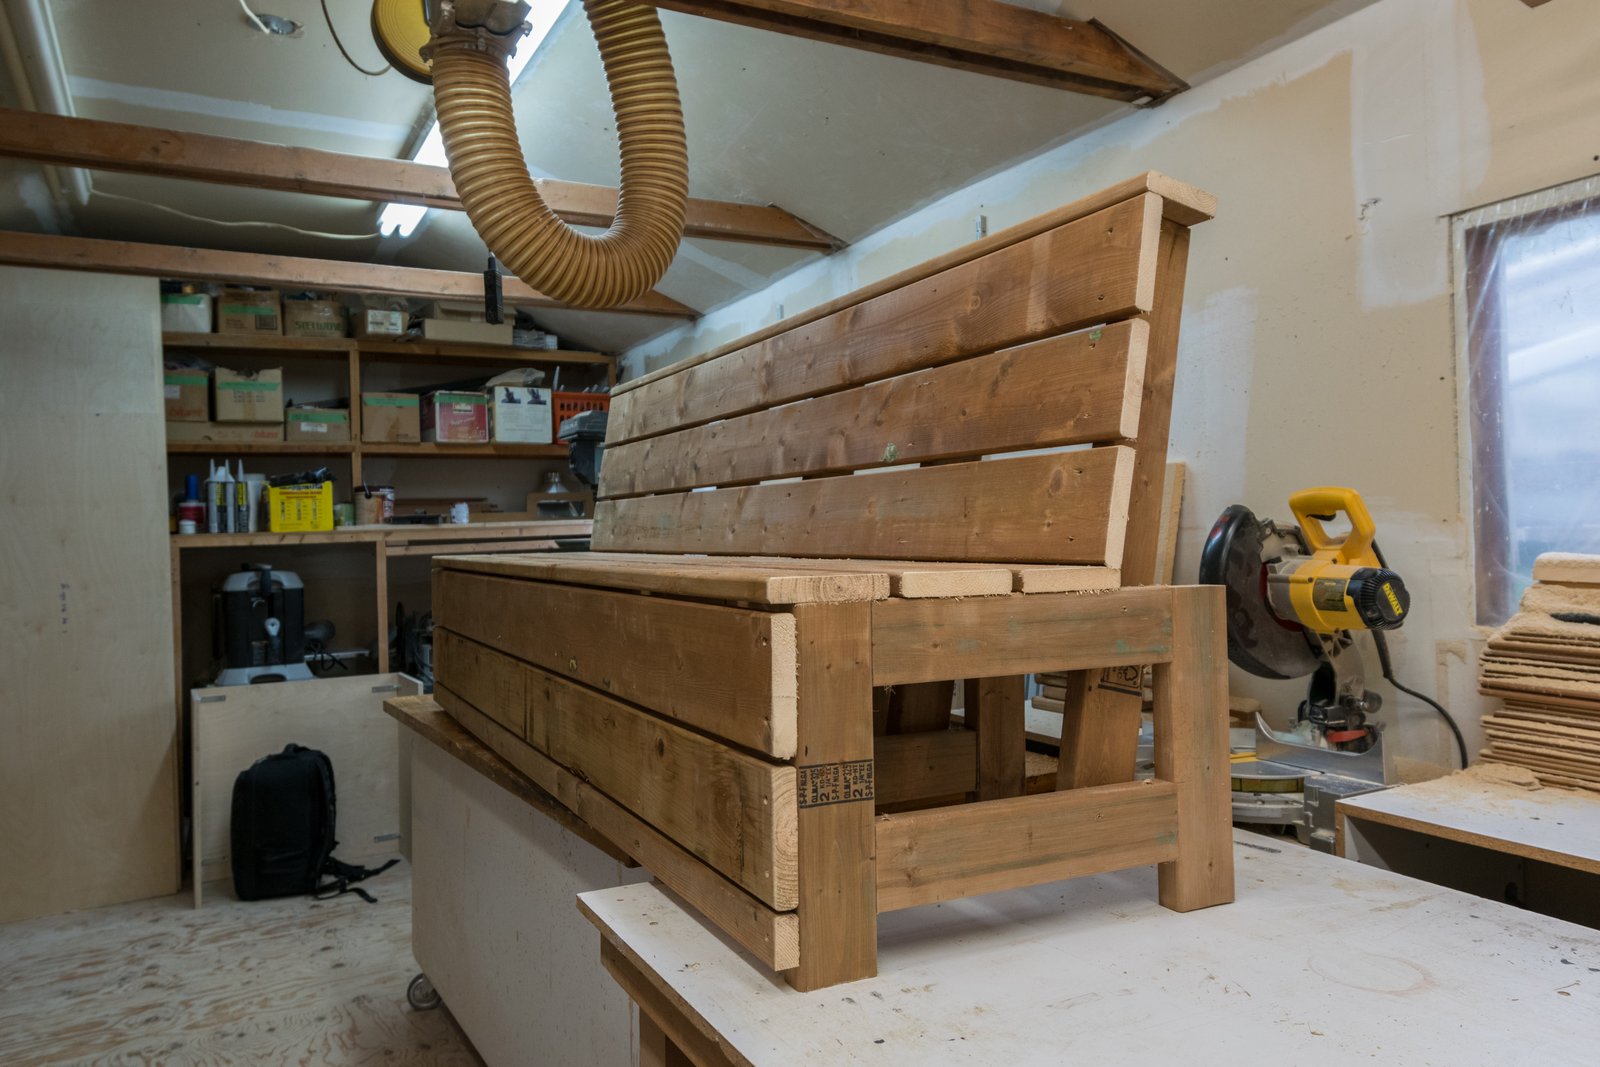
Not pictured here are the two 30 foot long ropes I used to haul this bad boy up onto my upstairs deck. That was fun.

If you’re interested at all in the planter boxes that are flanking the bench here’s my tutorial on how to build those!
Next up I’ll be making 2 more (different) benches and a table to complete this outdoor space. So far I’m really liking how this is turning out. Any questions? Drop them in the comments and stay tuned for part 3.