ModdersToolList

This comprehensive guide breaks down my favorite tools and consumables needed to build a professional-grade modding station.
Disclaimer: Some of the links below are affiliate links. If you purchase through them, I may earn a small commission at no extra cost to you. I only recommend tools I personally use and trust.
1. Teardown & Diagnostics
Before modifying a system, first you have to get inside of it. These tools ensure you can open any console safely and diagnose issues without guessing.
Precision Screwdriver Sets
Electronics manufacturers love using proprietary, tamper-resistant screws to keep you out of their hardware. A high-quality precision driver set is your passkey into almost any device.
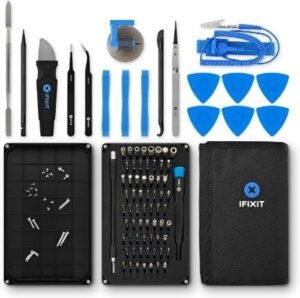
Option 1: Budget-Friendly Precision Set
Get it here (~$15 – $30 USD)
A fantastic entry-level option that gives you an incredible bang for your buck. It includes an extensive array of security bits (like Torx Security, Gamebit, and Tri-wing) needed to open up everything from classic Nintendo systems to modern consoles.
Option 2: Premium Precision Set
Get it here (~$40 – $75 USD)
The gold standard for daily bench work. This kit features high-quality steel bits that resist stripping, an aluminum driver with a smooth spinning cap, and a durable case. It is a premium, “buy-it-once” tool.
Option 3: The Ultimate Time-Saver: Fanttik Electric Precision Screwdriver
Get it here(~$50 – $70 USD)
Manually backing out dozens of screws from a console chassis gets tedious fast. This electric driver is the most expensive option on the list, but it pays for itself in saved time.
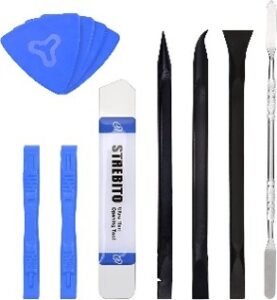
Nylon Spudgers & Prying Tools
Using metal screwdrivers to pry apart plastic console shells is a guaranteed way to scratch, gouge, and permanently disfigure the plastic.
Get it here (~$10 USD)
A collection of ESD-safe nylon spudgers, opening picks, and plastic pry bars. These tools let you safely pop stubborn plastic clips, disconnect fragile internal ribbon cables, and separate glued components without scratching the casing or shorting out sensitive electronics.
Multimeters
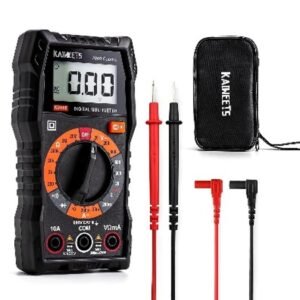
A multimeter is your eyes and ears on a circuit board. Without one, you are completely blind when a mod doesn’t work.
Option 1: Entry-Level Multimeter
Get it here (~$10 – $20 USD)
An absolute must-have for checking basic electrical properties. It is perfect for verifying power rail voltages, testing fuses, and checking continuity to ensure your soldered wires are actually making a solid connection from point A to point B.
Option 2: Auto-Ranging Multimeter with Smart Features
Get it here (~$25 – $45 USD)
A major quality-of-life upgrade. It features auto-ranging (meaning you don’t have to manually guess and dial in the correct voltage or resistance scale) and includes a crisp, backlit screen. It makes troubleshooting faster, more accurate, and much less tedious.
Thermal Cameras
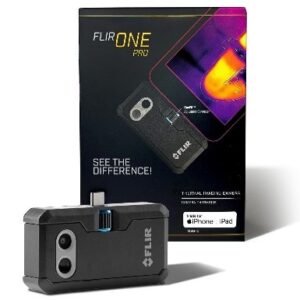
When a console refuses to turn on or immediately shuts down due to a short circuit, finding the faulty component by hand is incredibly difficult. A good thermal camera makes it easy to find.
Get it here (~$200 – $430 USD)
This compact camera plugs directly into your smartphone and visually reveals exactly where electricity is turning into pure heat. If a capacitor or power management chip has a dead short, it will glow brightly on the screen the second you apply power, allowing you to pinpoint the exact failure in seconds.
Digital Microscopes
Modern electronics utilize incredibly small components. Trying to inspect miniature solder joints or track down broken traces with the naked eye is a recipe for severe eye strain.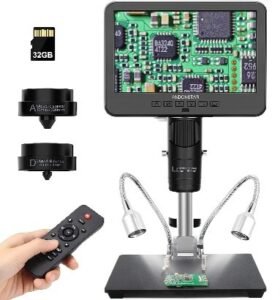
Option 1. Entry Level Benchtop Digital Microscope
Get it here (~$70 – $120 USD)
Featuring a built-in LCD screen, and a solid stand, this tool projects a highly magnified, razor-sharp view of your workspace. It is essential for verifying that your microscopic solder joints are clean and completely free of accidental solder bridges.
Option 2. The Premium Upgrade: Autofocus + 4K
Get it here (~$150 – $250 USD)
This is a major quality-of-life upgrade. Along with the 4K resolution, it features a better light, an adjustable arm, and, crucially, autofocus. Having the camera automatically keep everything in sharp focus saves a tremendous amount of frustration and time.
2. Soldering
Soldering is the core discipline of electronics modding. Investing in a proper heat controlled setup and high-quality accessories can prevent a lot of expensive mistakes.
Soldering Irons & Stations
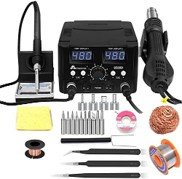
A cheap, wall-plug soldering iron with no temperature control will easily get too hot and permanently destroy delicate circuit boards. You need precise control over your heat.
Option 1. The Reliable Starter: Adjustable Soldering Kit
Get it here (~$30 – $50 USD)
If you are just learning the ropes, this is a fantastic first iron. It features simple, adjustable temperature controls and comes bundled with the basic accessories needed to get you started immediately.
Option 2. The Powerhouse Upgrade: 2-in-1 Soldering & Hot Air Station
Get it here (~$50 – $100 USD)
When you are ready to tackle more complex projects, this station is a massive step up. It delivers tons of power, but more importantly, it features an integrated hot air station. Hot air is a necessity for safely removing multi-pin surface-mount components or lifting old, stubborn chips off a motherboard without ripping the pads underneath.
Option 3. The Portable Option: Cordless Soldering Iron
Get it here (~$40 – $60 USD)
There’s a unique joy in not having a power cable dragging across your desk and knocking over components while you work. This cordless iron is incredibly convenient and perfect for quick jobs or working at awkward angles. The only trade-off is total heat output, it can’t keep up with the corded units there, but it’s plenty for making smaller connections.
Desoldering Pumps (Solder Suckers)
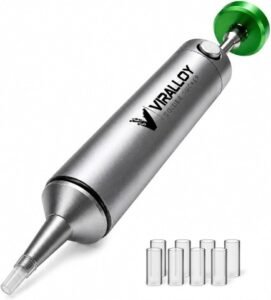
When you need to remove multi-pin components like classic console cartridge slots, controller ports, or capacitors, clearing out the old solder from the through-holes can be a nightmare.
Get it here (~$10 – $20 USD)
There is absolutely no need to spend a fortune on a manual pump. You just need something that works reliably, maintains strong suction, and is built to last through hundreds of repairs. This unit hits that perfect sweet spot.
Tweezers
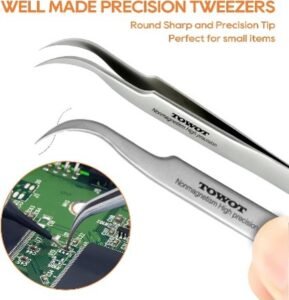
You cannot position miniature capacitors, resistors, or fine magnet wire using your bare fingers, that’s why you need a good set of tweezers. You will likely accumulate a handful of cheap, flimsy tweezers that come bundled for free with other kits on this list. But when those inevitably bend out of alignment or fail to grip tiny components, it is time for an upgrade.
Get it here (~$5 – $25 USD)
High-quality, ESD-safe tweezers make a massive difference in your workflow. They feature hardened tips that won’t deform under pressure and provide the grip strength necessary to handle delicate parts without dropping it. You will likely want to pick up a few of these in different shapes.
Silicone Project Mats
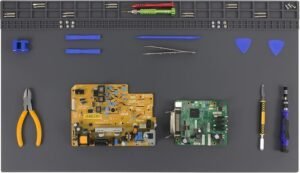
Soldering over an unprotected wood or plastic desk will inevitably lead to permanent burn marks and lost screws. A good silicone mat will protect your surface and whatever you’re working on.
Option 1. The Compact Mat: Small & Mobile-Friendly
Get it here (~$10 – $20 USD)
This is a cheap, relatively small mat that is perfect for working on phones, handheld consoles like Game Boys. It gives you the heat resistance and screw organization you need without taking up your entire desk.
Option 2. The Workbench Upgrade: Large Project Mat
Get it here (~$20 – $35 USD)
If you are working on full-sized game consoles, cracking open PC cases, or managing larger motherboards, you will want this much larger mat. A quick tip: make sure to avoid the black color option, as it shows every single speck of dust and gets visibly dirty incredibly quickly.
ESD Brushes
Keeping your PCBs clean is important not just for their longevity but also for your quality of life while working on them. These brushes will help you sweep away years of dirt and grime without damaging your favorite childhood electronics.
Get it here (~$10 – $15 USD)
This kit provides a good variety of different brush shapes and sizes, giving you the perfect tool for everything from wide scrubbing on a dirty housing to getting between the dense legs of a surface-mount chip. They are fantastic for aggressive cleaning and scrubbing old consoles without any worry about static discharge or damaging fragile surface components.
3. Wiring & Fabrication
Modding often requires physical alterations—routing custom wire paths, trimming internal structural plastics, or reshaping console shells to accommodate new hardware ports.
Automatic Wire Strippers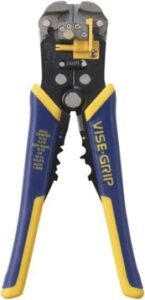
Stripping the insulation off ultra-thin wires with a manual blade frequently results in accidentally clipping the internal copper strands entirely.
Get it here (~$25 – $40 USD)
A massive time-saver. You simply insert the wire, squeeze the handle, and the mechanical jaws automatically clamp down and pull the insulation away cleanly in a single movement without damaging the delicate copper core inside.
Side Cutters (Flush Cutters)
Standard wire cutters leave a pointed, jagged peak at the end of a cut, which can pierce through tape or poke adjacent components on a dense circuit board.
Option 1. The “Cheap & Cheerful” Option: Spring-Loaded Cutters
Get it here (~$5 – $10 USD)
These entry-level flush cutters get the job done without breaking the bank. They are plenty sharp for basic wiring and standard electronics work. The biggest advantage here is the built-in spring mechanism that automatically returns the jaws to the open position.
Option 2. The Professional Grade: Heavy-Duty Cutters
Get it here (~$20 – $35 USD)
If you need to cut through thicker gauge wire or heavier metal pins, you will want to step up to a professional-grade set. The hardened steel on these will stay sharp significantly longer than the cheaper alternatives. However, they annoyingly lack a return spring, so you have to manually open the jaws between every cut.
 Craft Knives
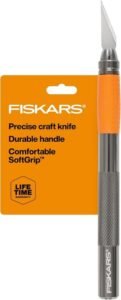
A reliable craft knife is an essential bench tool for the physical, destructive side of modding.
Option 1: The Entry-Level Standard Precision Knife
Get it here (~$5 – $10 USD)
The classic, fine-point knife that belongs on every desk. It is excellent for delicate, close-up work like gently scratching away solder mask to expose copper traces on a PCB, cutting thin plastics, or slicing through small wires.
Option 2: The Heavy-Duty Upgrade Olfa Utility Knife
Get it here (~$10 – $20 USD)
When making major structural modifications to a console—like cutting away large sections of thick ABS plastic inside a case, you need something with more backbone. This heavier-duty Olfa knife won’t snap under heavy pressure.
Precision File Sets
When widening a port hole or fine-tuning the fitment of a custom 3D-printed bracket, a craft knife can easily catch or slip and cause unintended damage.
Get it here (~$10 – $20 USD)
This set provides a variety of file profiles (like flat, round, half-round, and triangle) to give you control. They are significantly more accurate than trying to whittle away hard plastic with a blade, leaving you with clean, factory-looking case modifications.
3D Printers
Adding a 3D printer to your workspace completely changes how you prototype. Instead of messy hot glue or leaving internal components loose, you can fabricate custom enclosures, mounting brackets, and structural faceplates.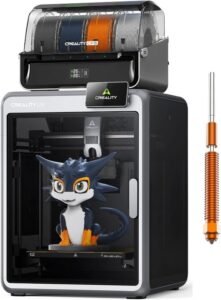
Option 1: Hassle-Free Entry Level Printing – Bambu P2S
Get it here (~$600 – $800 USD)
If you want to spend your time modding electronics rather than tinkering with your printer, this is the way to go. It delivers amazing print quality and consistent results right out of the box. You are paying a premium for a hassle-free experience, and it does operate within a slightly more restrictive “walled garden” ecosystem.
Option 2: The Open-Ecosystem Alternative – Creality K2
Get it here (~$400 – $600 USD)
If you prefer full control over your machine and enjoy tuning settings, the Creality K2 is a fantastic alternative. It requires a bit more hands-on calibration than its premium rivals, but it operates on a wide-open ecosystem for easy aftermarket mods and comes in at a lower price point.
Option 3: The “Cadillac” of 3D Printers – Bambu H2C
Get it here (~$2,000+ USD)
When budget isn’t a primary concern and you want the absolute best tool available, this is the powerhouse you want on your desk. It allows you to seamlessly print in multiple colors simultaneously, swap various nozzle sizes for extreme detail, and consistently delivers flawless, commercial-grade results every single time.
4. Bonus: The Consumables Stash
Tools are only half the equation. Consumables are the materials you will actively deplete and replace as you work through your projects. Keeping a well-stocked supply of these essentials prevents frustrating mistakes.
- Solder Flux | Get it here
Flux is the secret ingredient to successful soldering. It removes oxidation from the metals being joined, allowing the molten solder to flow smoothly and bond securely. Applying a liberal amount of flux is entirely non-negotiable for clean joints.
- Solder Wick (Desoldering Braid) | Get it here
Mistakes happen, and solder bridges are inevitable. Solder wick acts like a copper sponge for liquid metal. When placed over unwanted solder and heated with your iron, it draws the excess solder up into the braid, allowing you to clean up messy joints or clear out through-holes.
- Kapton Tape | Get it here
This translucent amber tape is a high-temperature polyimide film. Because it easily survives direct contact with a hot soldering iron without melting, it is perfect for isolating exposed contacts, protecting delicate nearby components while applying hot air, or cleanly securing your wire routing against the console shell.
- Leaded Solder | Get it here
While lead-free solder is the modern manufacturing standard, a good rosin-core leaded solder (typically 60/40 or 63/37) is vastly superior for hobbyist modding. It has a significantly lower melting point, flows much more predictably, and cools to a shiny finish that makes it easy to visually verify a solid joint. Just remember to wash your hands after your session.
- 99% Isopropyl Alcohol (IPA) | Get it here
Don’t reach for the 70% rubbing alcohol in the bathroom cabinet—the high-water content can cause corrosion or shorts. 99% IPA evaporates incredibly fast and leaves zero residue behind. Combined with an ESD-safe brush or a simple cotton swab, it is the only thing you should be using to scrub away sticky flux residue after your soldering is complete.
- Wire Kit (Various Gauges and Sizes) | Get it here
Having a solid assortment of wire gauges and colors on hand is critical. You will want thicker gauges for routing main power rails and much thinner, highly flexible wire for delicate data lines. A multi-color kit allows you to color-code your installations, making it infinitely easier to trace your work if you need to troubleshoot a connection later.