Live Edge Maple TV Stand
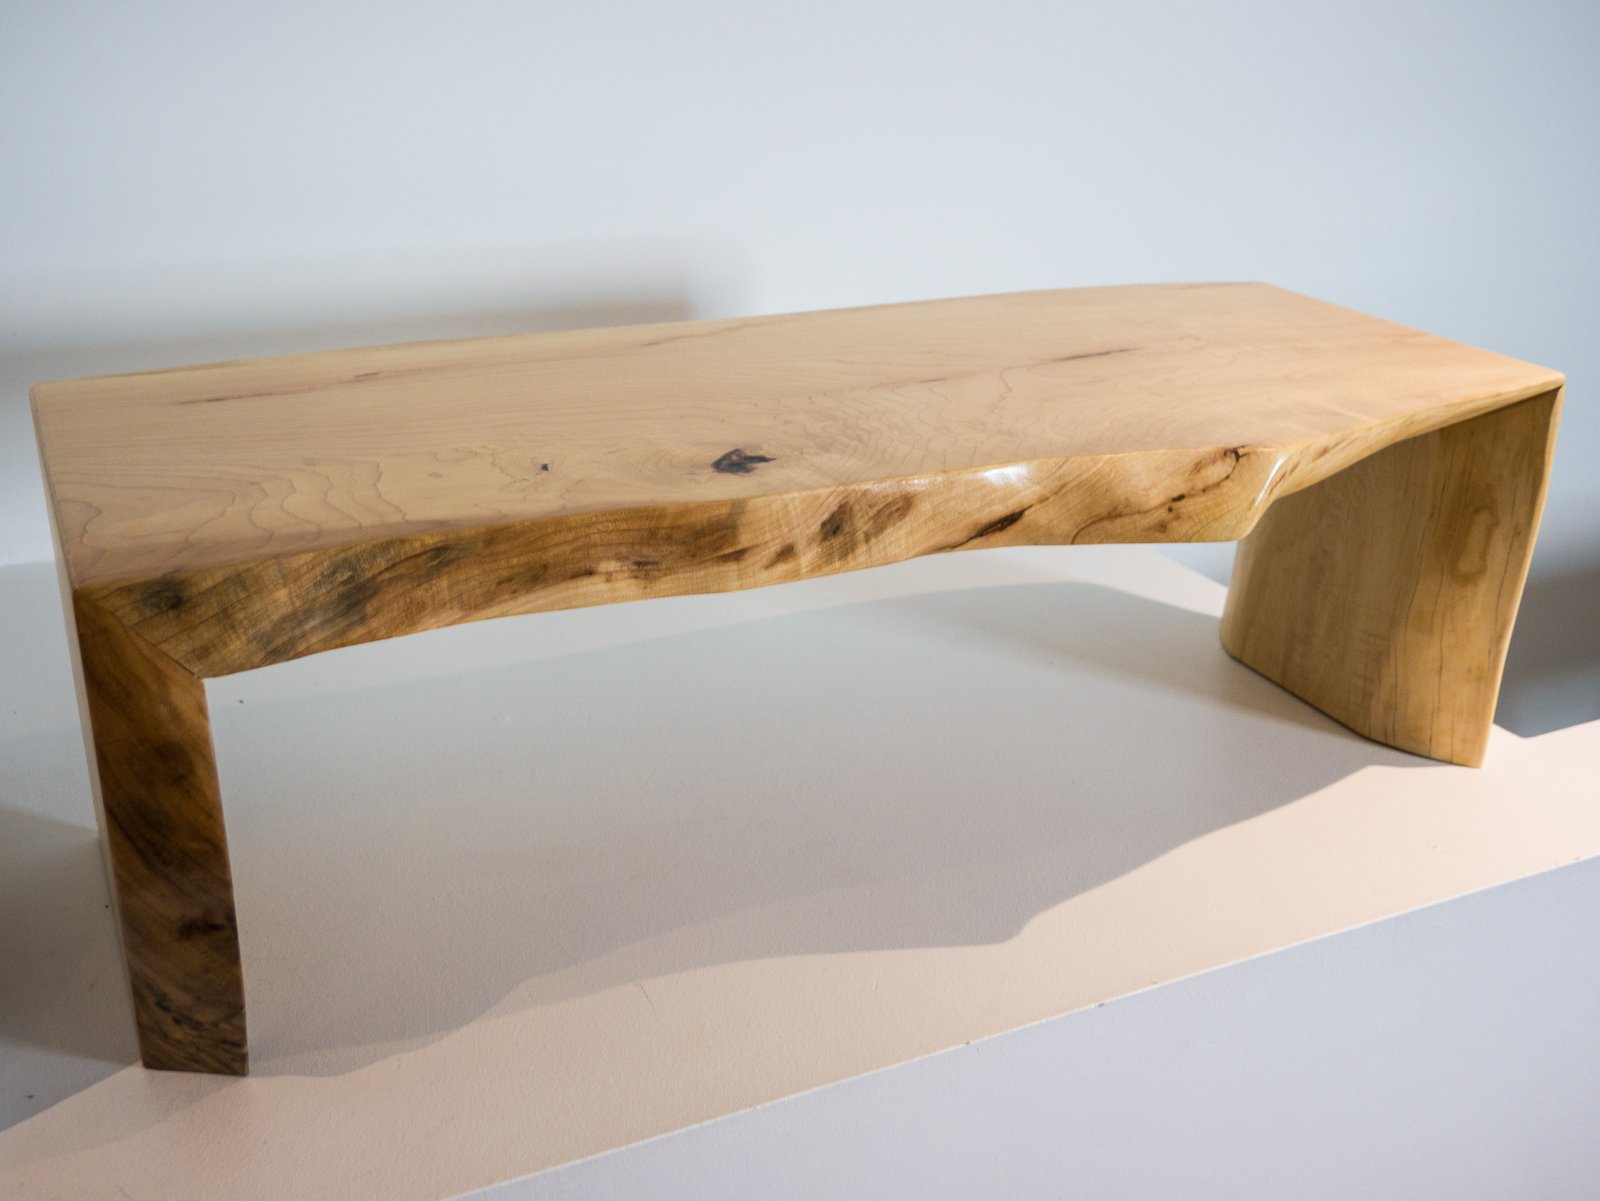
I built this TV stand to add a little bit of height to my bedroom TV setup. It also gave me a place to store everything beneath it. Probably overkill for a TV stand, but I really wanted to try my hand at the “waterfall” style of live edge furniture. I had seen a bunch of other people do similar pieces and it got me really excited to try it out. It has no external fasteners and the grain is consistent across it’s entire surface.
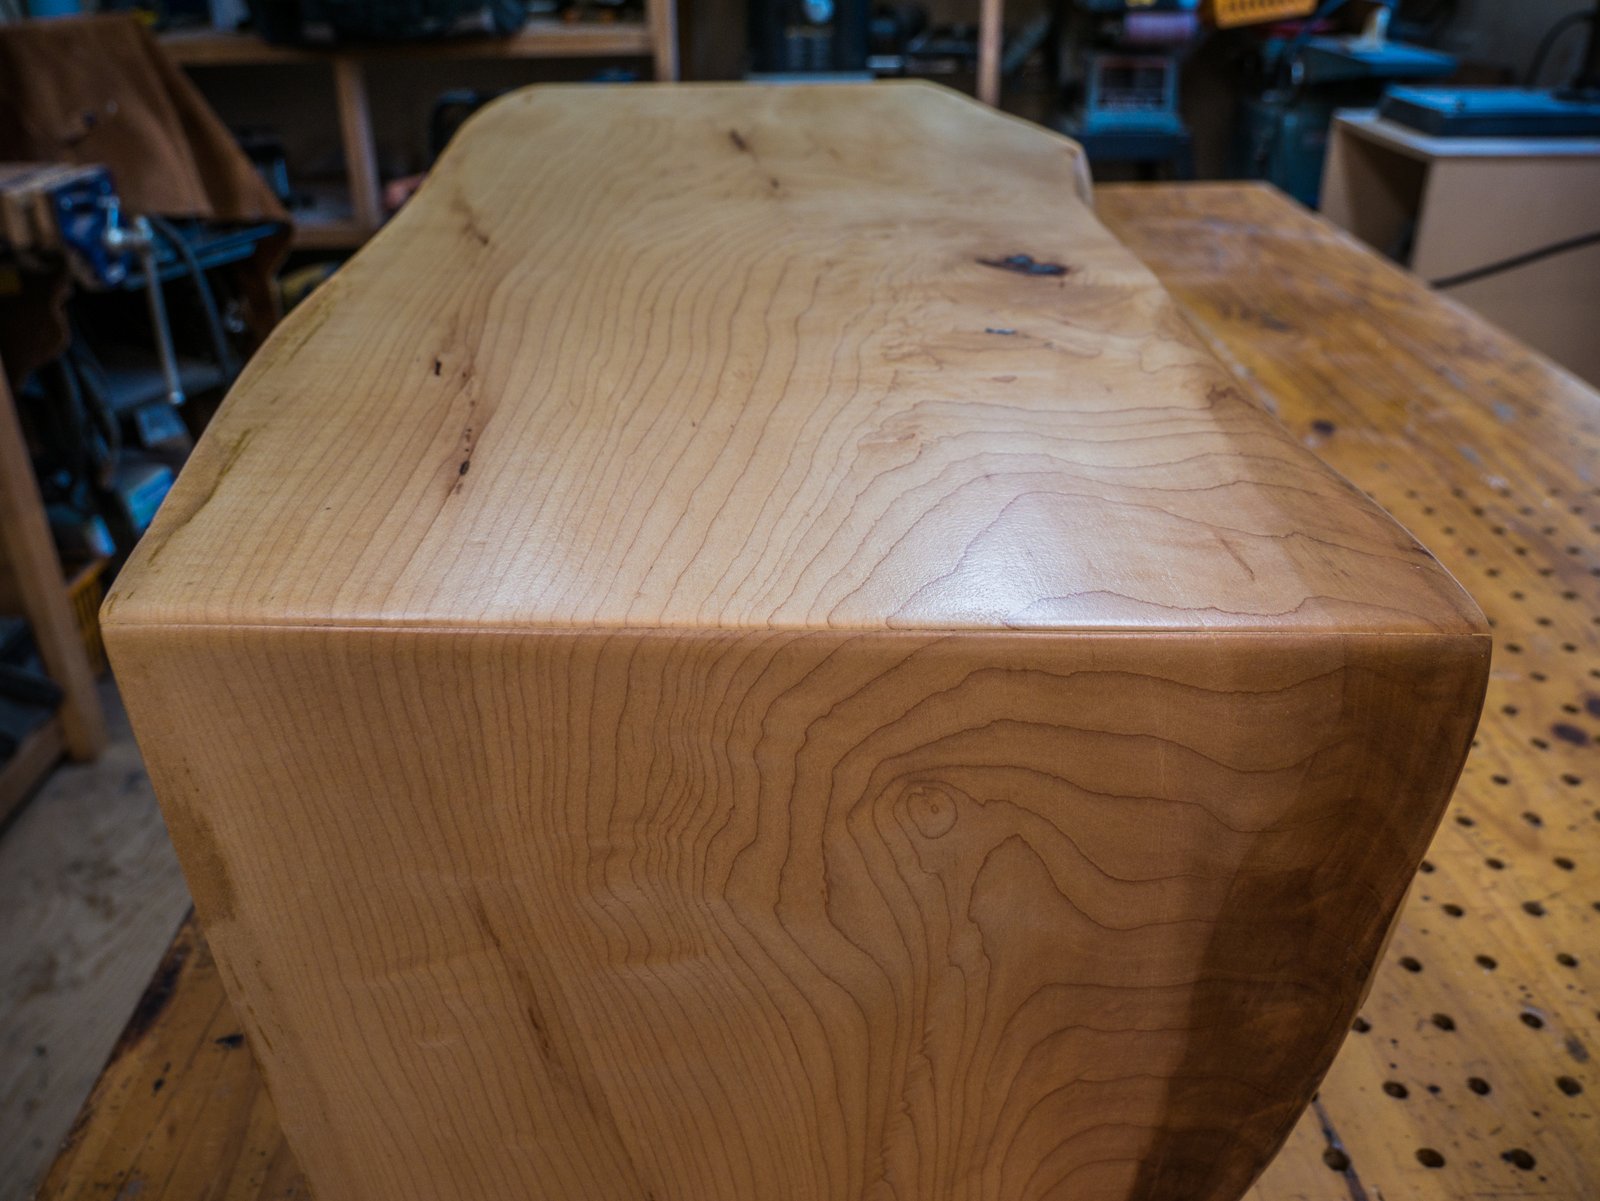
I love the way the grain continues as the edge simply folds over. It looks awesome, I learned a lot doing this project and am definitely planning on doing it again in the future for something like a coffee table or a maybe a dining room table (though that might be prohibitively expensive).
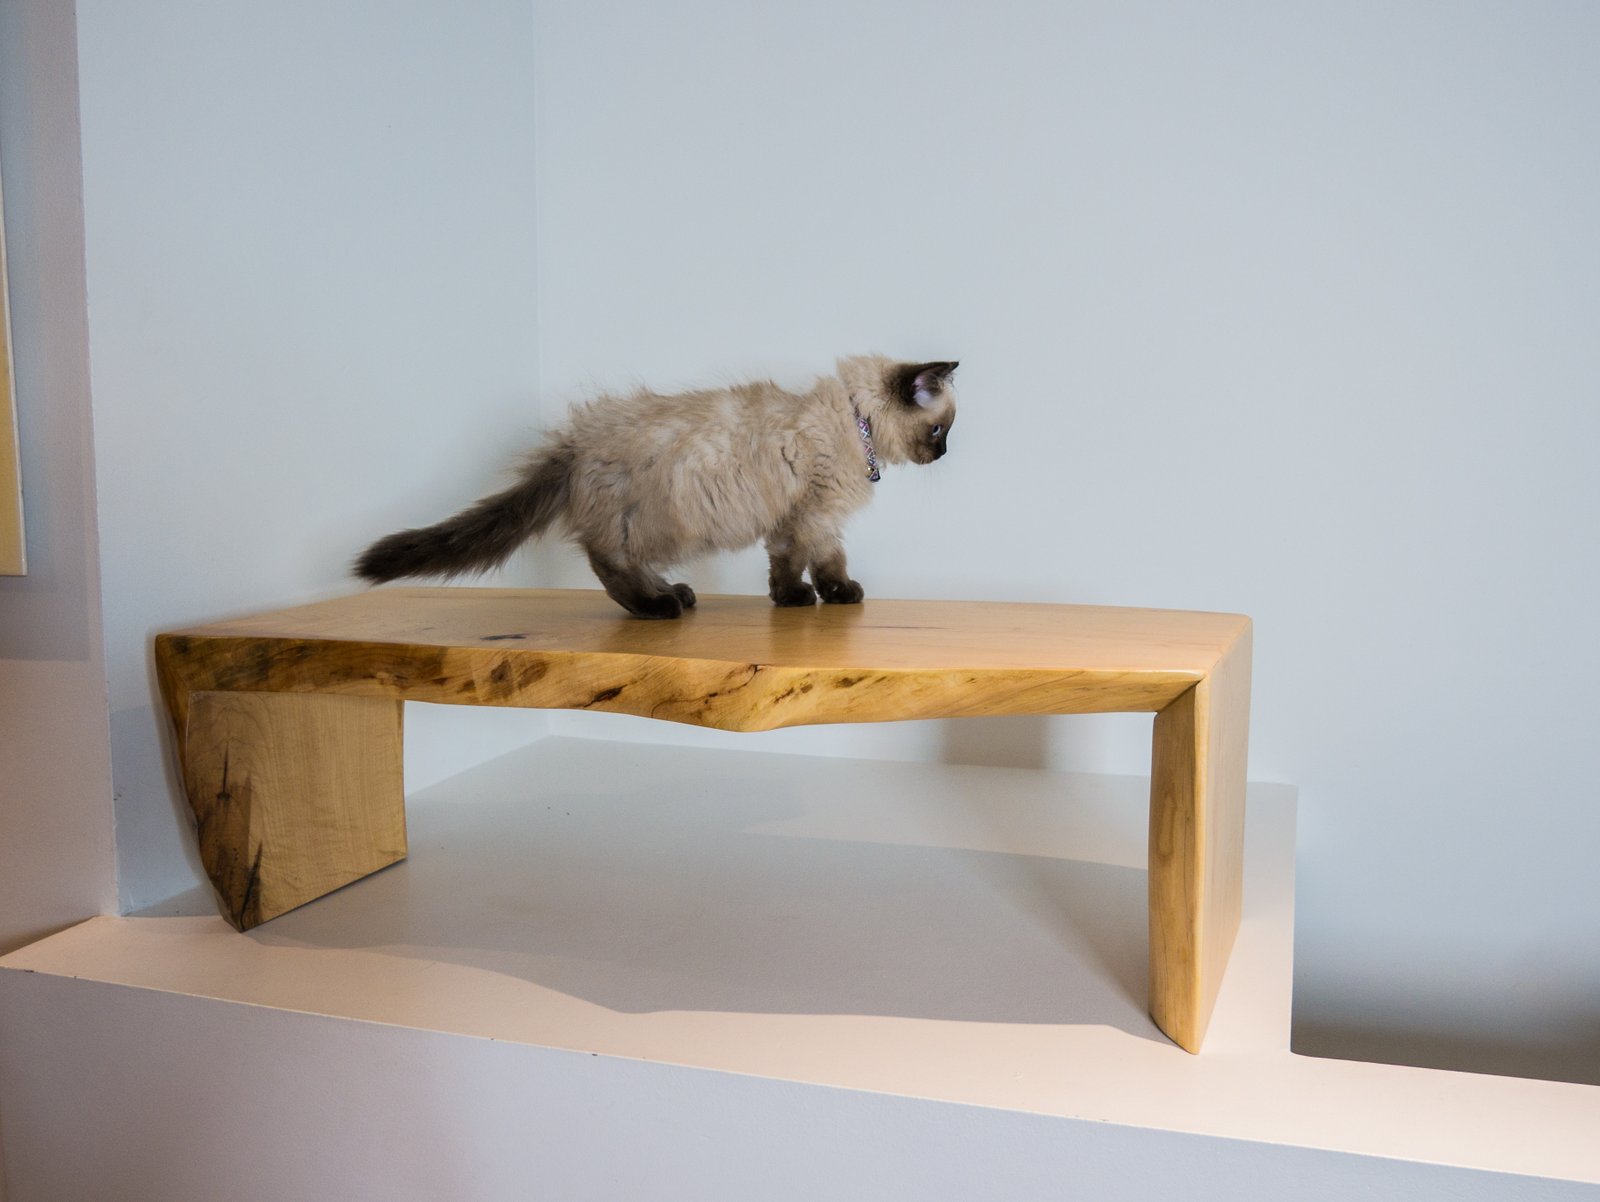
Here’s the finished product with my new kitten Bing inspecting my handy work. I think it passed her tests, she meowed a lot anyways, I think that’s a good sign.
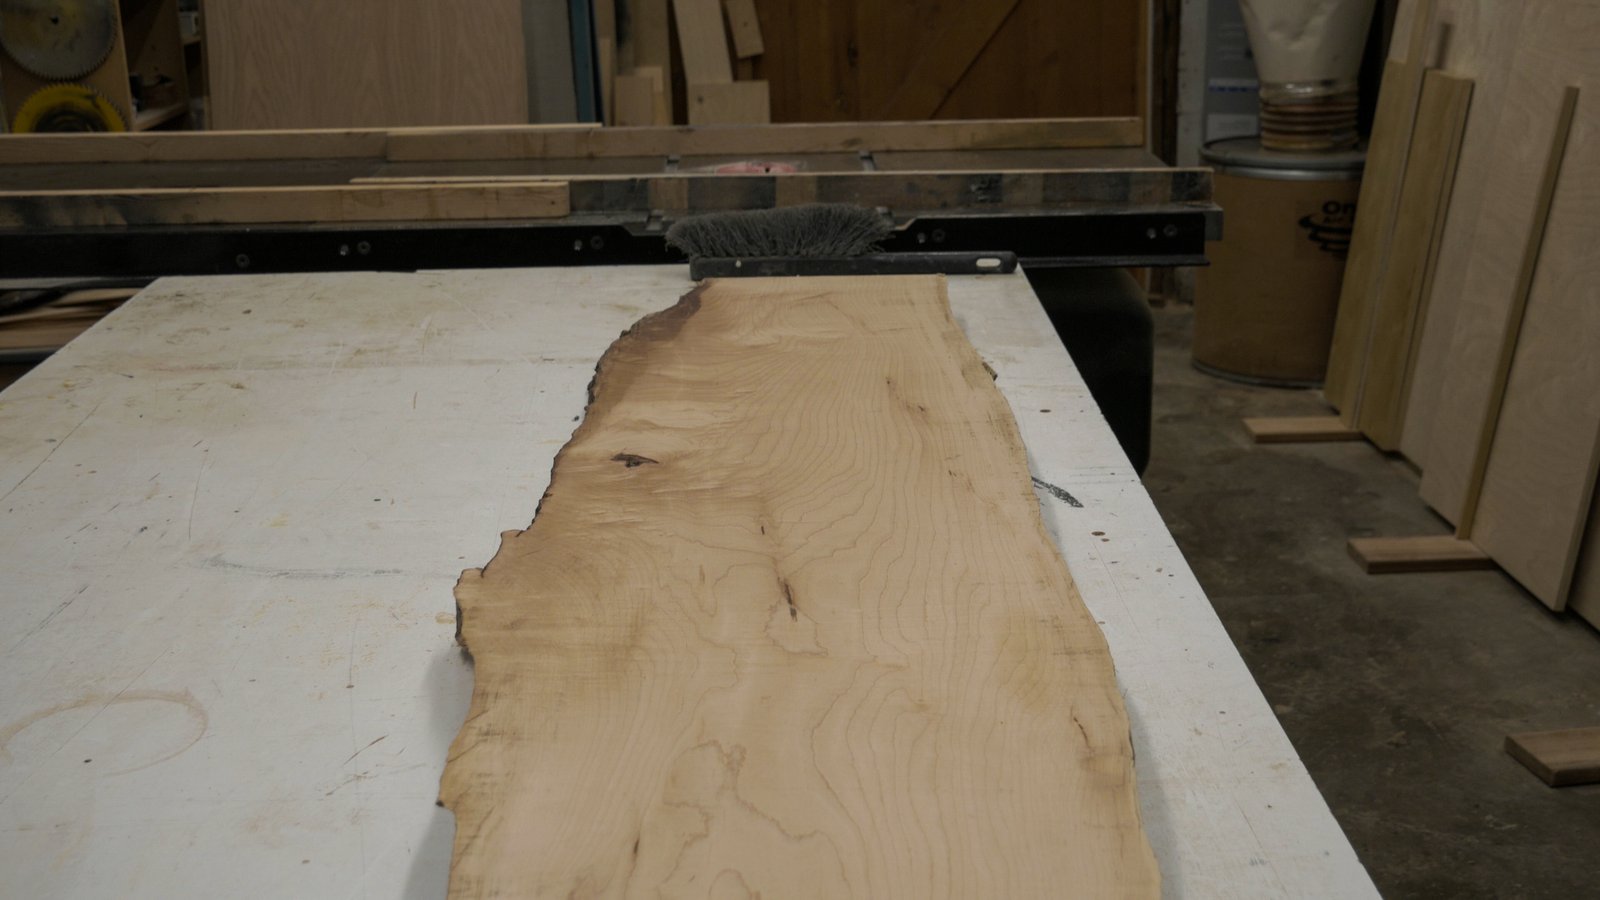
I bought this specific slab because it had so much character, but was basically a uniform width. If anyone is looking to do a similar project make sure you pick a piece of wood that has a similar width the whole way through. 70% of my time on this project was spent carving and shaping the wood so that the corners would line up.
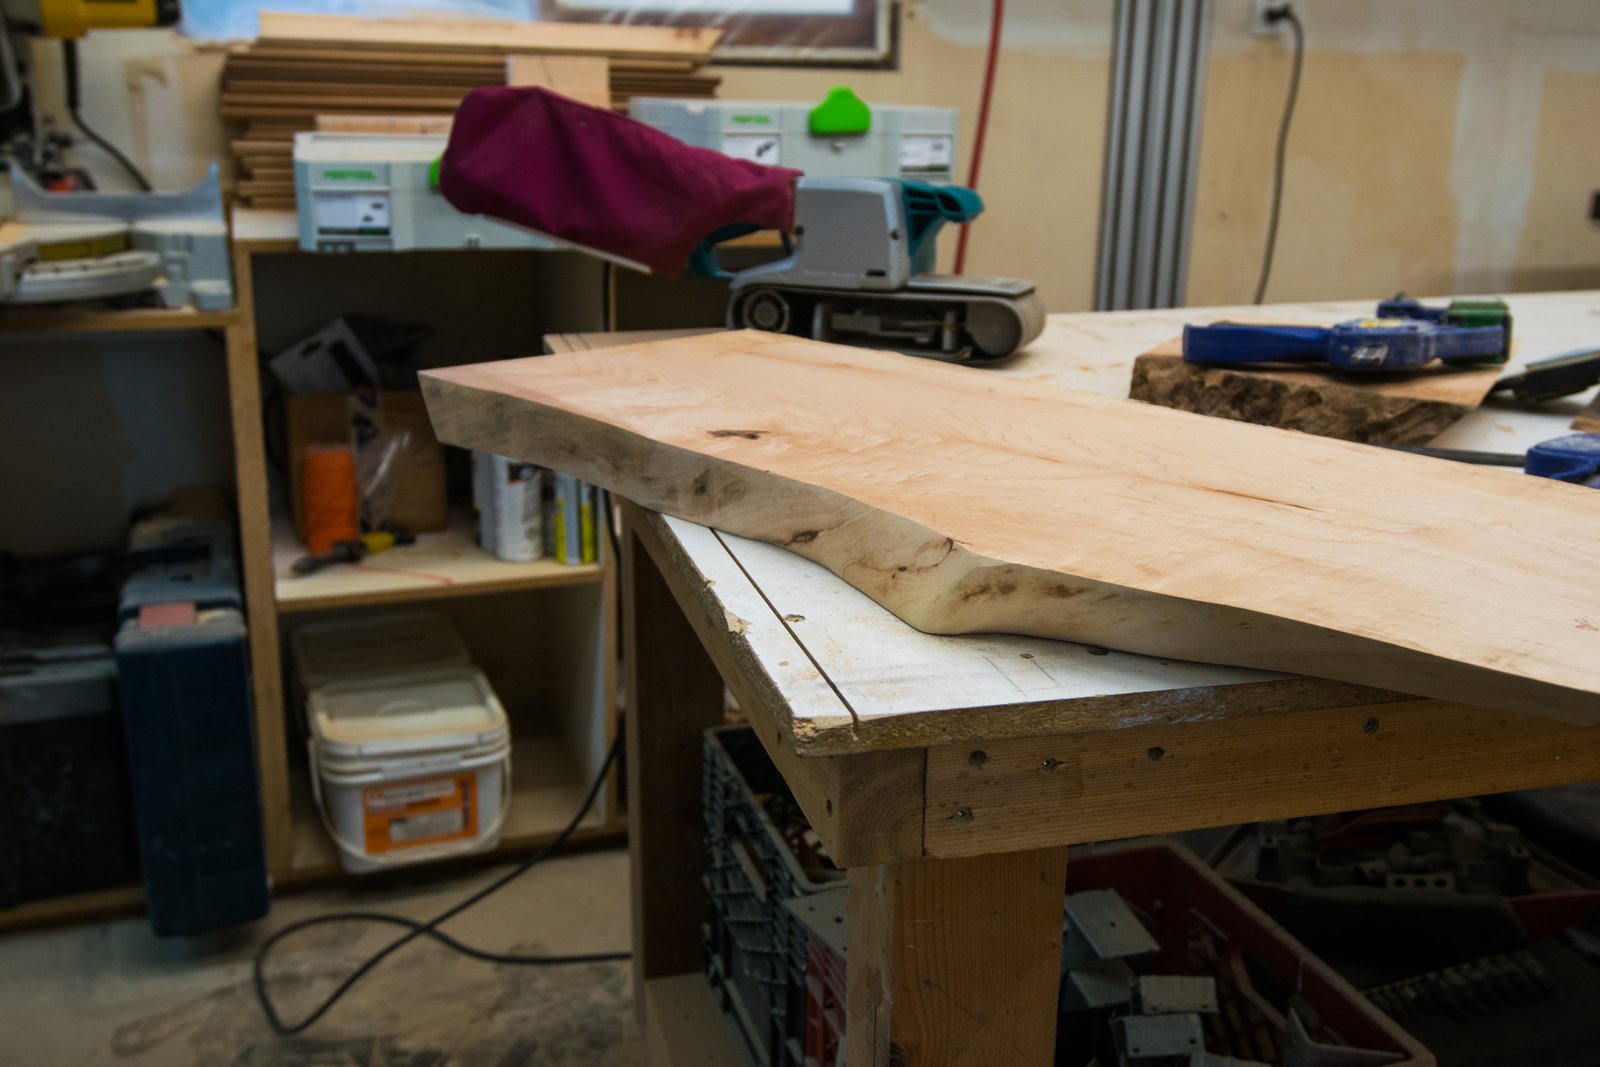
Here’s the piece as I bought it. A nice heavy 2″ thick slab of live edge maple. I got it for $40 CAD. Probably wouldve cost me about twice that if I didn’t ask the mill owner for a bulk discount. I was already there buying a bunch of stuff for a client so they cut me a deal. Everything else I used in this project I already had laying around. Just some clear coat and a whole bunch of sand paper. Its about 12″ wide and 80″ long.
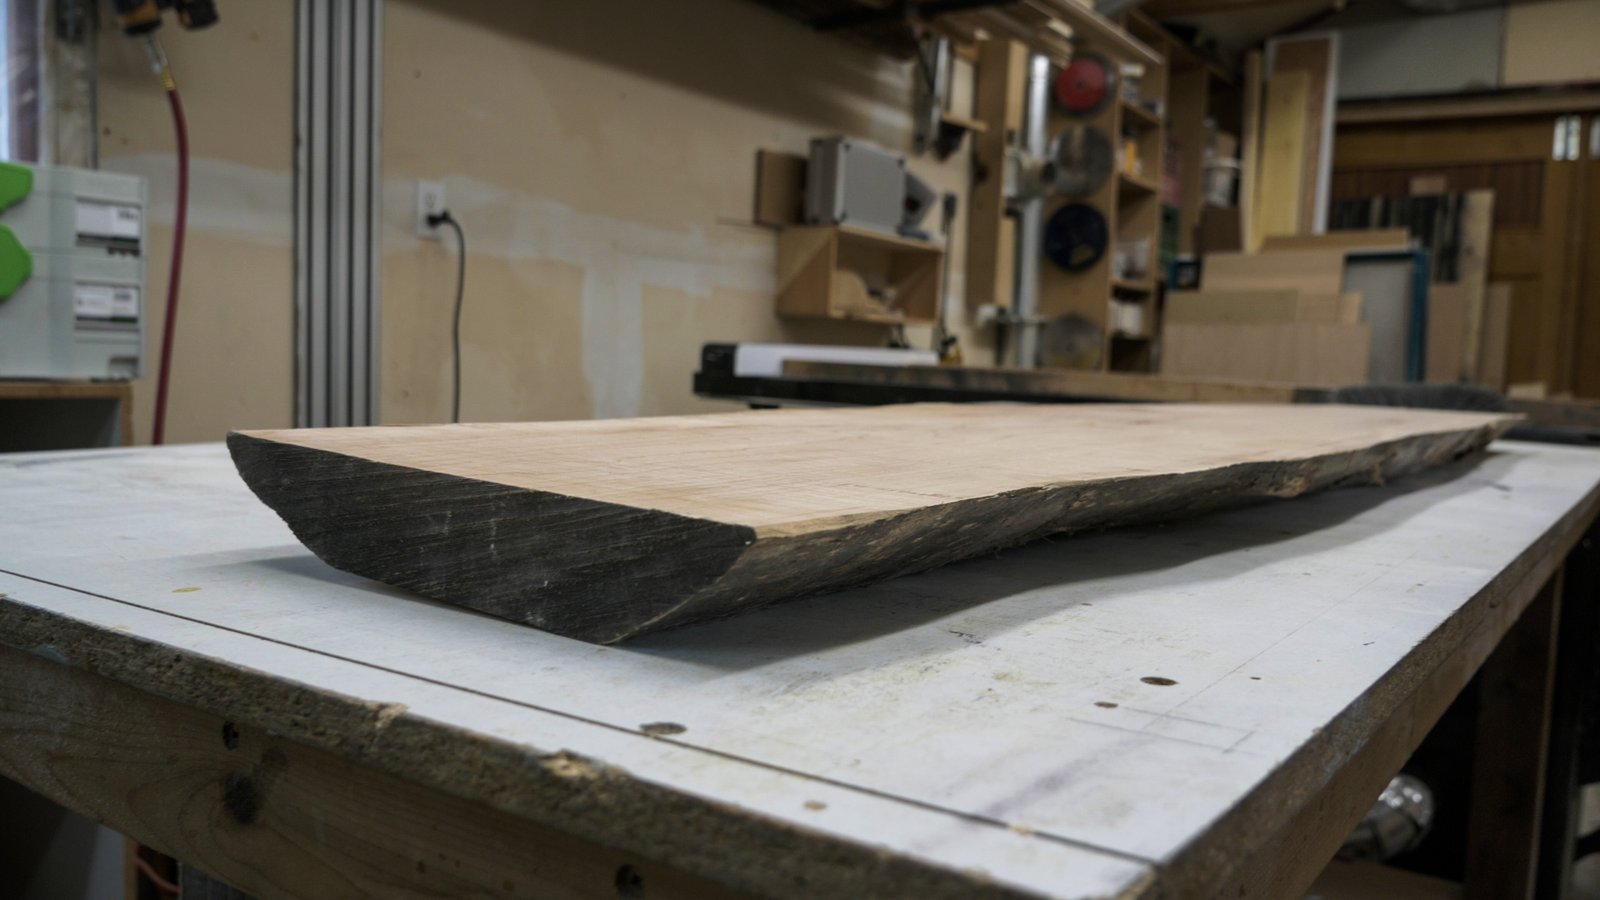
Notice how edges taper in on the bottom, wish I paid more attention to that when I bought it, made my job quite a bit harder. Oh well, live and learn.
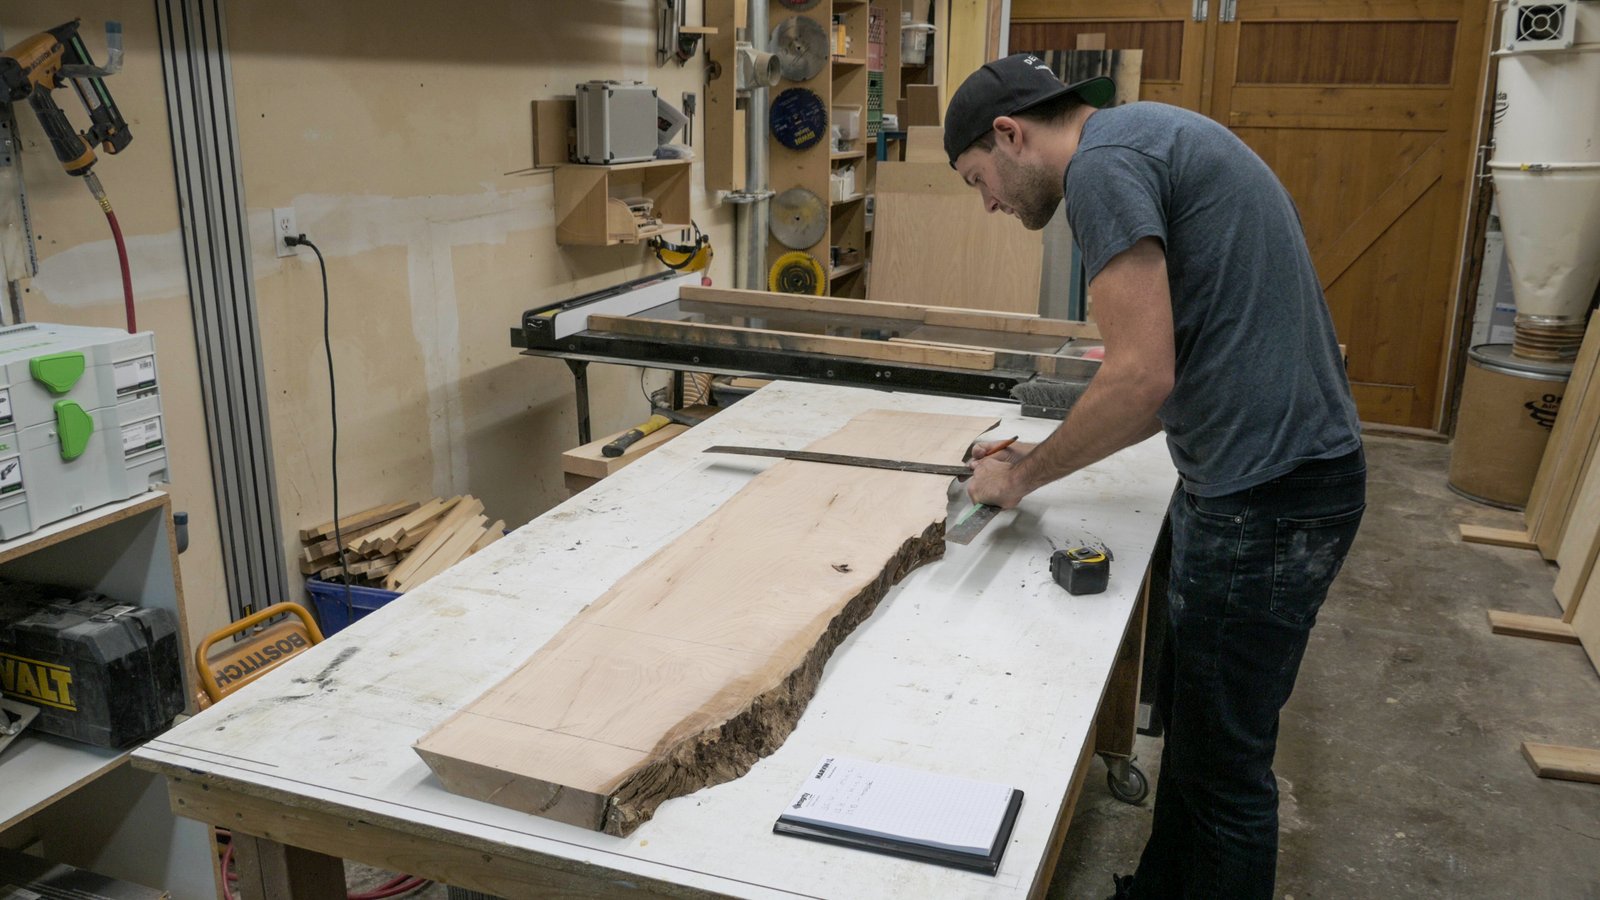
Here I am marking out my cuts. I made 4 cuts to the piece total. 1 on either at either end to clean things up. I cut about 4″ off of either side, I could’ve cut less but I wanted I needed the piece to be a bit smaller. Next I measured in from those lines 12″ because I wanted my finished outside height to be 12″. This left a large section in the middle that was 48″.
In order to make sure everything was square I traced one line and then measured the other 3 lines off of the first line. You have to find your own square when working with live edge because there are no straight lines in nature (except for all the straight lines in nature, what a stupid saying).
Out comes the track saw. I carefully aligned the track with the lines I just traced onto the wood. Because maple is very hard I made this cut in 4 passes. Each time I would increase the depth of my cut by a 1/2″. I’ve burned out motors in other track saws in the past trying to cut through too much hard wood at once. The two cuts on either end are straight, 90 degree, cuts.
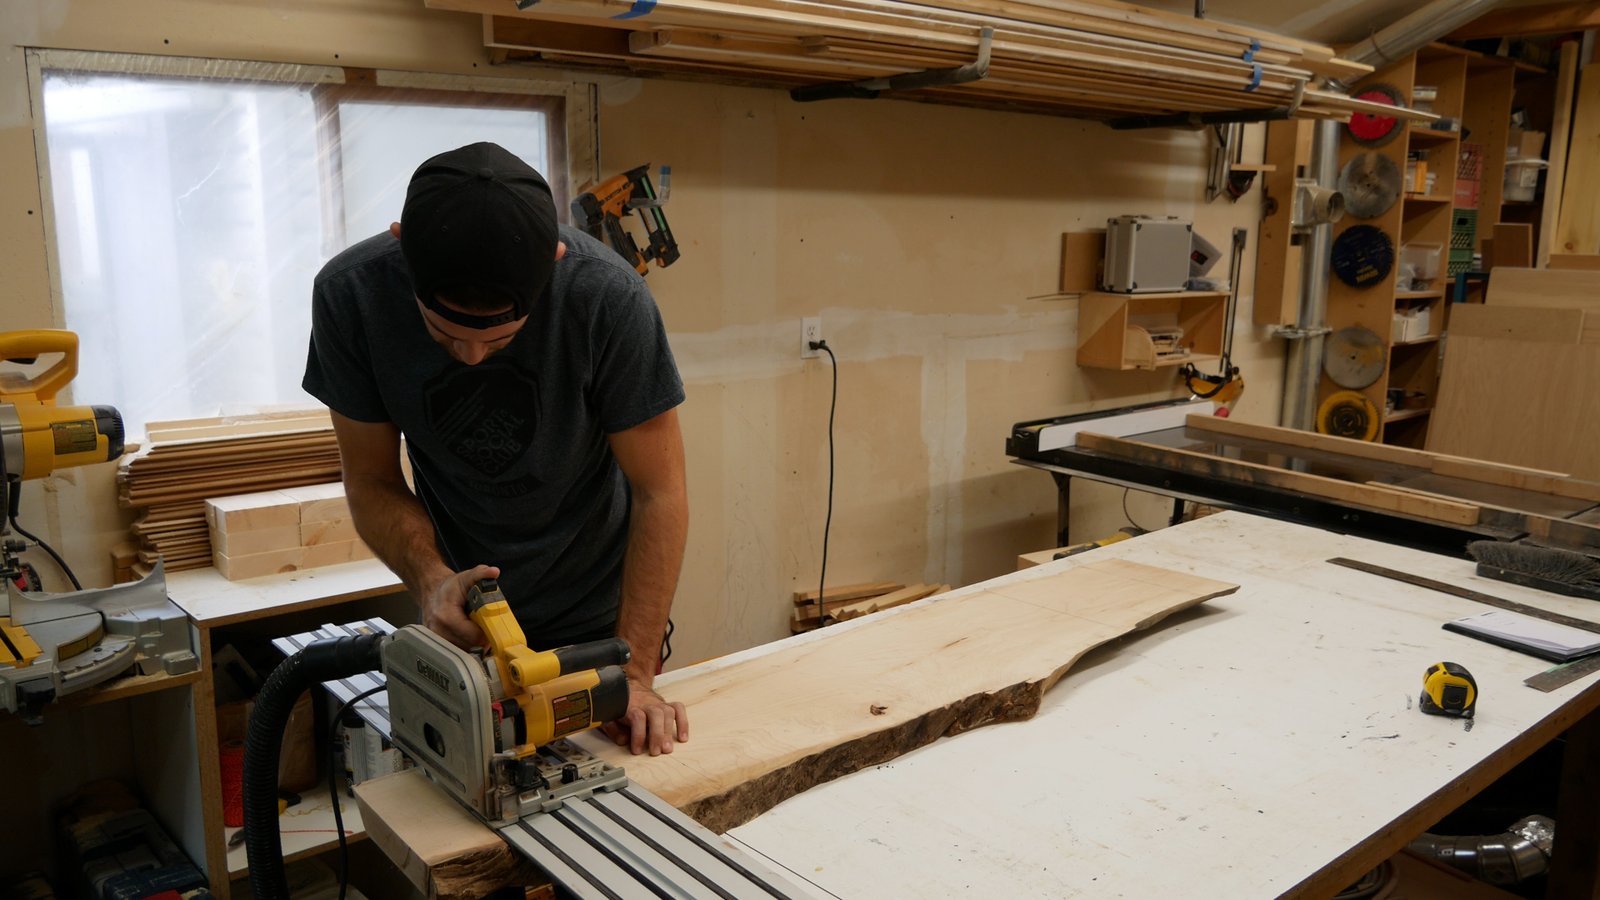
The next 2 cuts are at a 45 degree angle. Here I’m cutting the second set of lines I traced onto the wood. The lines that were 12″ in from the first cut I made. Again I did this in multiple passes.

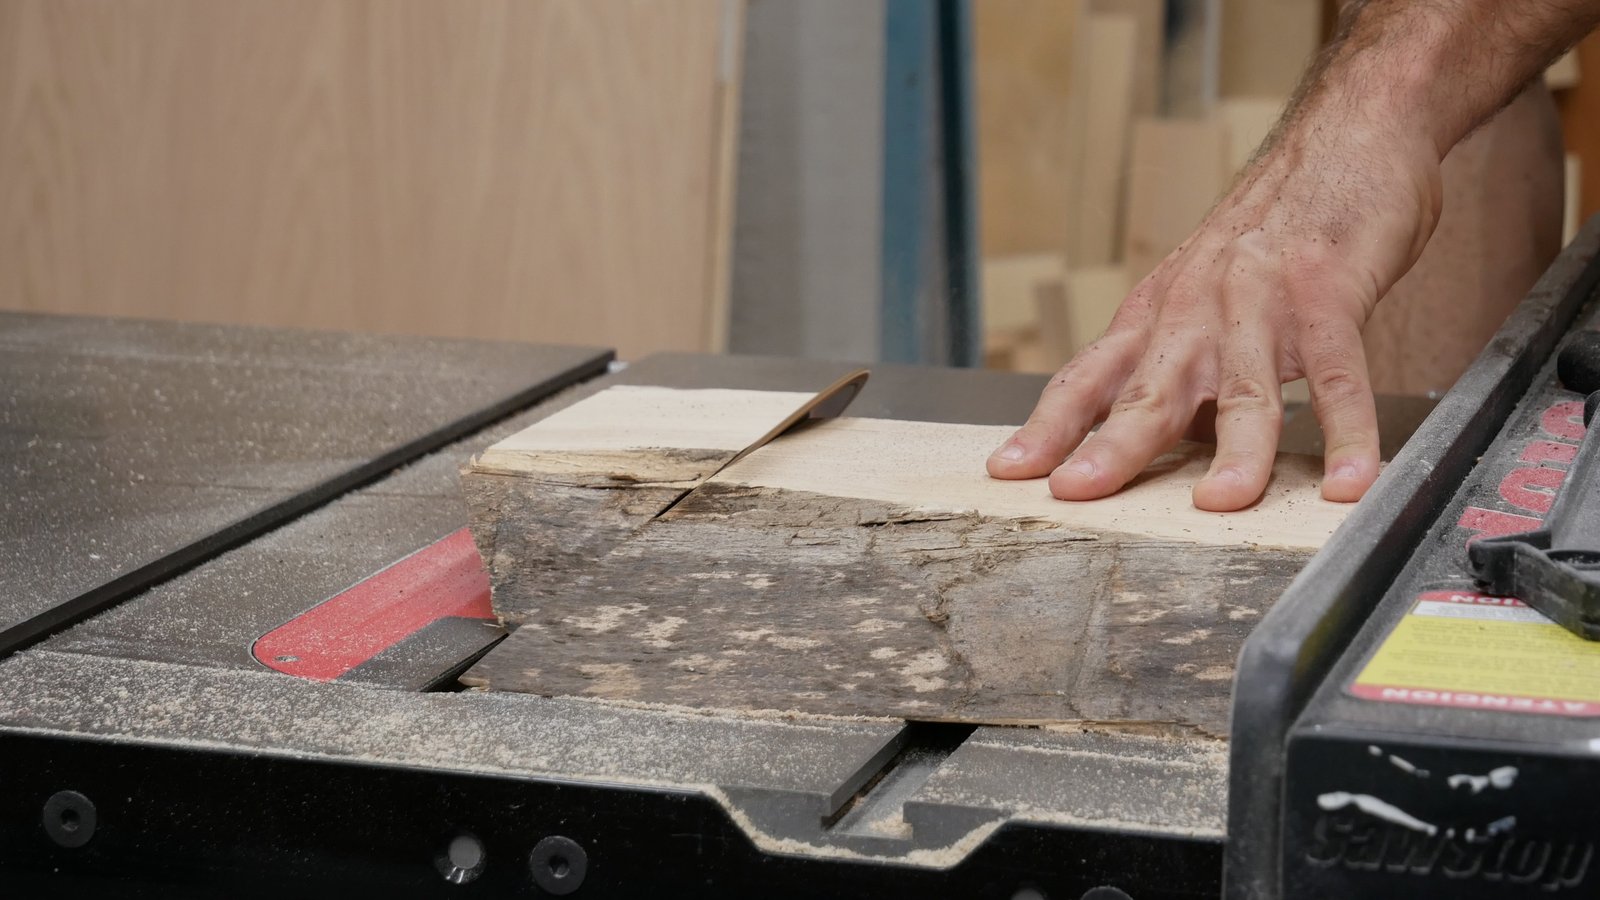
The 45 degree cuts I just made gave my top piece the right angles, but the two side pieces that will be the “legs” of my tv stand need to be cut again. I ran the side pieces through the table saw and reversed the 45 degree angle. When you do this you want to remove as little wood as possible. This will help keep all of the grains lined up on the waterfall edge.
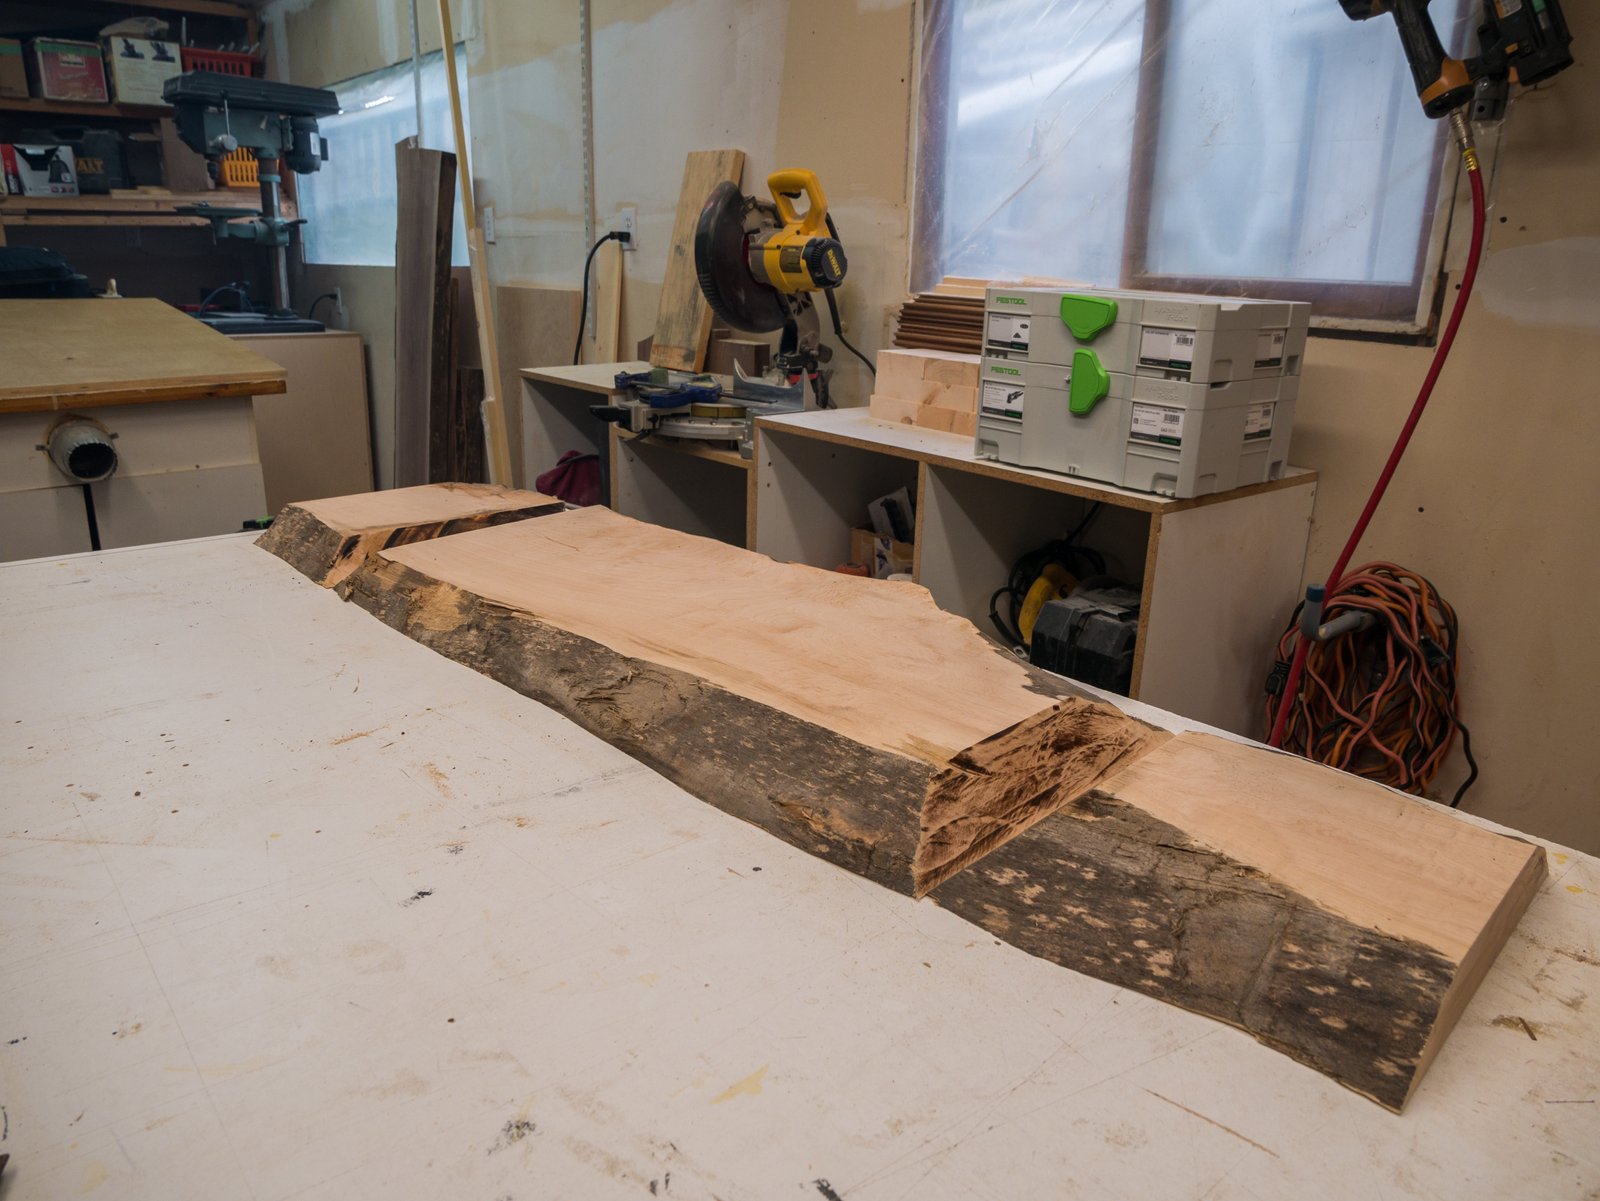
With all the cuts done you should have some that looks like this.
Layed out like this you can see that I essentially cut 2 v-shaped wedges out of the slab. While this looks nice on the top side of the stand, we actually removed quite a bit of material from the inside of the stand so the grain and the overall shape of the wood don’t line up very well. I’ll fix that later on the guide.
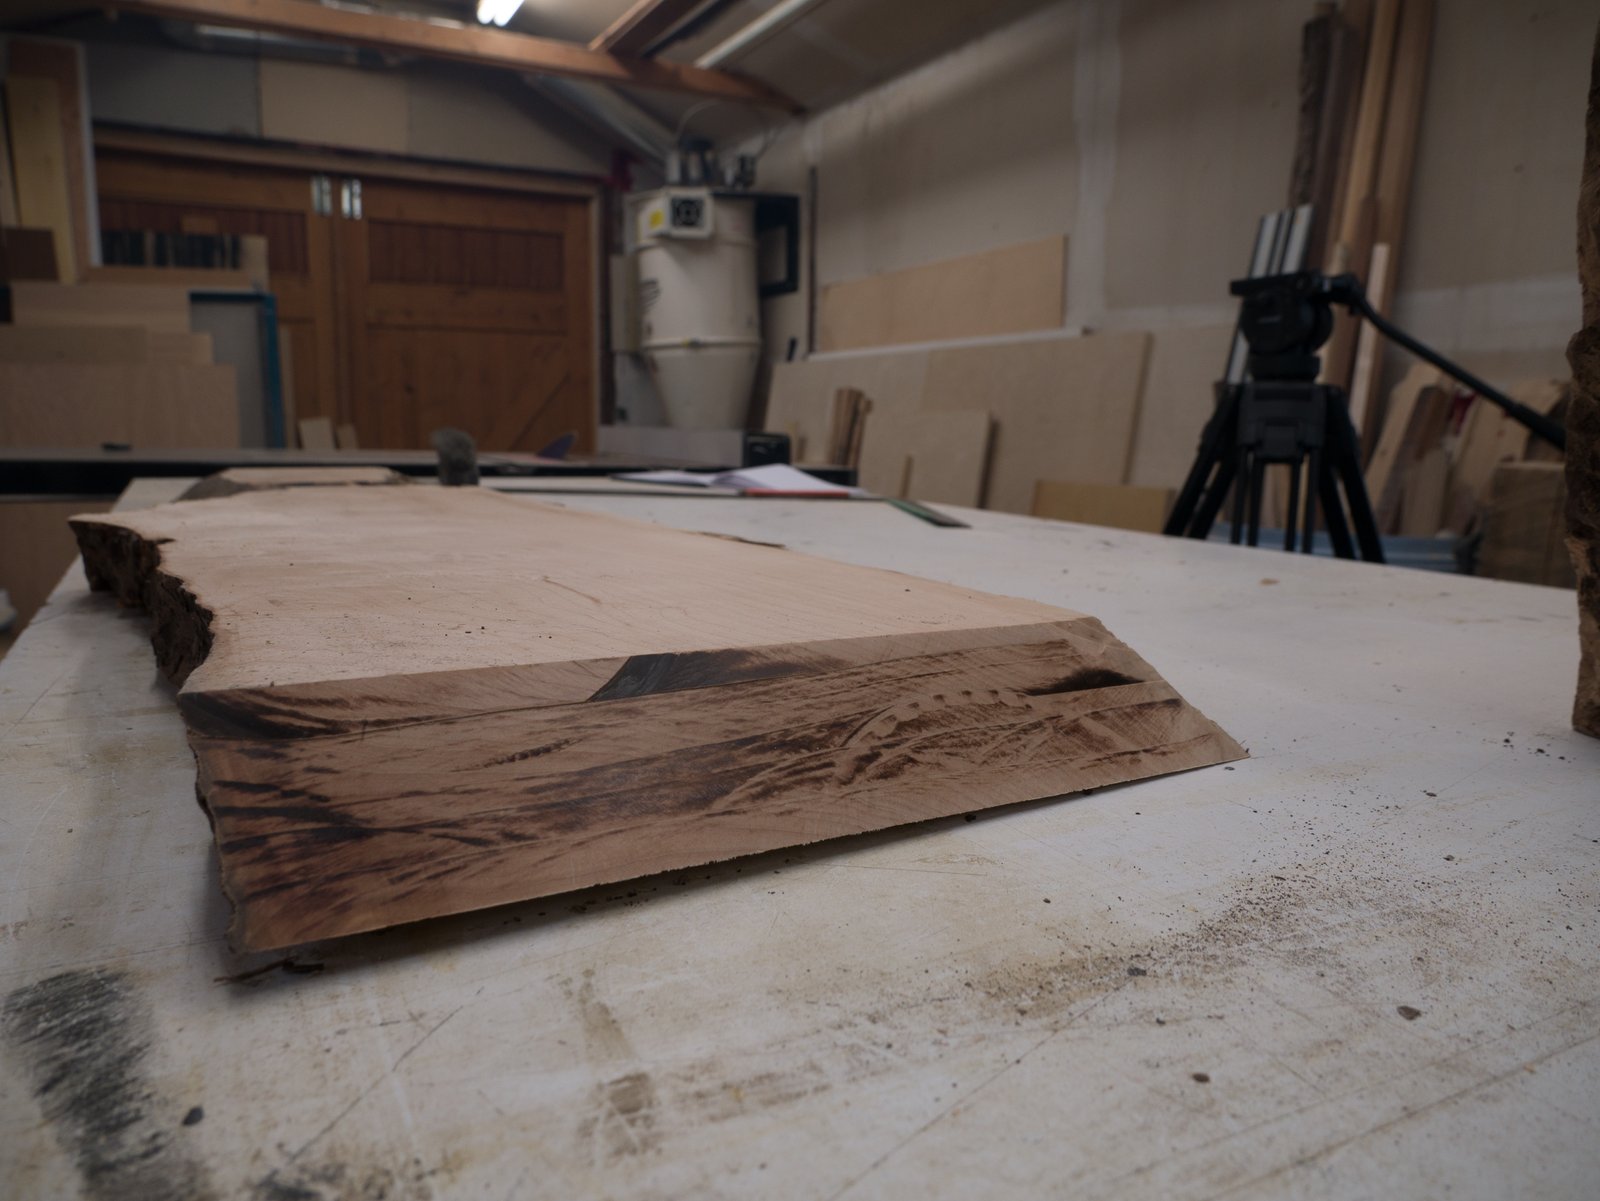
Next I used a combination of a belt sander and a random orbital sander to remove all of the bark and smooth the outside edges of the slab. This took some time and removed quite a bit of wood. Some people like to leave the bark on the wood. Me? I prefer more of a naked look.

Here’s what it looked like after it had been de-barked and smoothed out.
Remember how I used multiple passes with the track saw to make my cuts? It doesn’t make for the cleanest cuts unfortunately. When lining up the legs and the top piece I need to have perfectly flat 45 degree cuts in my wood. Let’s clean that up.
Also, I left my tripod in the shot. So there’s that.
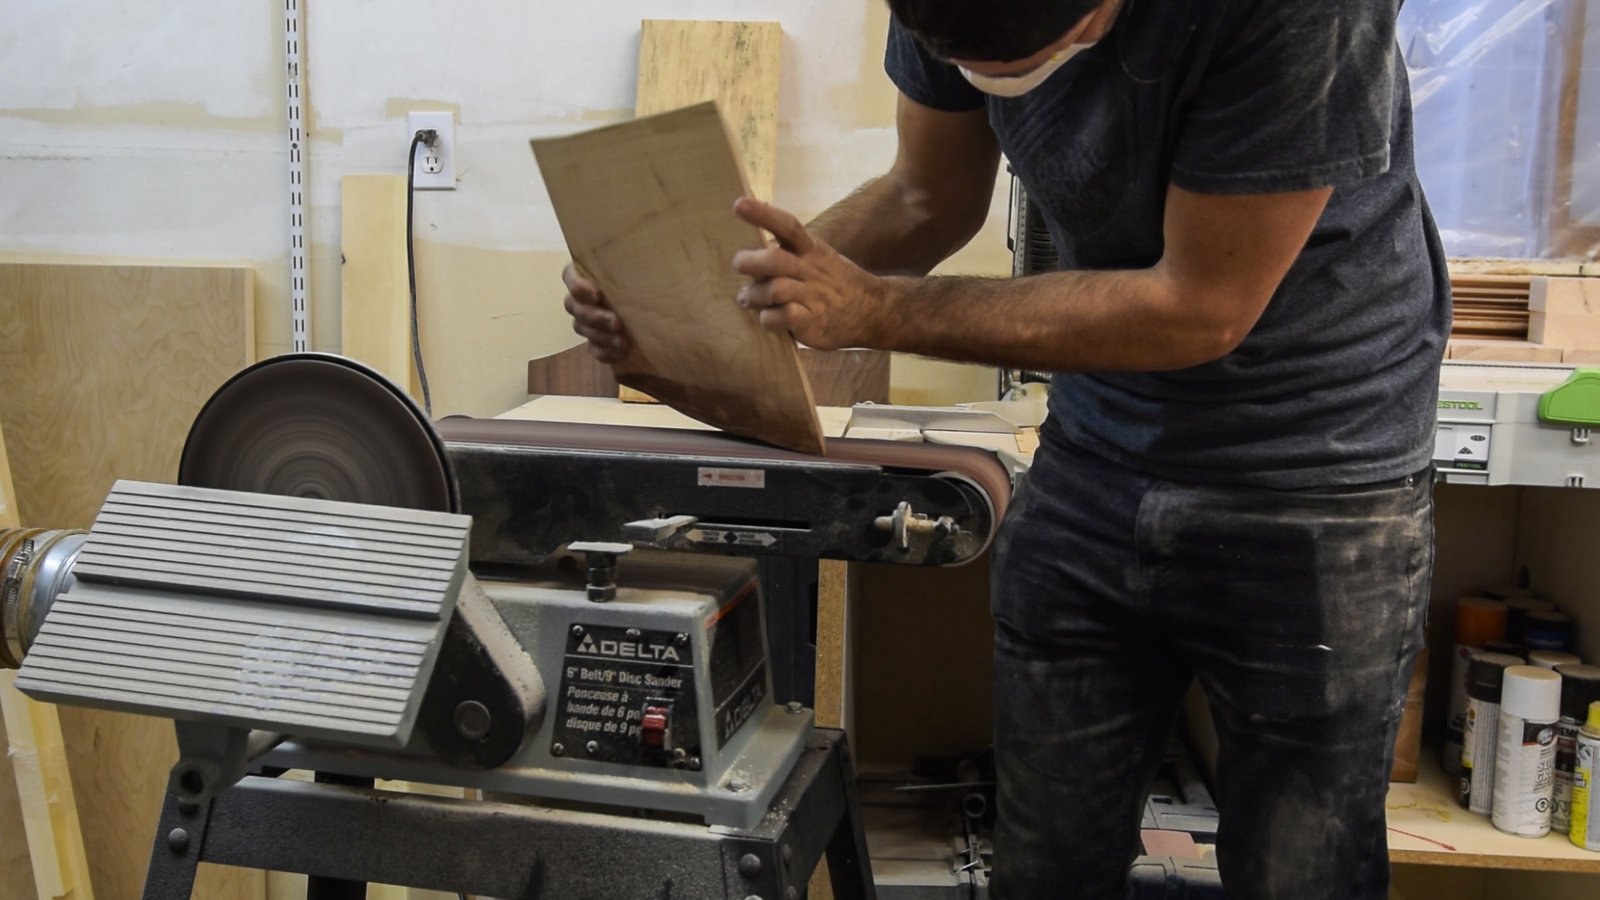
I held each piece of the stand at a 45 degree angle to a stationary belt sander and smoothed out each of the cuts until they were perfectly flat. This was easy for some pieces and harder for others.
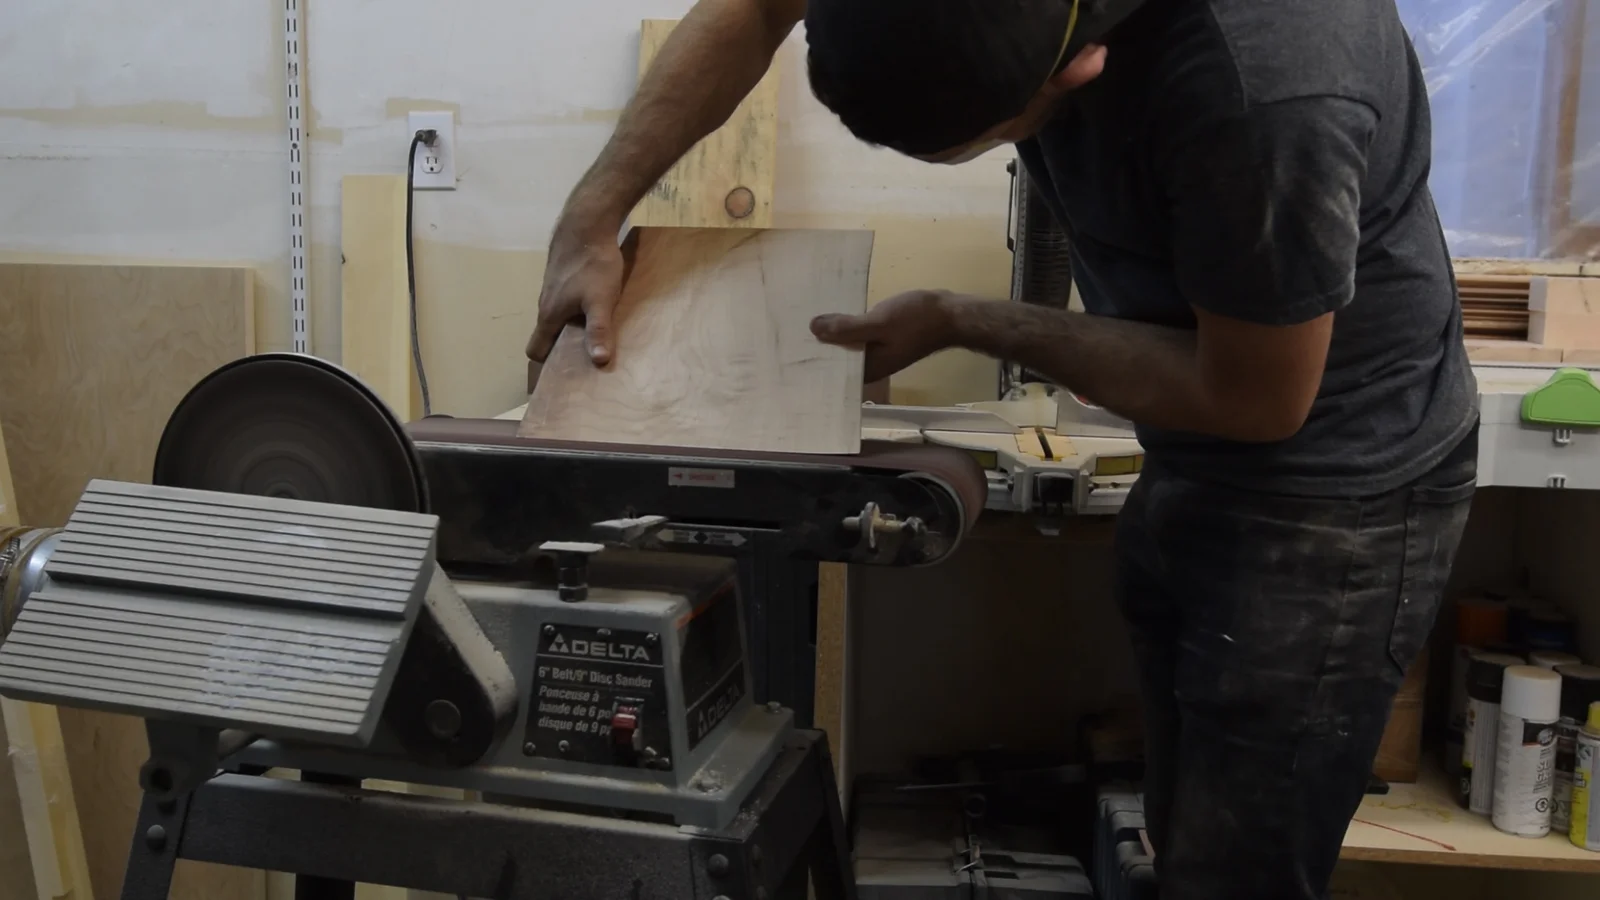
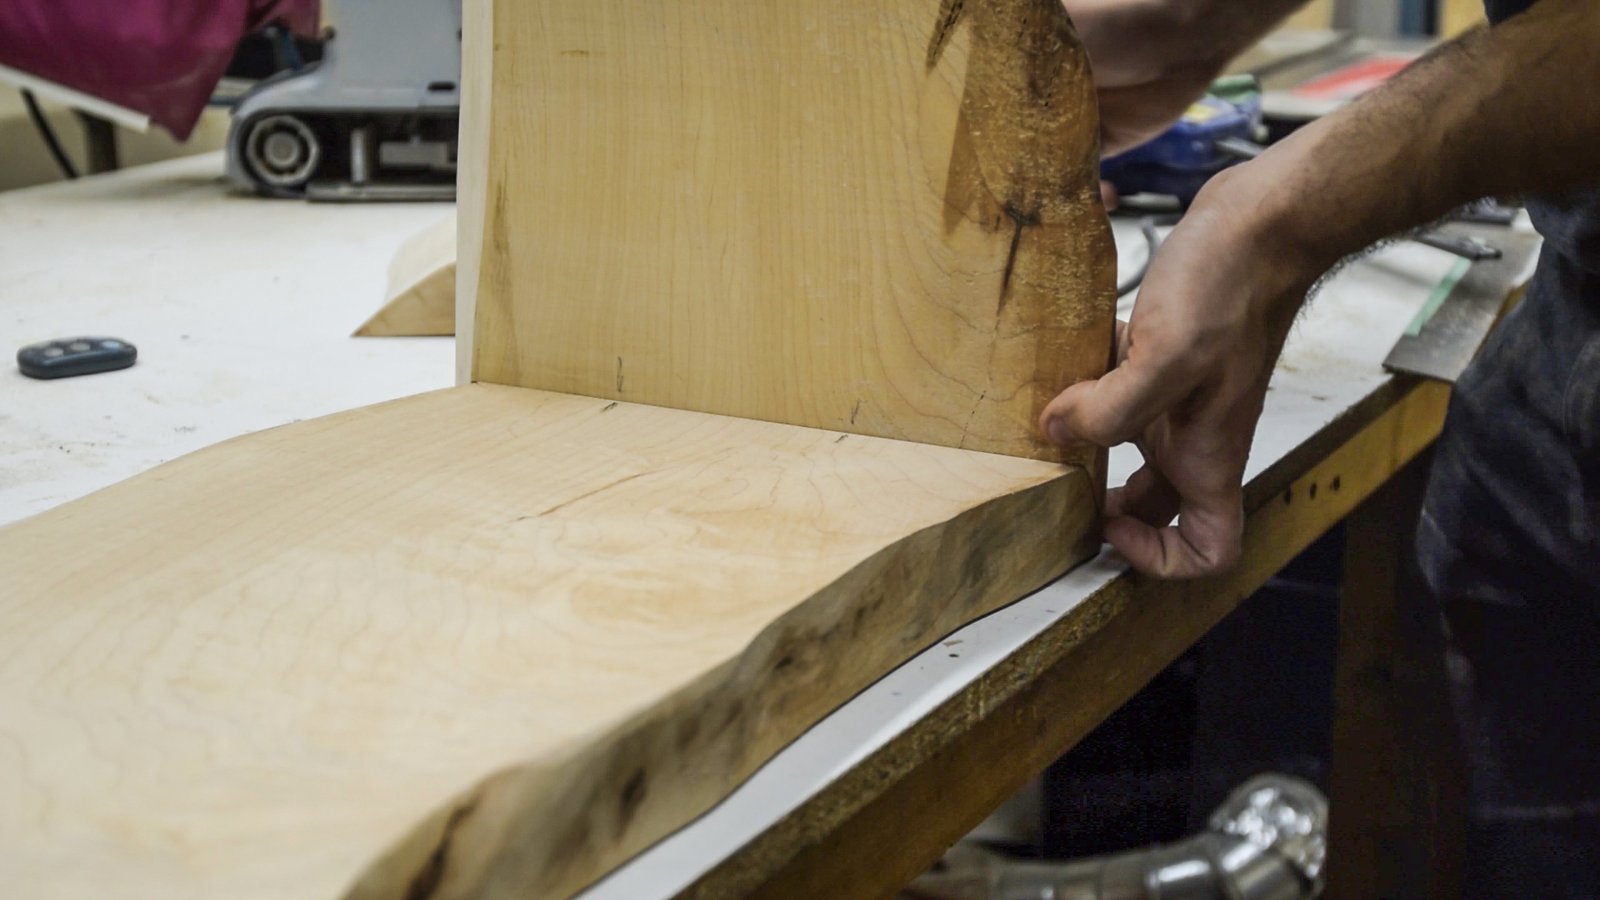
Once I was done making sure my 45 degree angles were perfect I held each of the legs against the top and marked section of the wood that didn’t line up. I then used the belt sander to sand away any undesirable wood. This took a couple of hours. A lot of back and forth.
Sand, check, mark with pencil, sand and repeat.
At this point I wasn’t aiming for perfection, but I got them close enough that I could do the rest of the sanding with a random orbital sander.
Next I held the legs against the top, trying to align the sides and the top as best I could. I then made 2 marks in pencil on both pieces of wood as you can see in the picture.
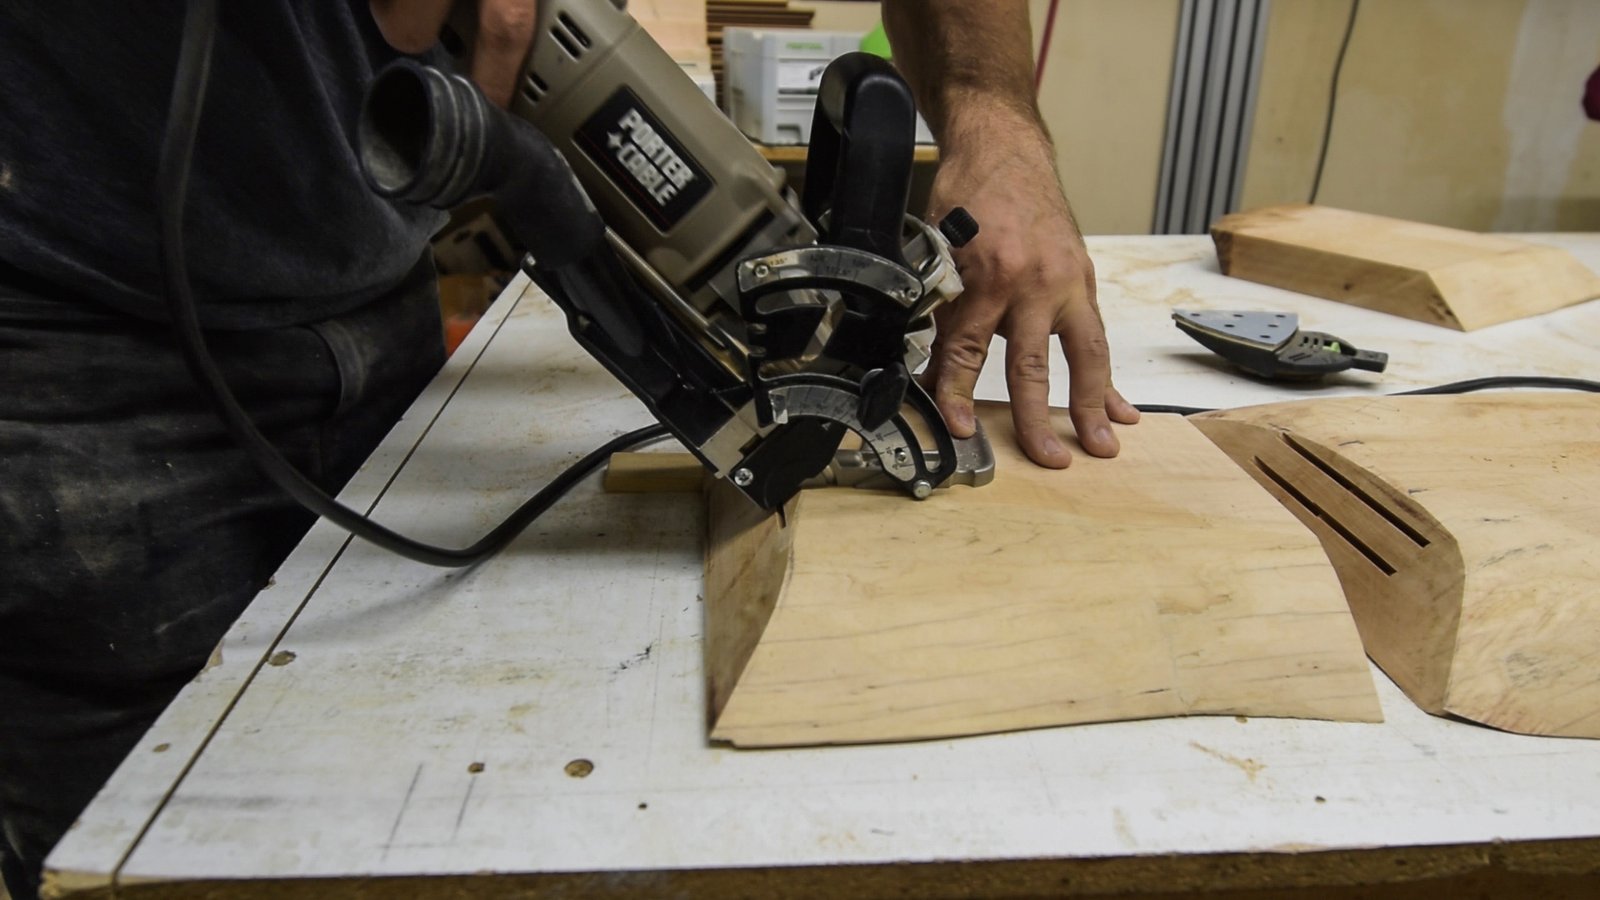
These marks helped me line up my biscuit joiner. I set my biscuit joiner to 45 degrees and routed out 16 biscuit pockets total. 8 per side.
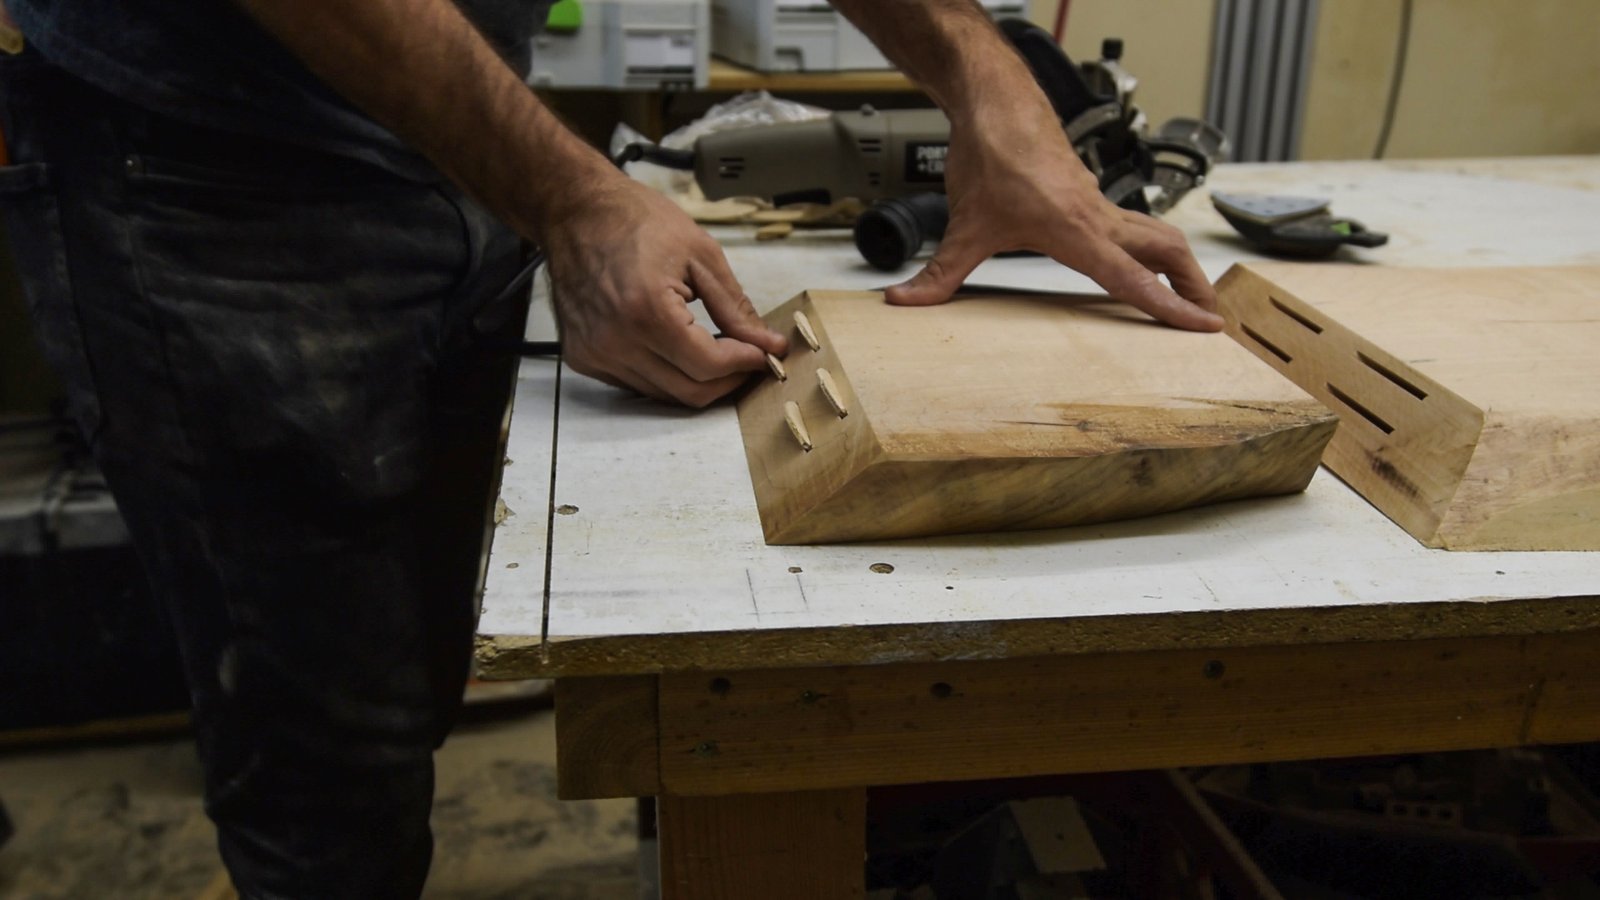
Here I am jamming biscuits into the pockets to make sure that all of my biscuit grooves are deep enough. For those of you unfamiliar with biscuits they are small pieces of wood that are inserted into the pockets. When glued in place they act as the fasteners that hold the whole stand together.
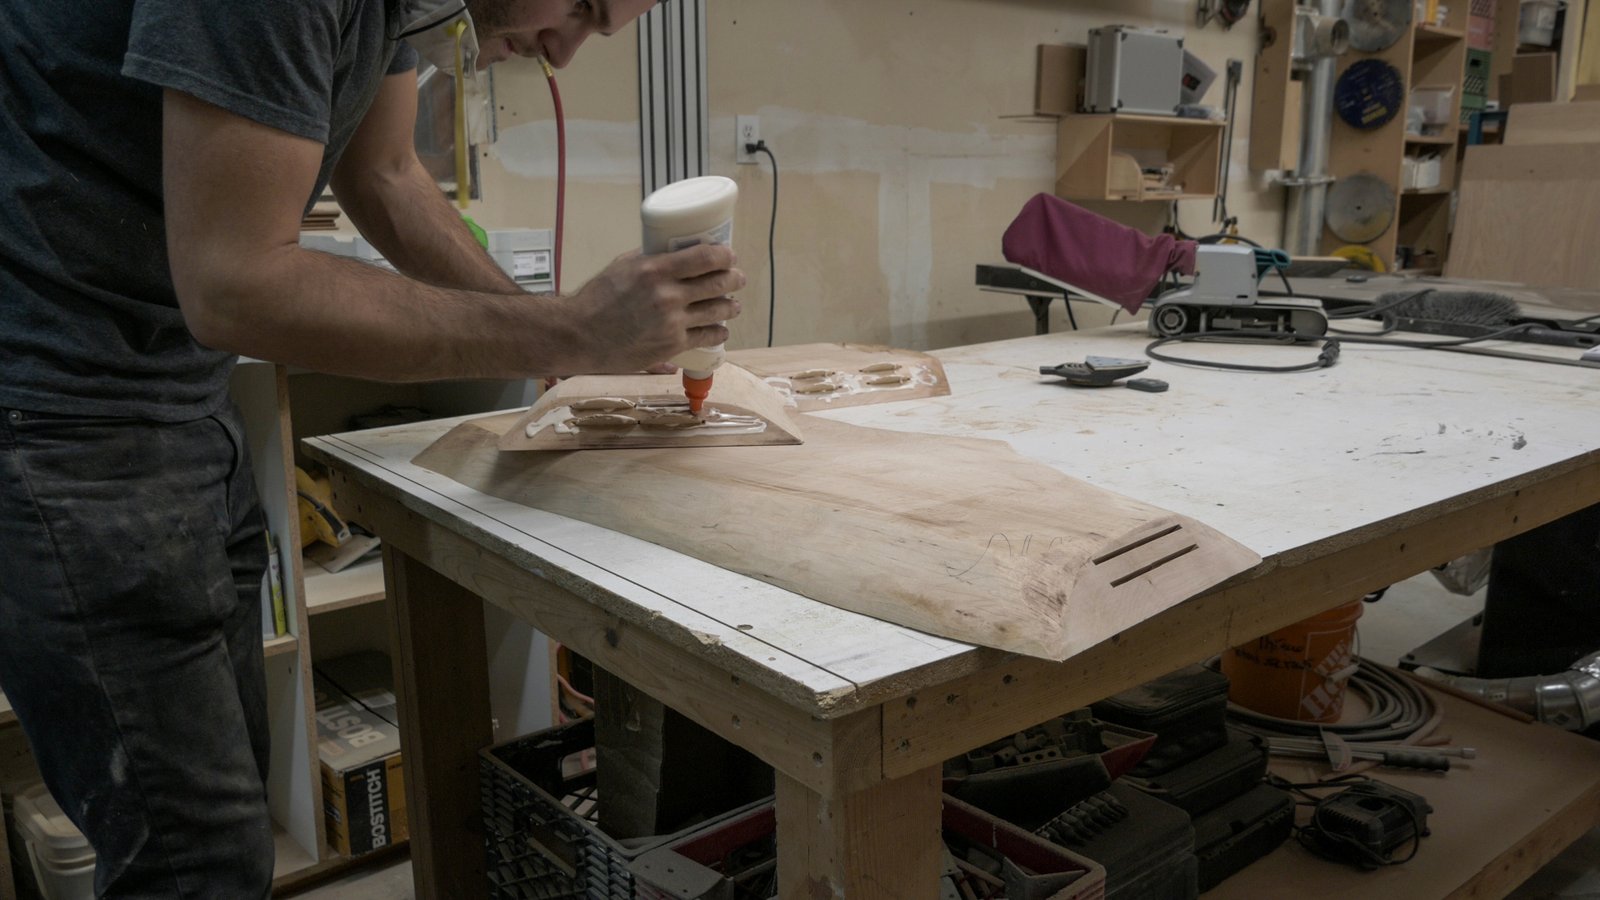
Then I generously applied glue to the whole thing. Make sure you put glue in your biscuit pockets, on the biscuits, and the surfaces you are mating. Glue everything!
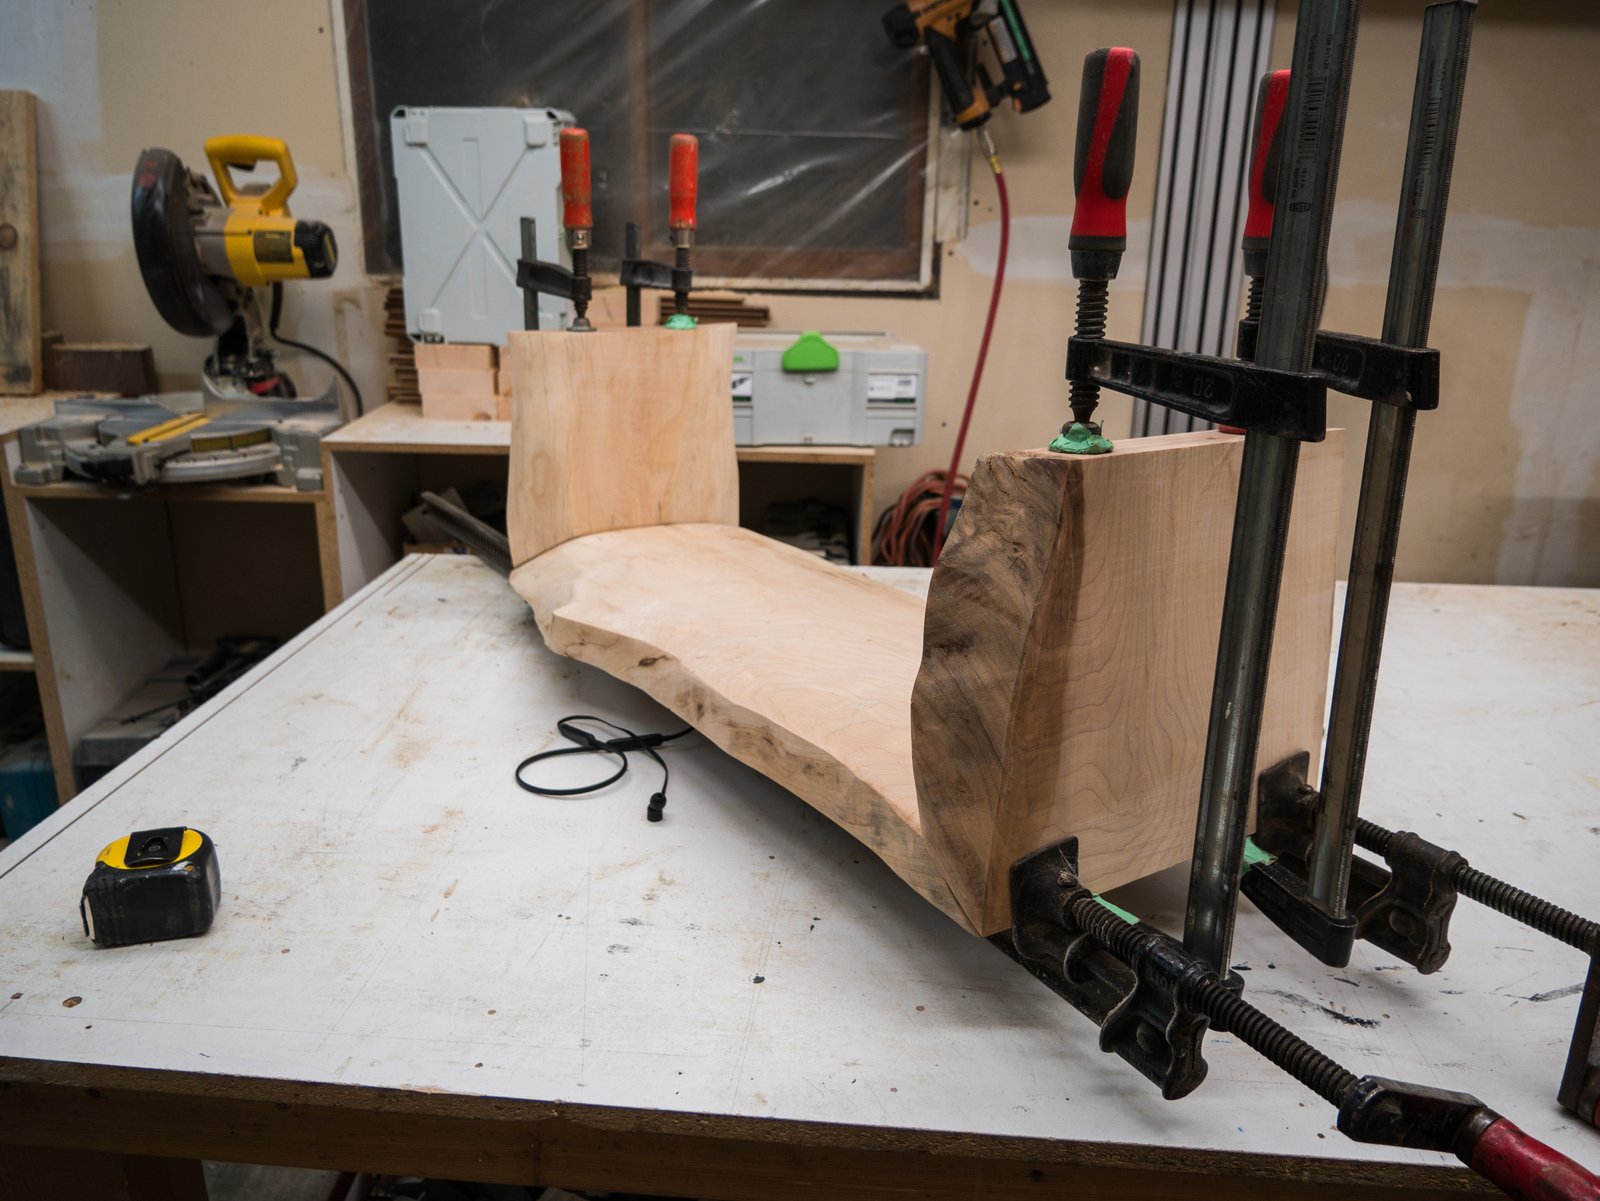
With the glue and biscuits in place it’s time to clamp the whole thing overnight. I really made sure I cranked the clamps down to ensure a good snug fit. At this point I left it for the night to dry.
Good thing too because I was getting tired and ready for bed.
DAY 2
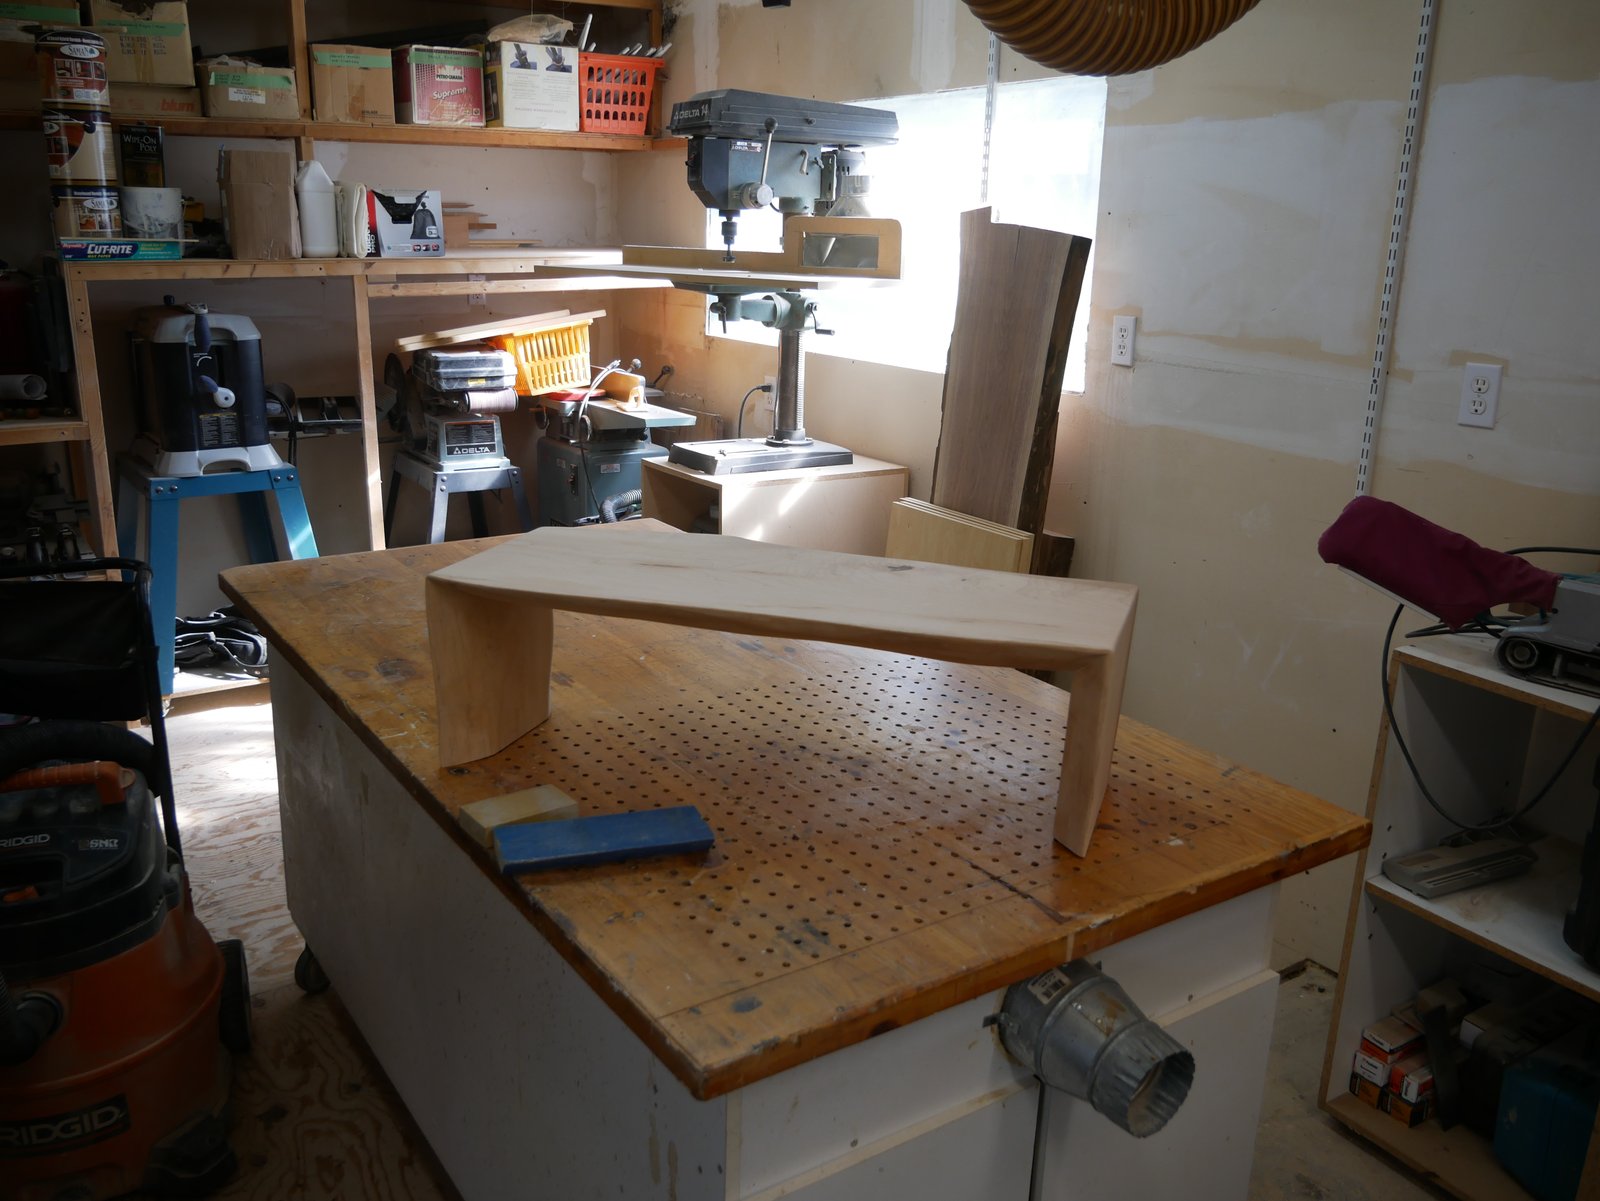
Ahh a new morning, bright sun shining through the shop window! Here’s the stand with the clamps removed. Looking pretty cool already. I’m starting to get excited for the finished product.
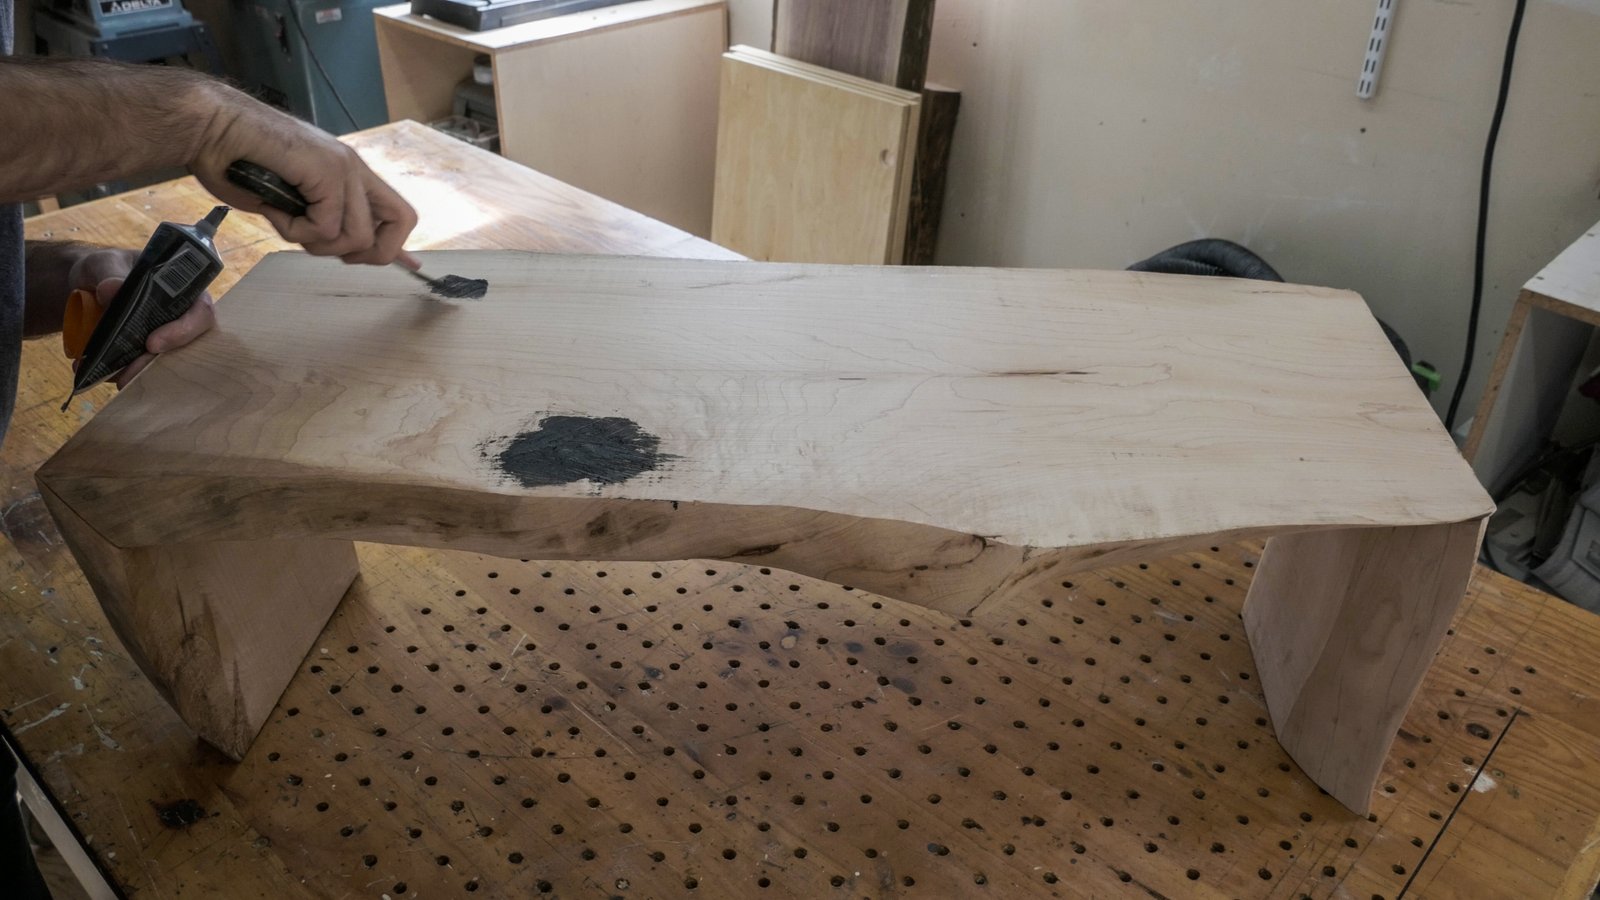
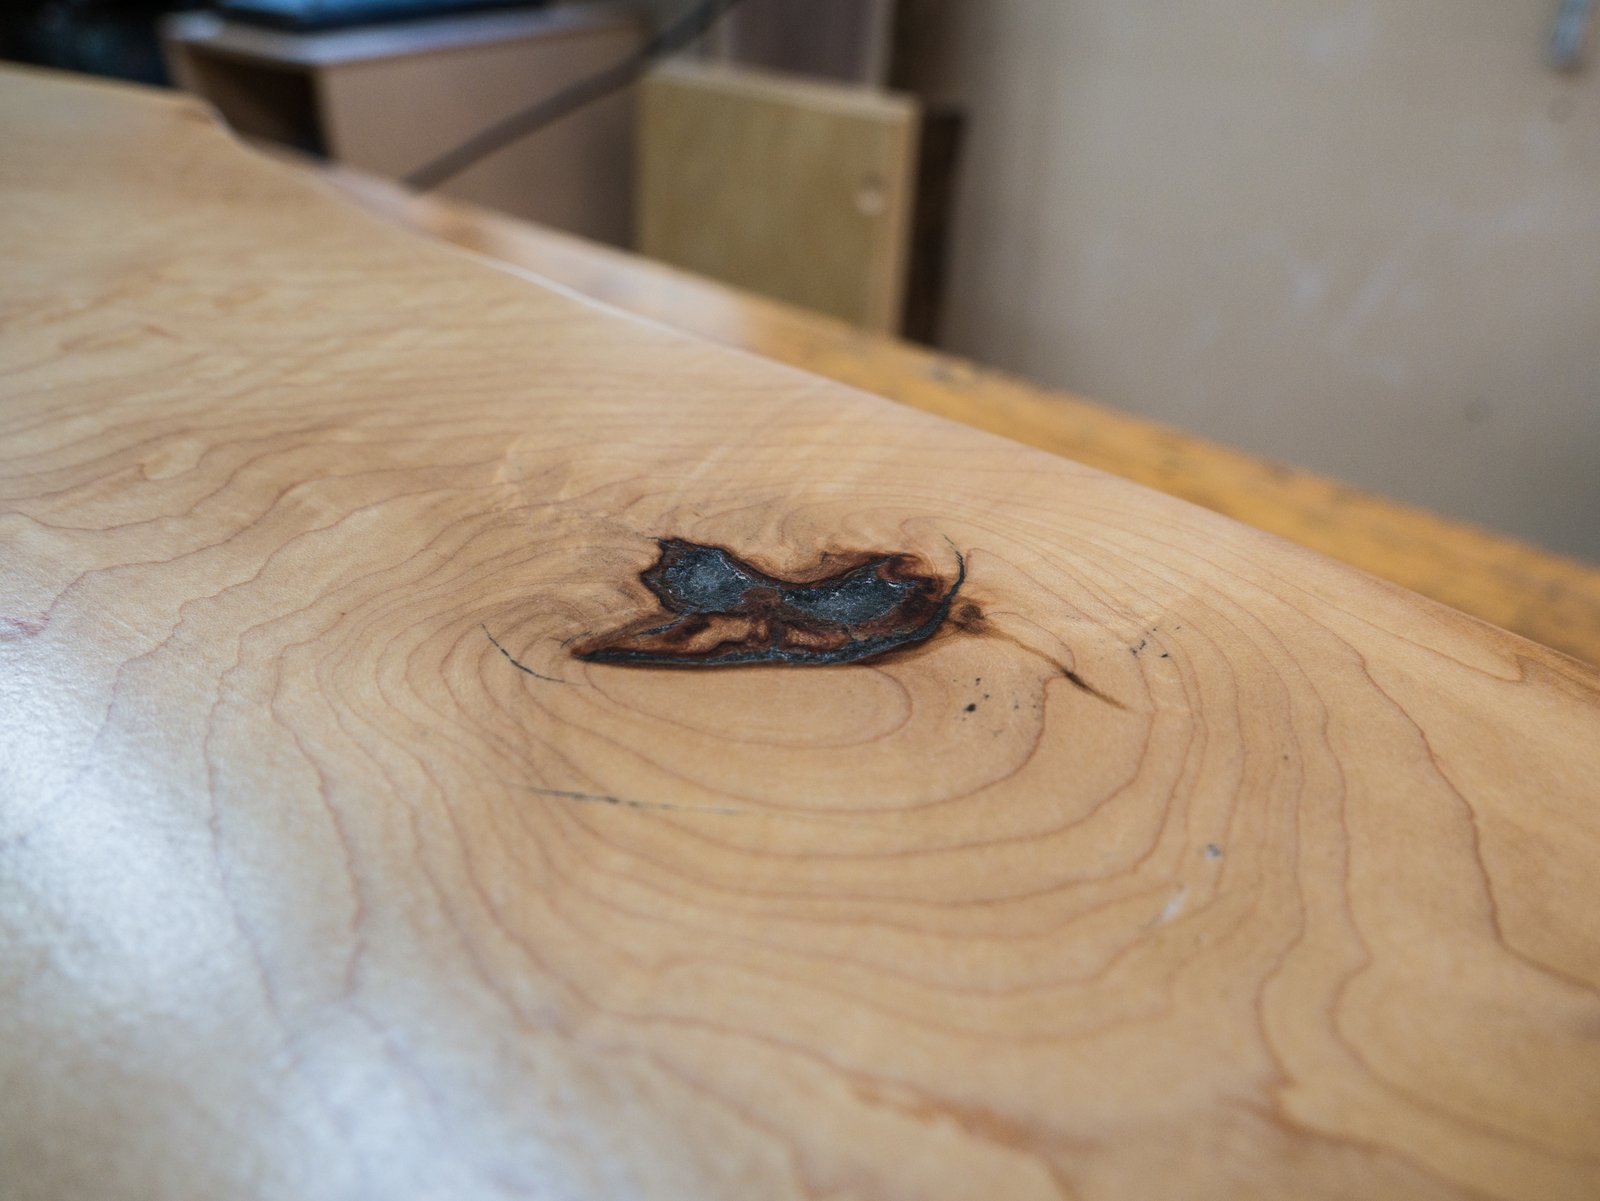
I start the day by filling all the knots and holes with a black ebony wood filler. Some guys like to match the color of the wood, I prefer a contrasting color for knots and holes.
I squeeze the wood filler out of a tube and push it into the cracks and crevices with a putty knife. Make sure you push hard. Remember its better to use too much wood filler than to use too little. Be generous, you’re going to sand most of it off anyways.
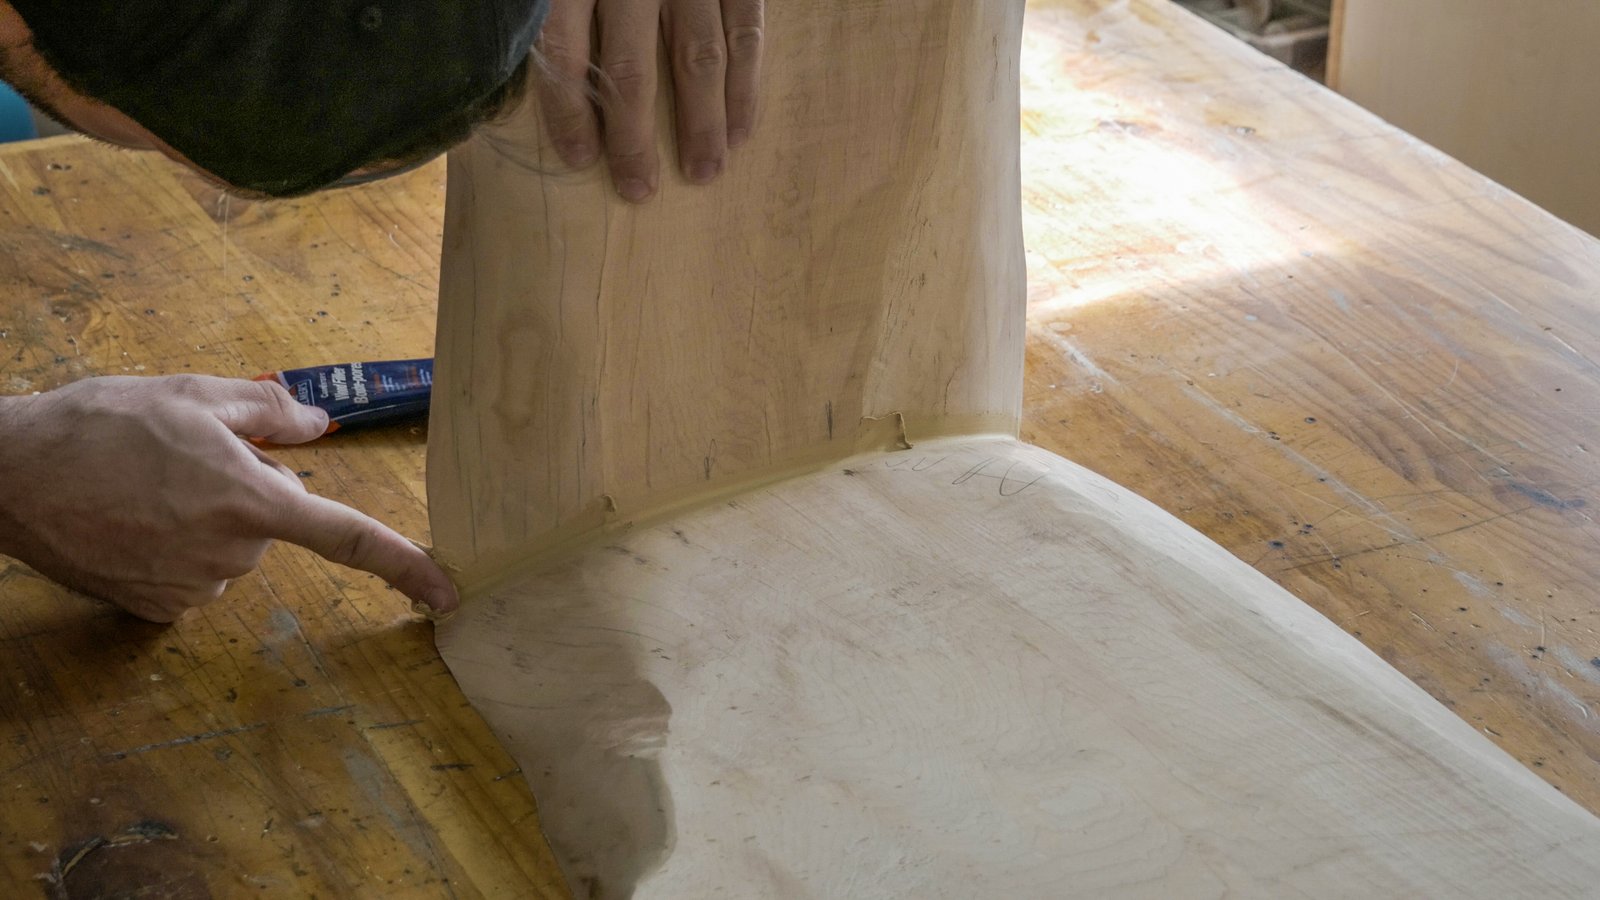
The inside corners weren’t perfect when the glue dried. Not to worry though I used some color matched wood filler to fill the gap. I applied a thick line of it in the corner and used my finger to push it in. I wiped off any excess with my finger and some rags. A little bit messy, but I can sand off any excess later with a sanding sponge.
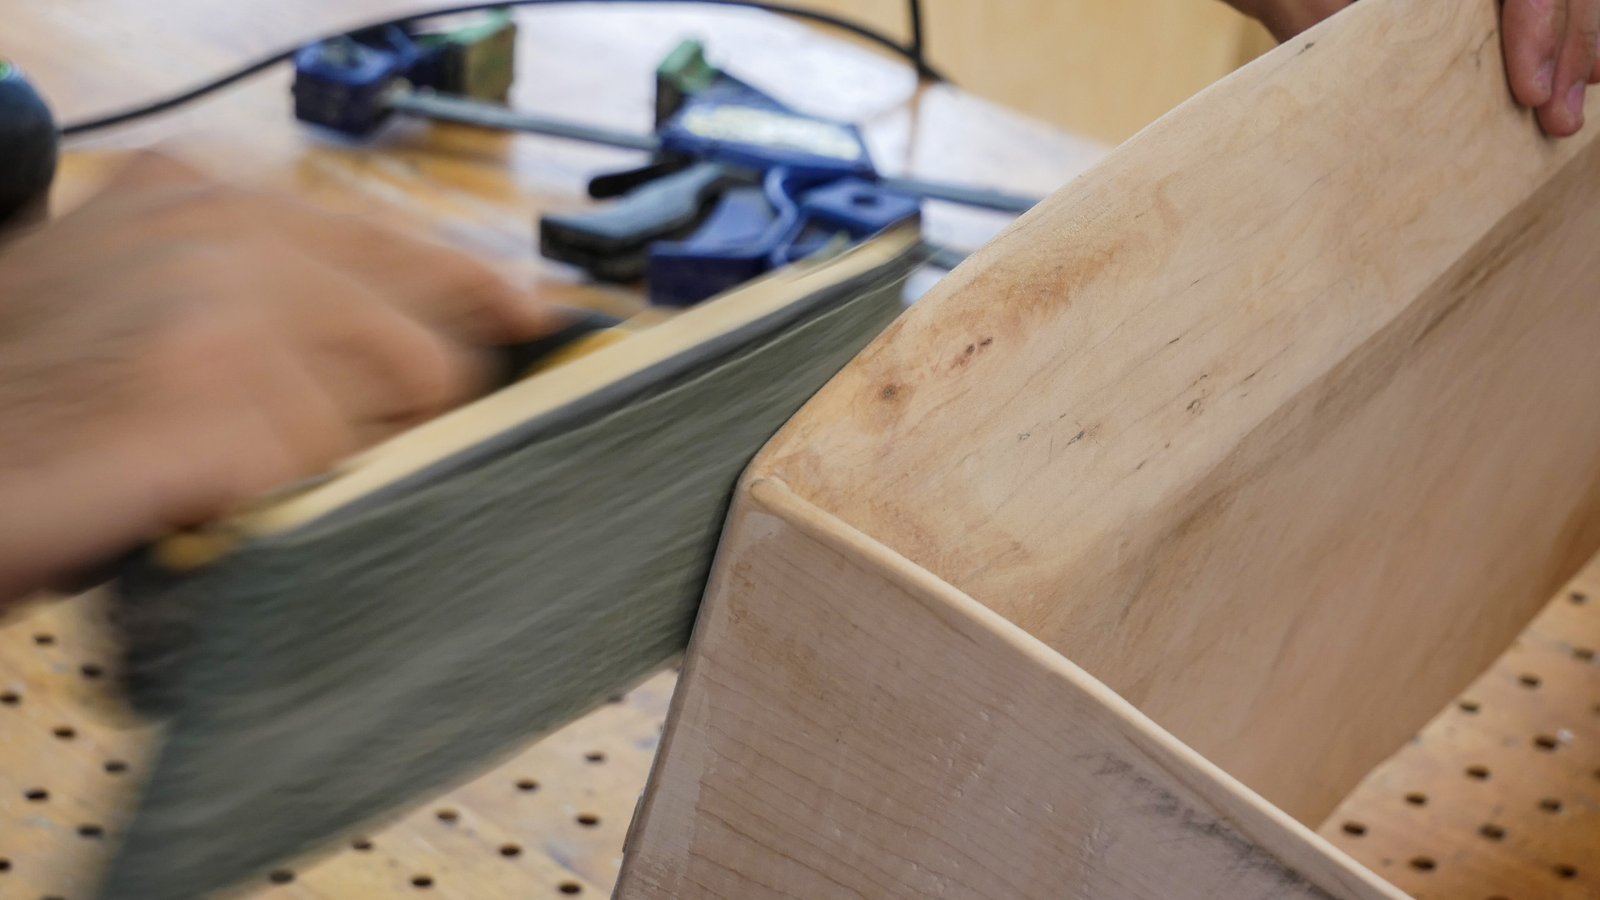
To give the outside edges a nice soft curve I used a trim router with a 1/4 inch roundover bit. This also helped to clean up any irregularities in how the outside edges lined up.
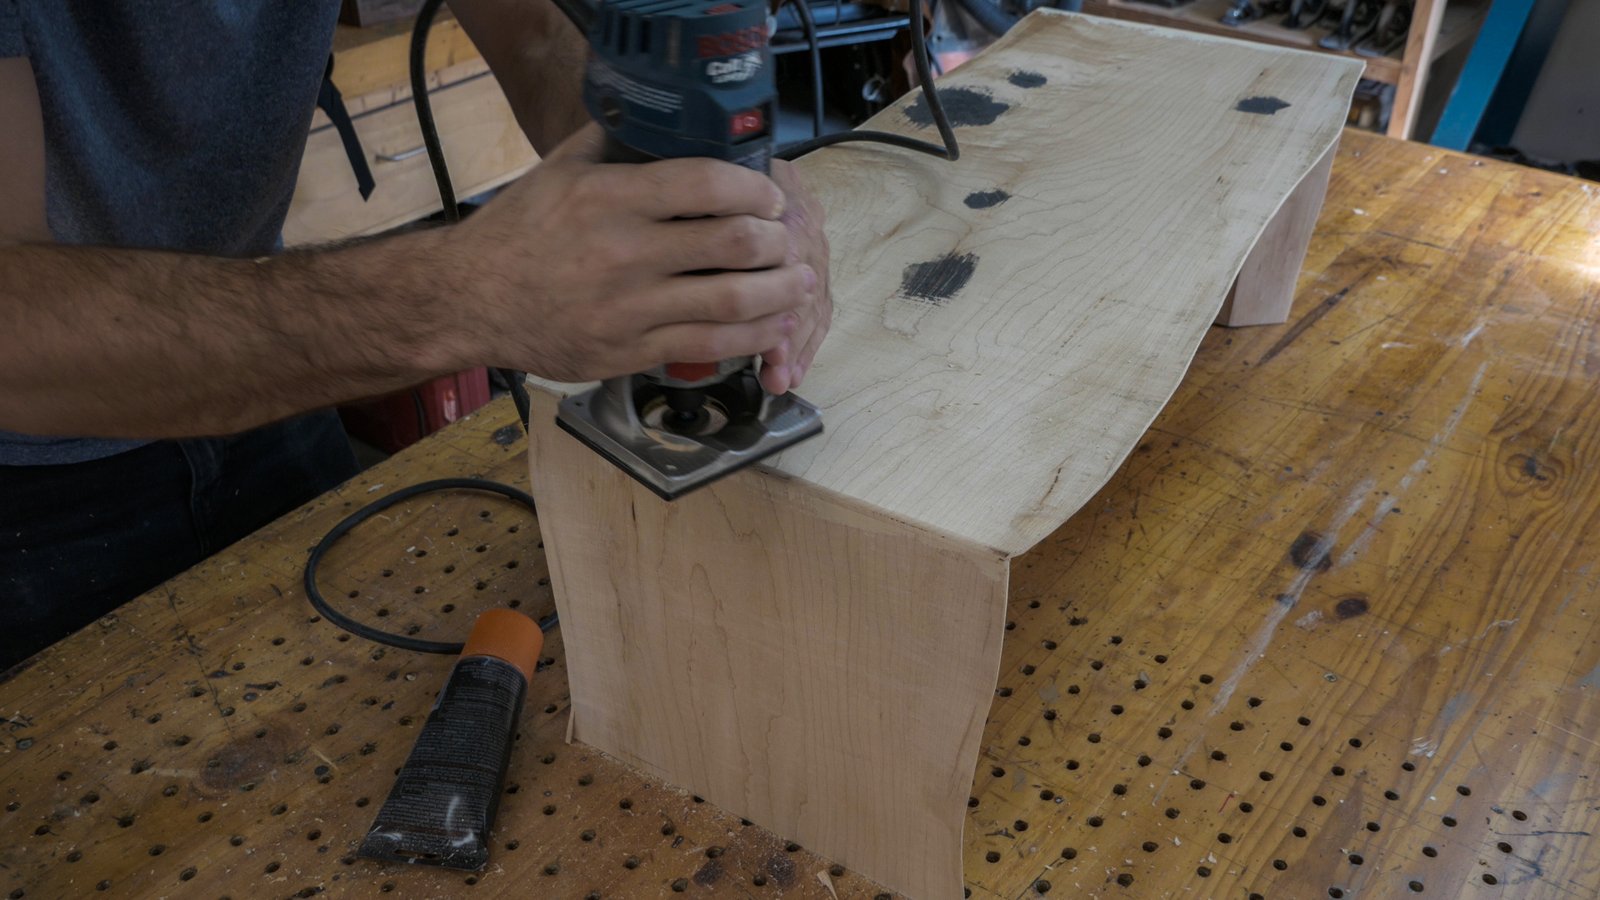
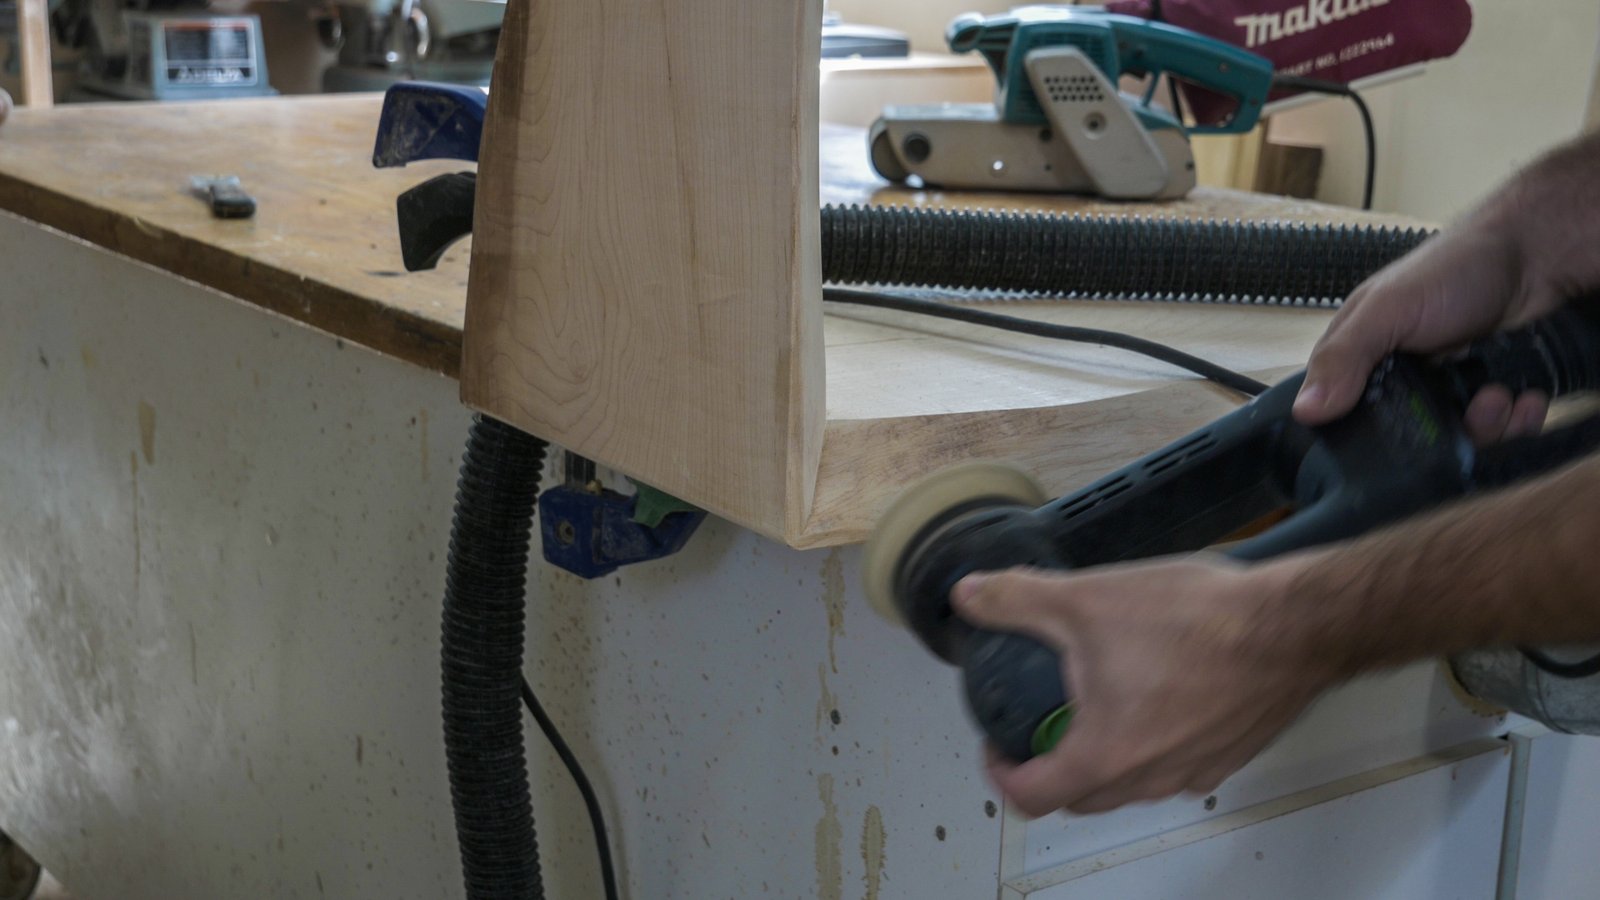
I used a small random orbital sander to further sculpt the corners. An 80 grit sanding pad cut pretty well but there were still a few times when I had to bust out the belt sander to more aggressively remove material.
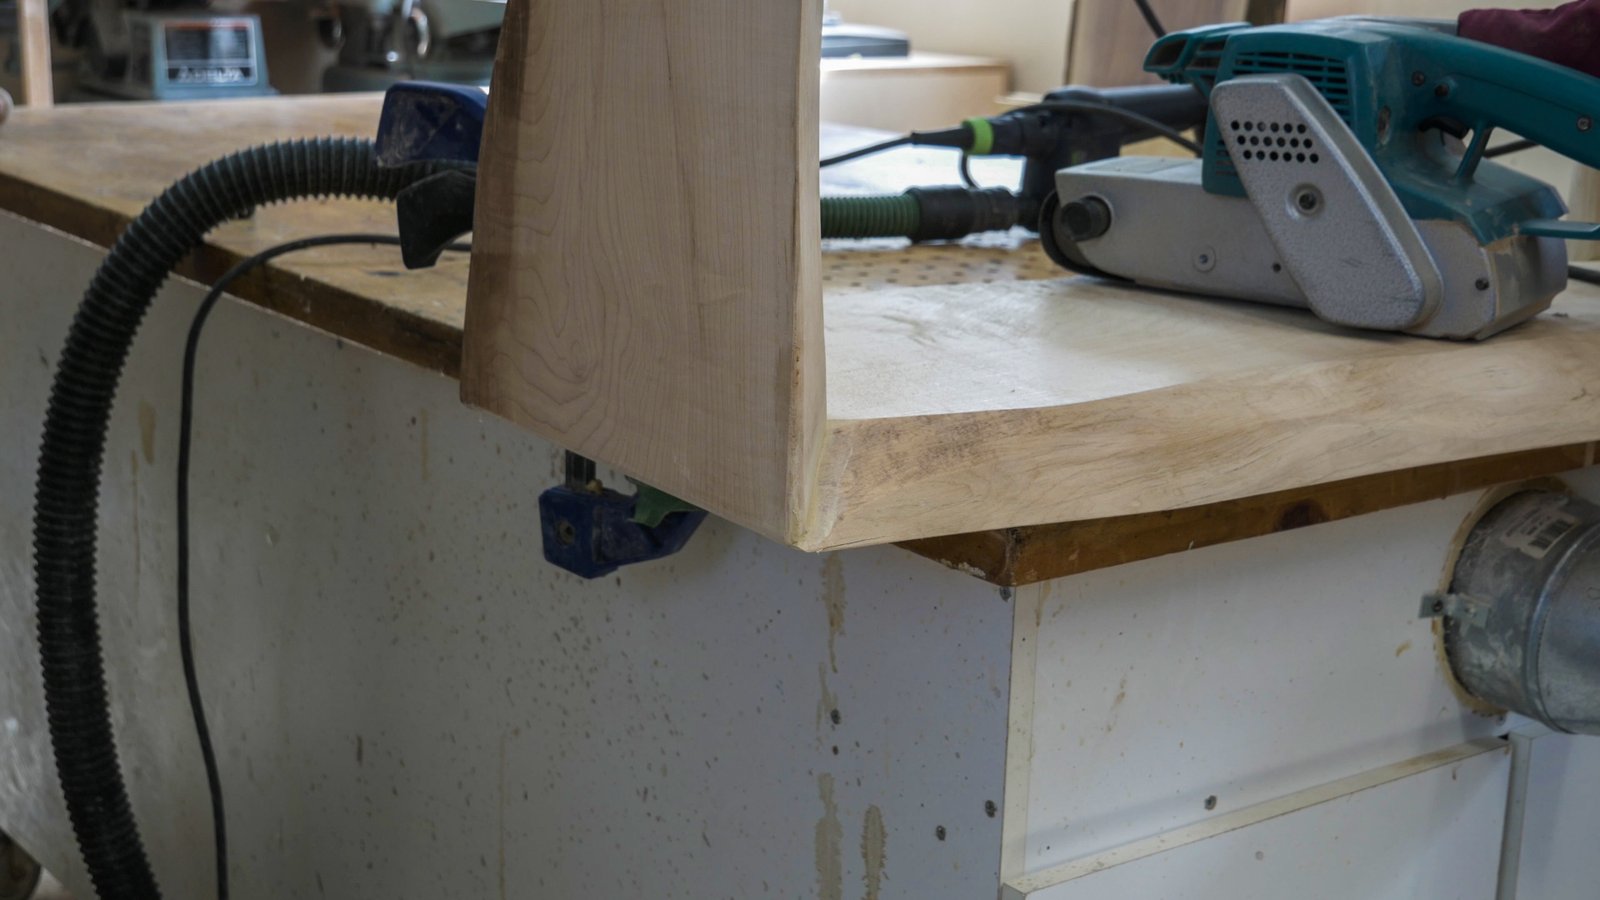
This is what it looked like after I was done with the corners. It’s pretty seamless. When my girlfriend saw it for the first time she asked if I cut the whole thing out of a solid piece of wood. She might have just been being nice, but it did look good.
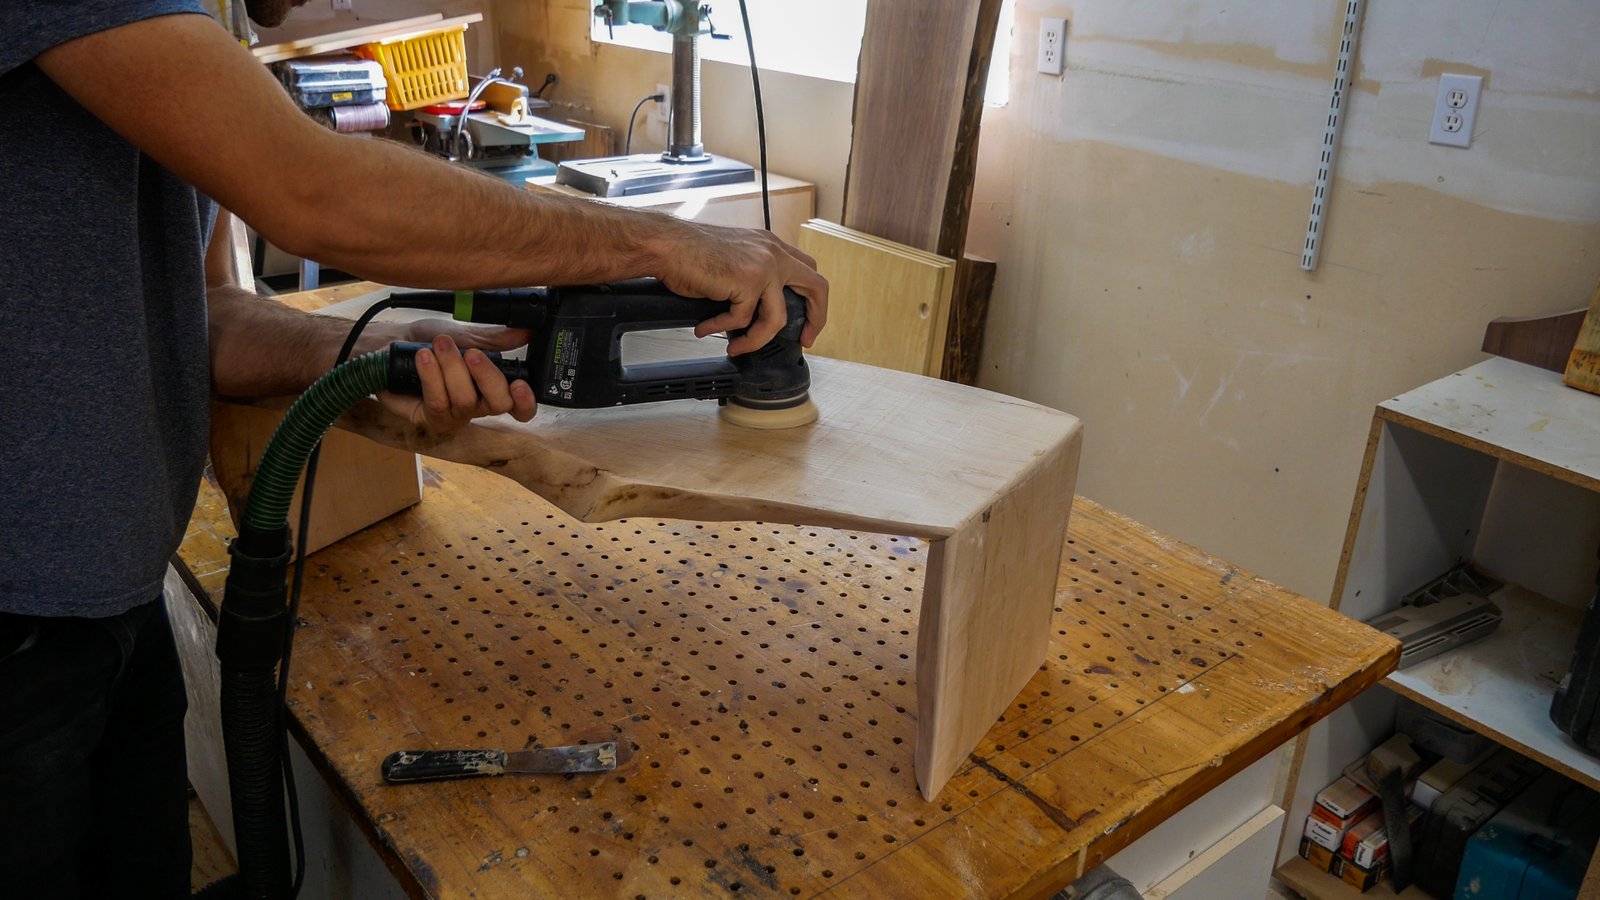
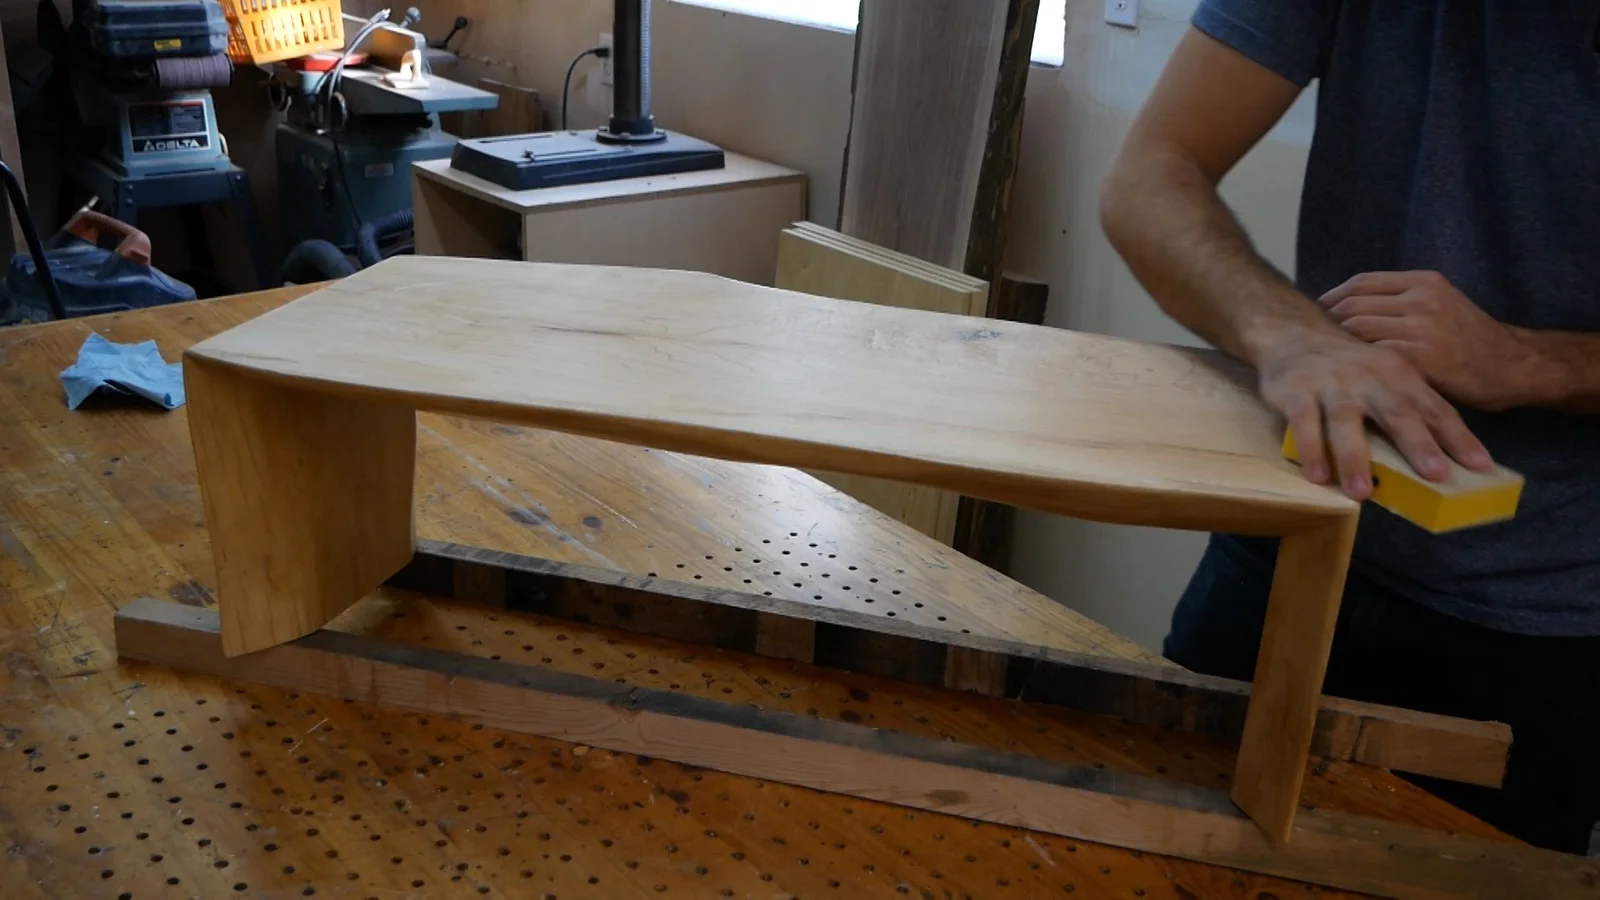
Time to sand the whole surface of the stand. I started with 80 grit to smooth out any imperfections in the surface and moved into 120 and 180 grit sand paper to give the surface a really smooth finish. Maple is really hard so even while working with 80 grit sand paper it took quite a bit of time to smooth some parts. Be patient and take your time, it will pay off.
No substitute for a good sanding block when it comes to sanding edges and doing a final pass. I find that sanding with a random orbital sander or belt sander can leave a lot of hard edges, I went over the whole stand and rounded off any left over hard edges.
In order to prep for the clear coat I blew the stand off with compressed air and vacuumed the my whole work area. Nothing is worse than laying down a nice smooth coat and a bunch of dust getting trapped in it. I do my best to keep my work area clean but when it comes to finishing I take that shit seriously!
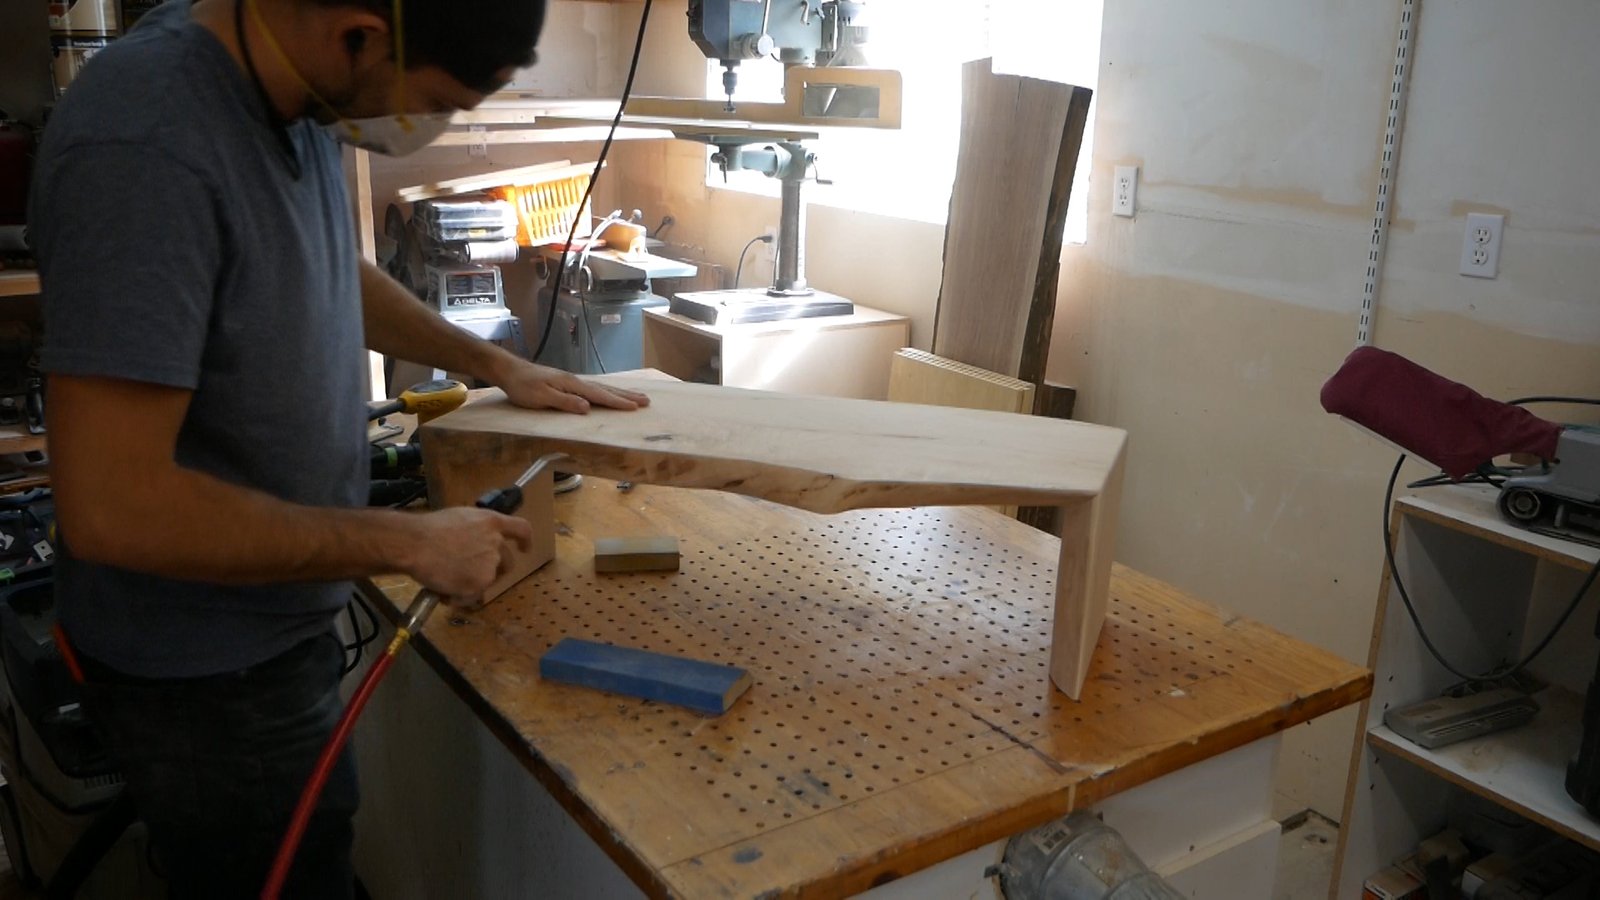
I actually used a floor varnish as my clear coat. I’ve been working with this stuff a lot on another project and its super forgiving. It almost always dries smooth, even if you really botch the application. Plus it’s a floor varnish so it’s super tough. It has a satin finish with a slight yellow hue. This floor varnish is a hybrid oil so it dries really quickly and cleans up with water.
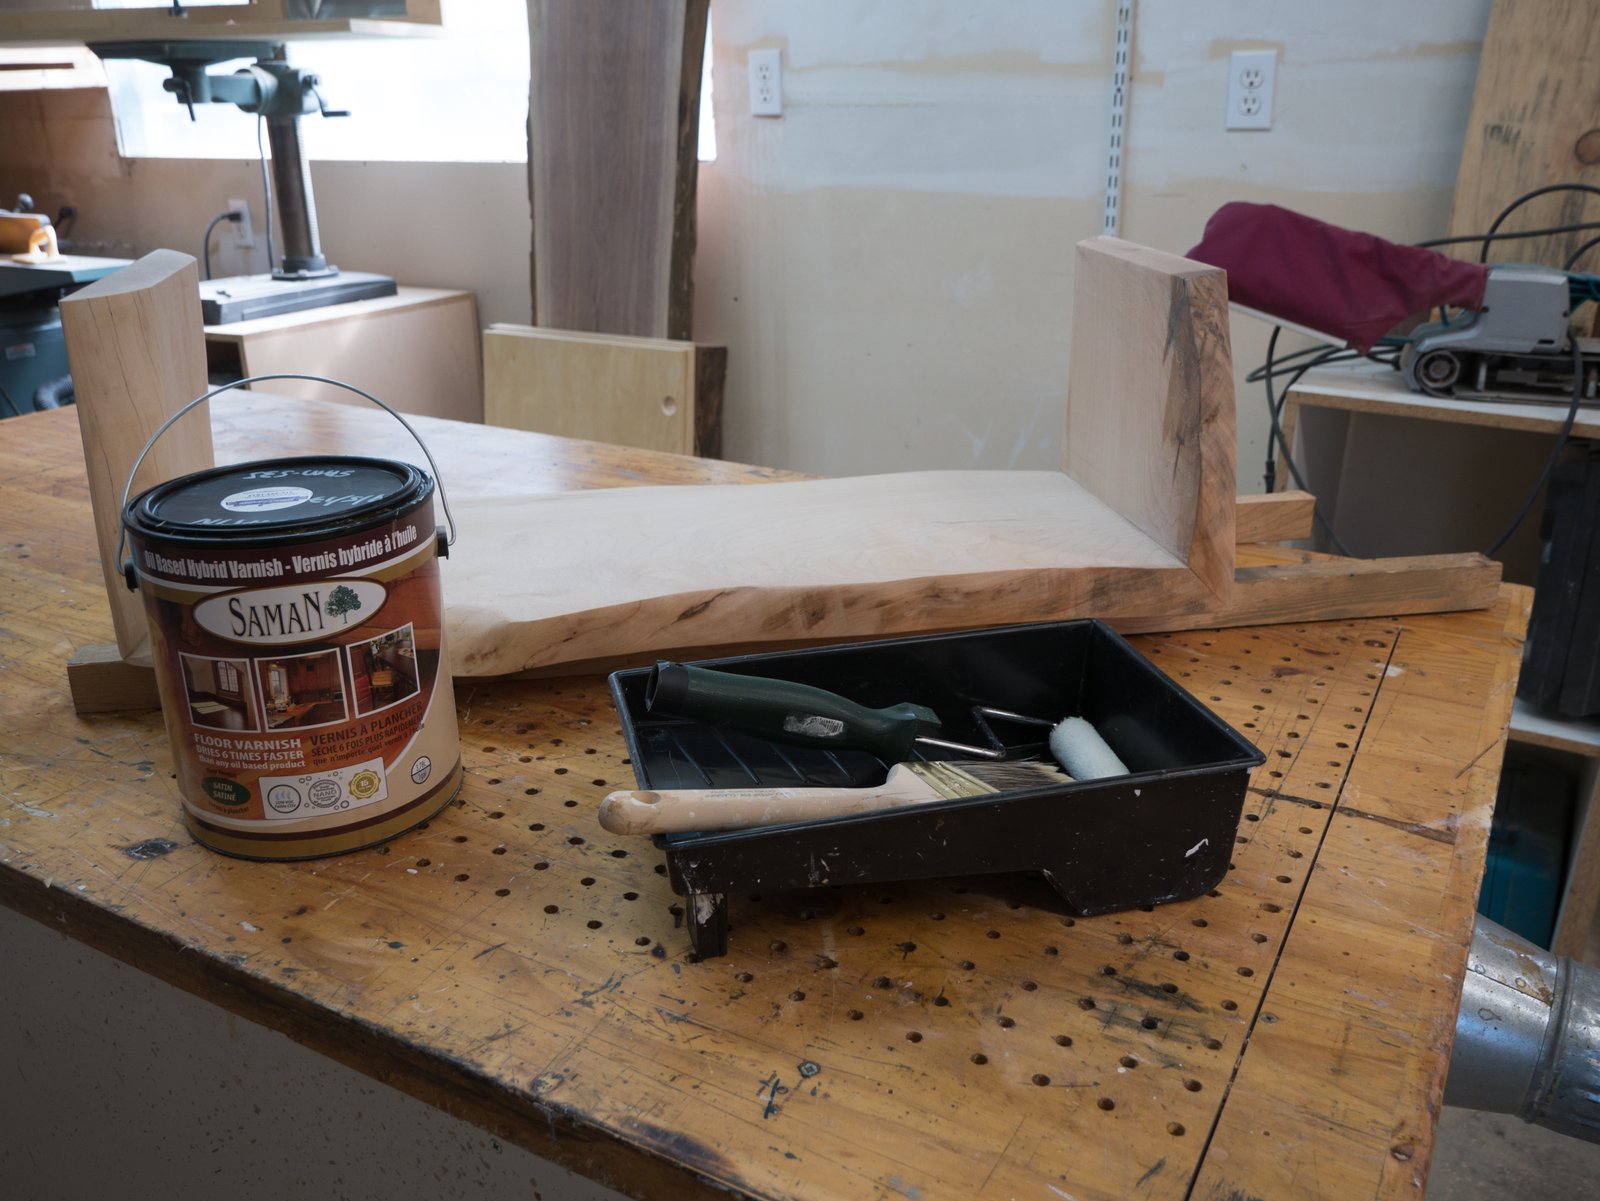
I rolled it on with a really low nap mini roller. Avoid the foam rollers, you’ll get a lot of bubbles. Best to use a lint free fiber roller. I ended up doing 4 coats because this stuff dries so quick.
To get a nice finish I find it’s best to do many thin coats. Don’t worry too much about getting a perfect application. Just get it on quickly and let it dry. I used a high quality paint brush to cut the inside corners where the roller wont reach.
Between every coat I sanded the whole thing with a 320 grit sponge sanding block. Try not to sand off everything you just put on, just take off any high points or imperfection.
After sanding make sure you get all of your dust off. You can use a brush, but I prefer blue shop towels. They are really tacky for fine dust and do a great job not leaving anything behind.
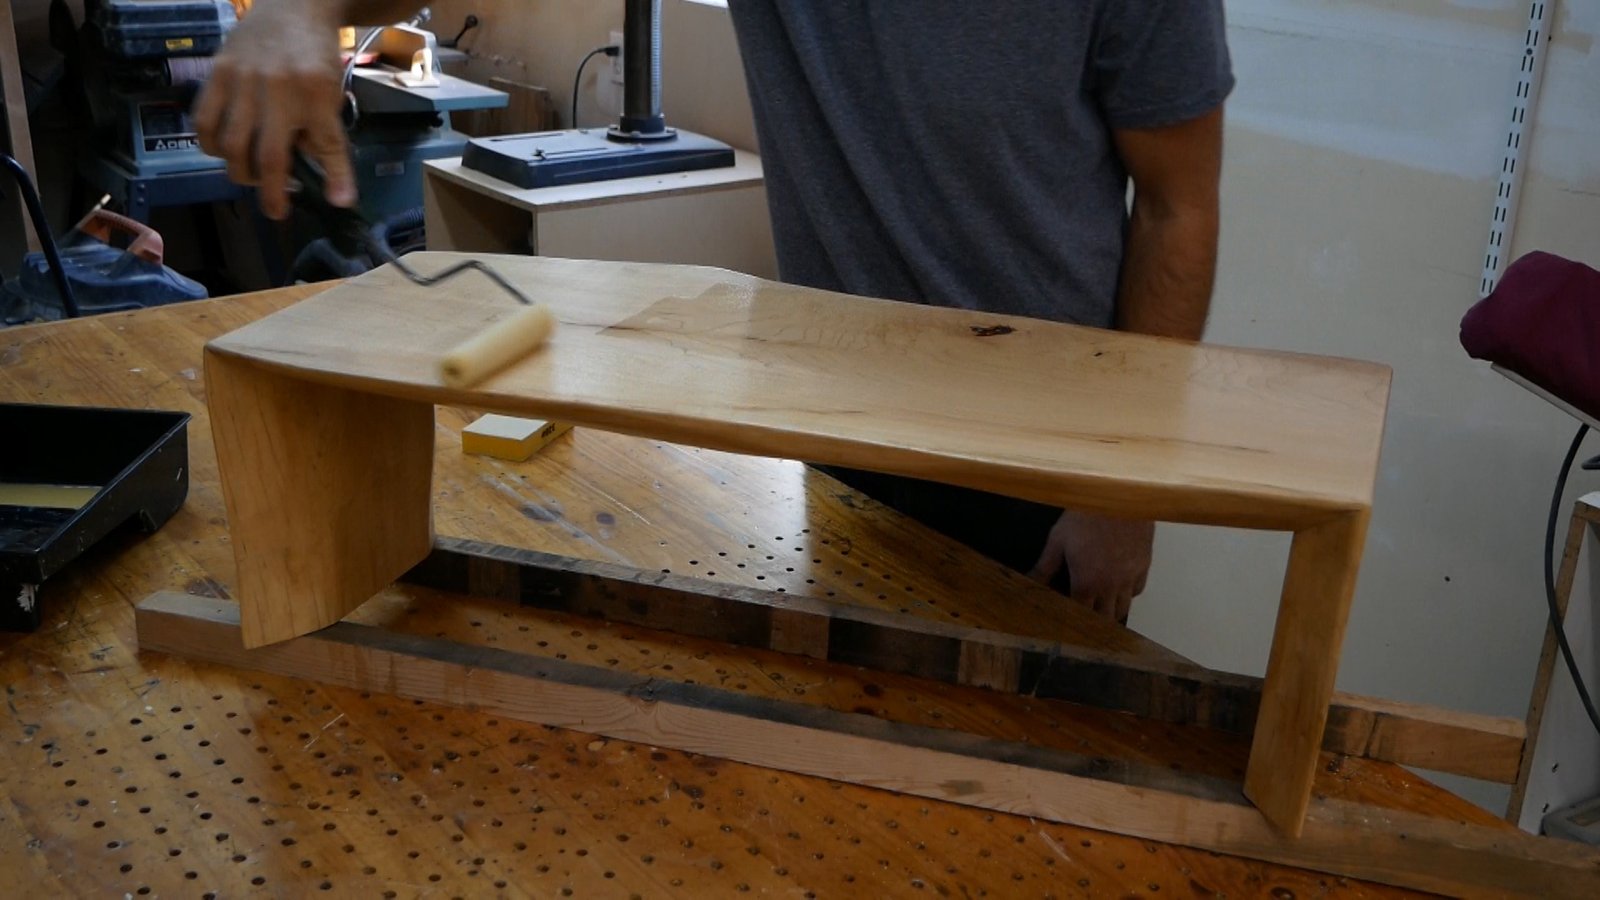
Here you can see a close up of the finish. It isn’t glossy, but it isn’t matte either. It’s comfortably in the middle. I like satin finishes because the wood still looks like real wood, but its easy to clean and dust.
After 4 applications of clear coat it looked like this!
Like I said I made this stand to add some height to my bedroom tv. When I was in bed and watching TV my feet would often get in the way of the screen. Well not anymore!
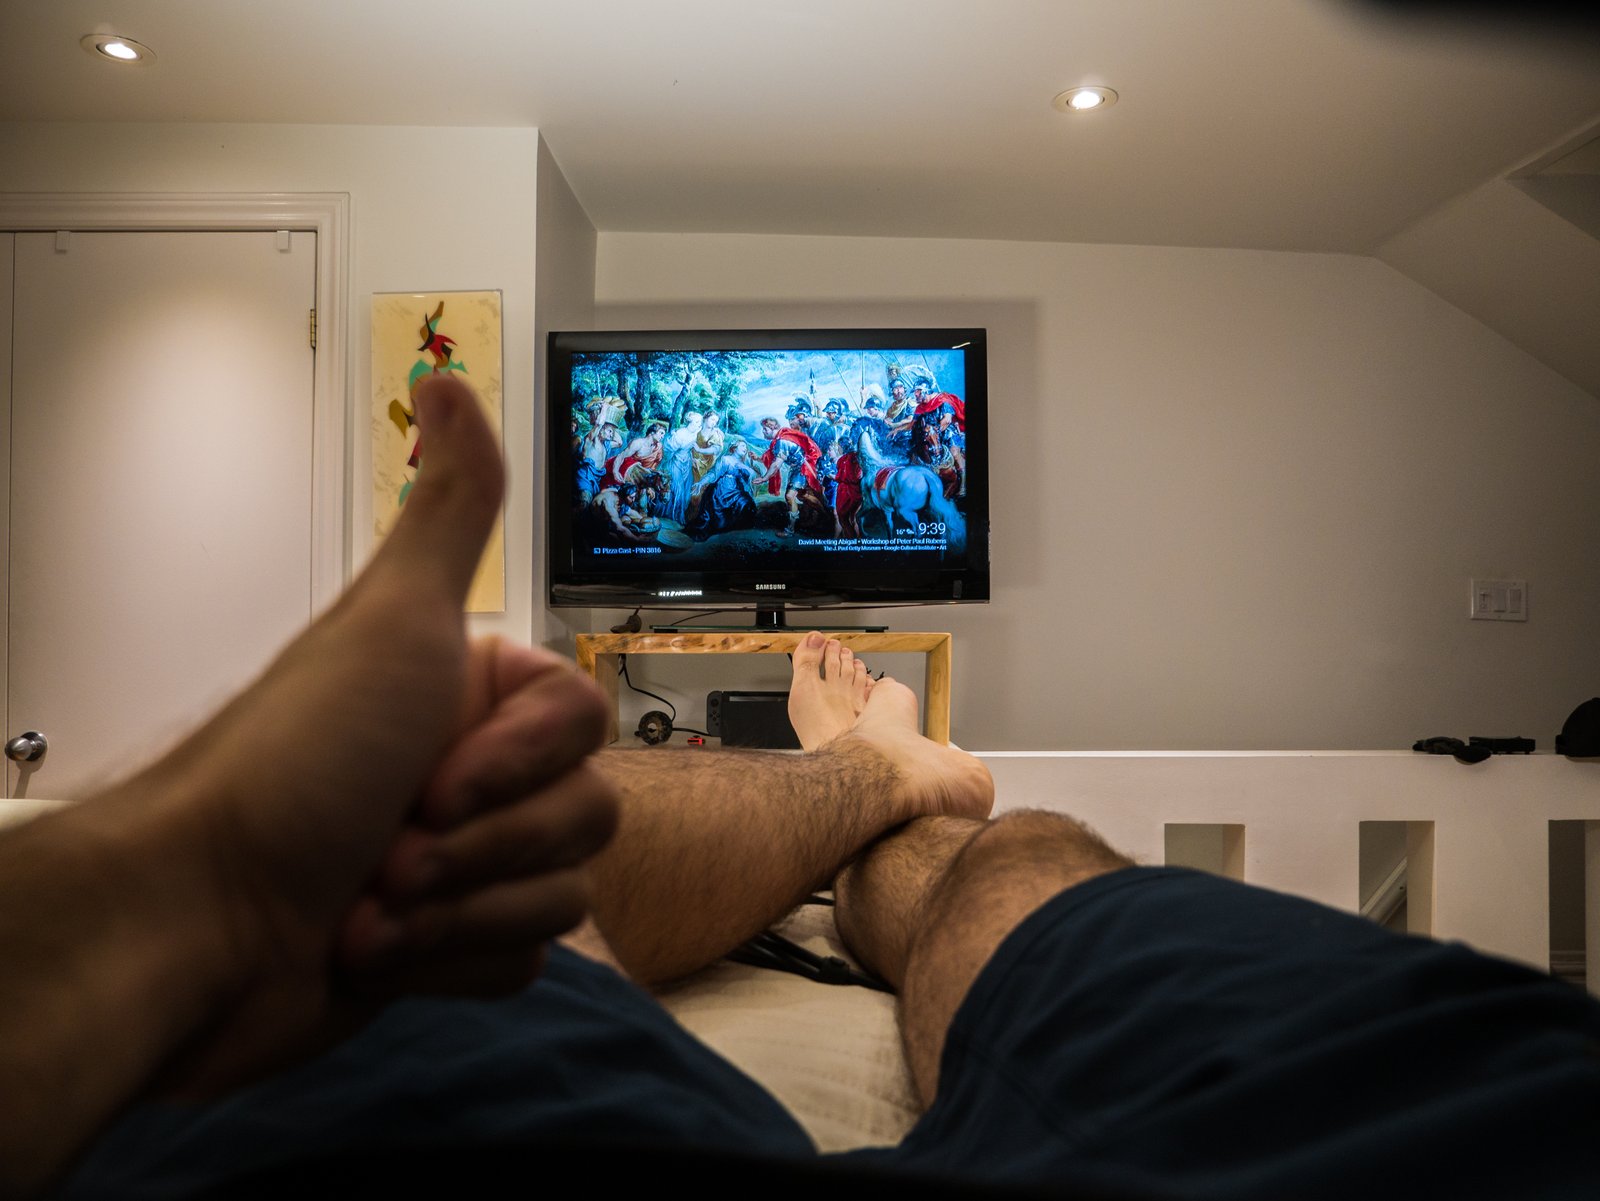
Now I just need to get a slicker looking TV to match the sand.
Thanks for reading and I hope you enjoyed this project. Check out some of my other projects and drop a comment below if you have any questions about this project!