Industrial Stacking Cart Table
Ok, I’m back. Took a brief couple of weeks off around the holidays. Just enough time to recharge the batteries and get ready for a new year.
So here’s my first project back. Not bad looking if I do say so myself. This stacking cart went from barely holding itself together to looking sharp and new. Ready to start its new life as a coffee table instead of being used to store gold and cash. Hmmm, come to think of it, maybe that’s a bit of a demotion. Yes you heard me right. This stacking cart came straight from the vaults of the Bank of Canada.
Apparently until just recently this little guy served our country by storing cash and precious metals in an underground vault. Or at least that’s what the guy I bought it from on Craigslist told me haha, who knows. Might have just been trying to get me to pay more for it.
Here’s how it looked when I first started. This thing has definitely seen better days. I’m didn’t do it any favors by storing it outside for a week before starting this project either.
This stacking cart measures about 24″ x 36″ x 12″. I paid 40 dollars for it. Might have over paid, but I see the potential in it.
Let’s get to work.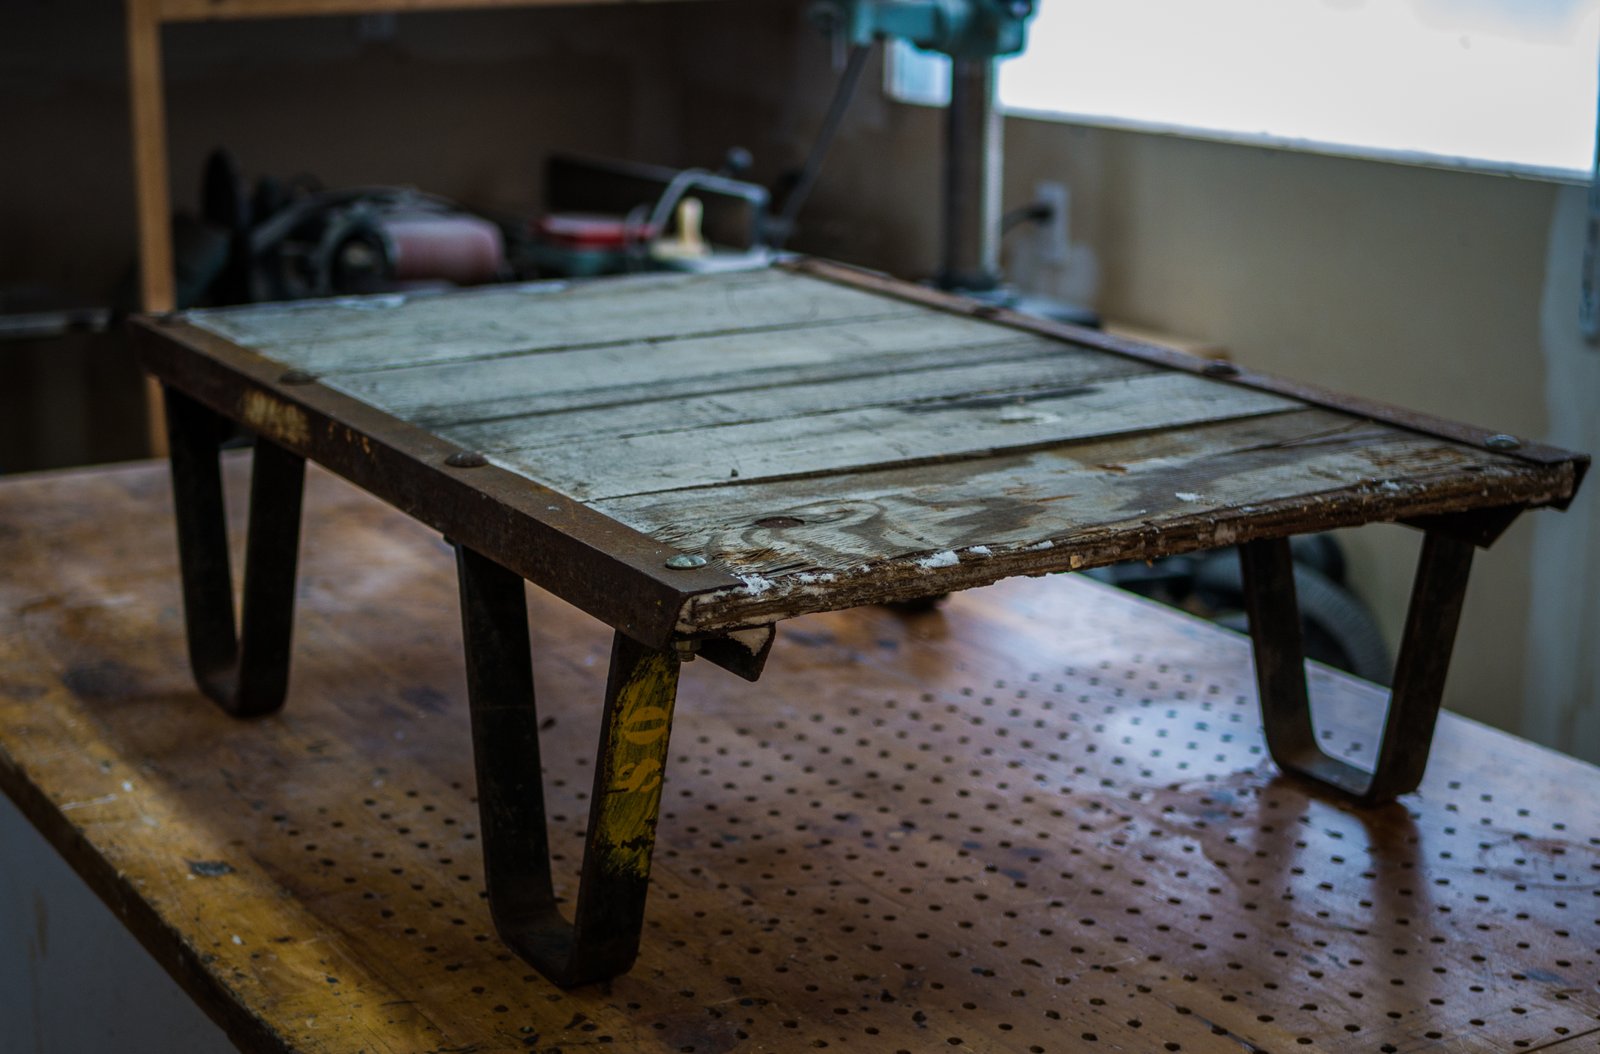
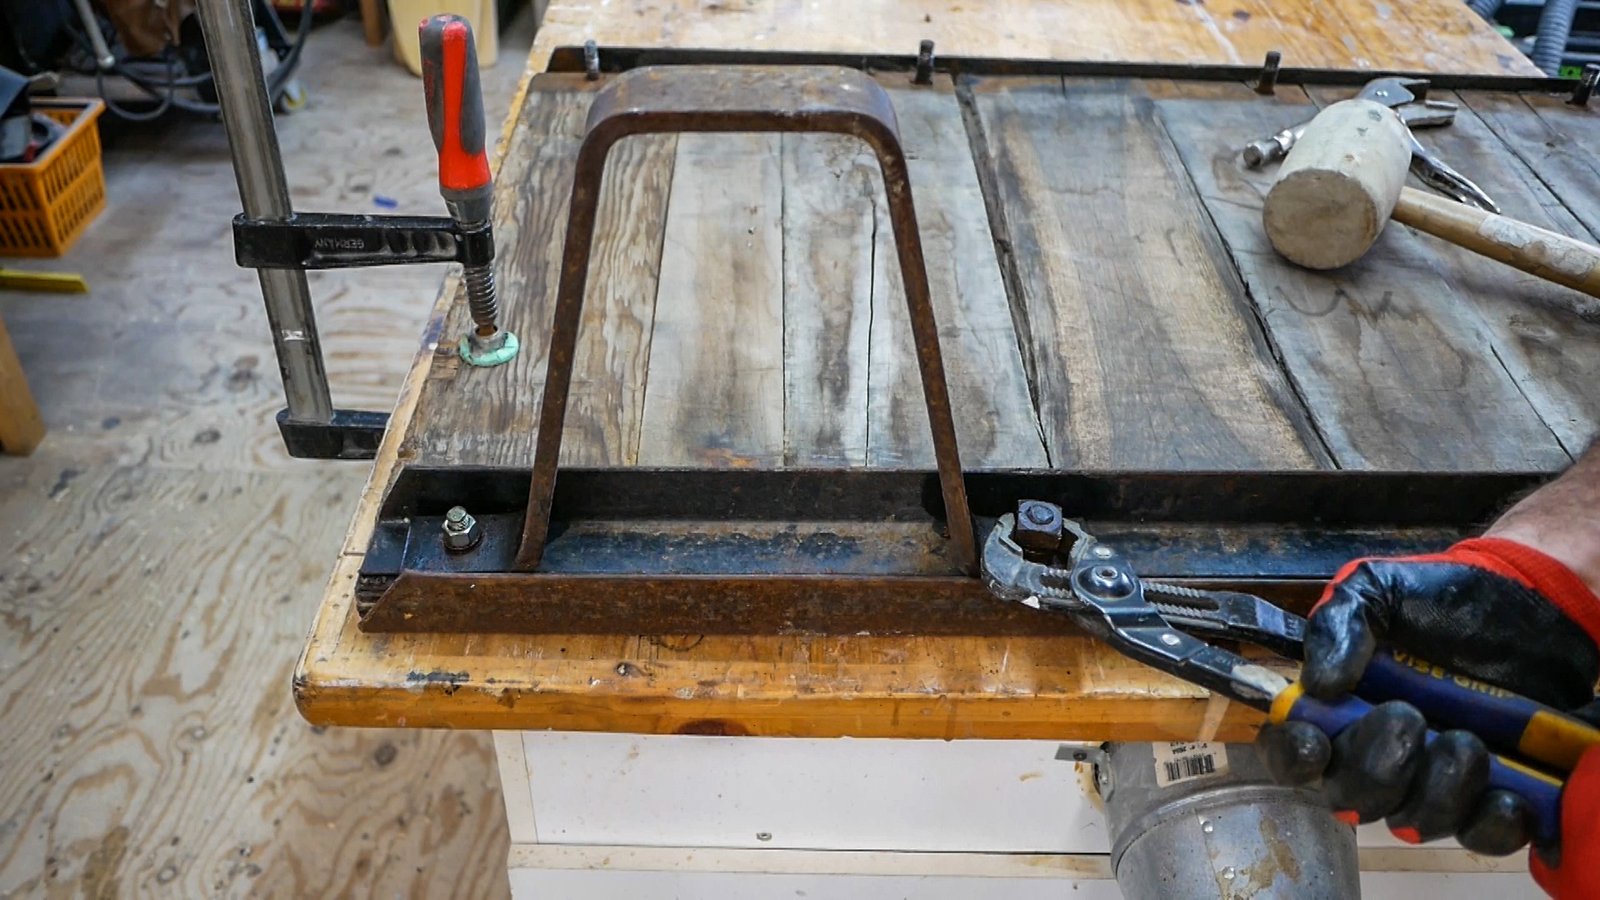
Let’s flip it over and see how this thing is put together. Seems pretty simple, 4 bolts on each side pinch everything together between two pieces of angle iron. The original wood is oak, but unfortunately someone replaced a lot of the original boards with cheap plywood that’s falling apart.

Alright, square nuts! Now none of my socket wrenches will work on them! /s These things were actually pretty rusted on there.
I hit them with a little bit of penetrating oil and then went at them.

Between a set of vice grips, channel locks and a rubber mallet I was able to undo all 8 nuts. It took quite a bit of swearing, but I finally got there. I was half expecting to have to use an angle grinder to remove them but all it needed was a little bit of elbow grease and a few choice swear words.
Not so tough anymore are you mr. stacking cart? It was at this point I decided to scrap the existing wood and use some wood that I had lying around the shop instead. Don’t worry I’ll find a use for the wood that came out of this stacking cart in another project.

I had some red cedar left over from a deck I did and some yellow pine left over from some restaurant mill work I just finished. Not enough of either one on it’s own, but combined I had more than enough.
Both pine and cedar happen to be very soft woods. I want this table to have a weathered and old look to it eventually so I’m ok with using a wood that dents and scuff easily.
I decided on an alternating pattern, because what other option did I really have? Cedar, pine, cedar, pine, you get it.

The original cart was 24″ wide and I saw no reason to change that. I setup a stop and cut each of my pieces of cedar and pine to 24″ inches long.

Here’s what it looked like after. Perhaps you’ve noticed there’s a height difference between each piece. You’re very observant. Don’t let anyone ever tell you otherwise.

In order to equalize the thickness I fed all of the wood through a planer and planed it down to 7/8″ thick. This was a time consuming process, with each pass I would only remove 1/16″ of wood. But the wood comes out looking so nice and smooth, so it’s worth it.

Now that everything is planed to the same height it’s starting to look a lot more like a table surface.

In order to make sure everything was square and a uniform width I pushed all the pieces through the table saw. On the pine boards I tried to remove as little as possible, but because the cedar boards were so much wider I ended up taking almost 3/4 out of the width of each cedar board in order to make things more even.

The next step was to sand everything down and get it nice and smooth. There were some slight imperfections from the planner so I sanded those out.

Now to protect the wood and give it a more finished look. I had this floor varnish left over from another job so it was my obvious first choice. You can’t beat free!
Actually this stuff is really great to work with. It’s super forgiving, doesnt show defects, can be sanded easily and dries quickly. It’ll protect the wood and give it a nice satin finish.

I rolled it on with a mini roller. I ended up doing 3 coats on the top side. Between each coat I gave the board a quick sand with 220 grit sand paper to remove any high points.
Cedar and pine both tend to raise a little bit when they get coated with something so sanding is important. Don’t be lazy! Also I gave the underside 2 coats as well.

Here’s what the wood looked like after 2 coats, Almost there!

While the wood is drying, I’ve got to keep myself busy with some other work. I think I’ll start on the metal.
The metal was really rusty and dirty. It also had a lot of old paint, grime and dirt caked onto it. I setup my palm sander with some 80 grit sand paper, clamped the metal in a vice grip and went to town.

To get in the hard to reach areas and clean out stuff that was really stuck on there I used a wire welding brush and scrubbed for dear life. I was actually really surprised at just how much this method was able to remove.

After I was all done sanding and scrubbing this is what the metal looked like. Not perfect, but I’m not going for perfect. I want this table to look a little rugged. You can still see some traces of rust and the pitting is still there.

Similar story with the legs. These took a bit more work but also cleaned up very nicely.

I used this spray paint to black out the metal. I’m not really sure what “rust paint” is but it seemed appropriate given the circumstances. Plus it’s “Canada’s #1 Rust Paint” so who am I to argue with accolades like that in a very narrowly defined market segment.

Time to get a little high on paint fumes. The trick to working with spray paint is to huff just the right amount. I laid out a sheet of clean(ish) plywood and went to town. As you can see from my white outlines I’ve done this before.

I gave all sides of the metal 2 thick coats with the spray paint. Thin coats are always better when working with spray paint, but hey I was kind of in a rush. I like that you can still see the pitting in the surface of the metal.

With the metal trim still slightly tacky (don’t be dumb like I was and wait till things have properly dried!) I laid it out on top of the table surface and marked each of the holes where the bolts will go through the table’s surface.

I grabbed my cordless drill and drilled out each of the marks. The bolts are 3/8″ thick. So I used a 1/2″ drill bit to give myself a bit of wiggle room.

The old hardware was rusted, bent and just generally ugly. Frankly I’m surprised I got it all off without breaking anything. 8 dollars later at the hardware and I had this sick haul!

Doing this alone was actually kind of tricky. I had to keep everything lined up and thread the bolts through the table. Probably the hardest part of the whole project.
After I had the bolts threaded through the table I put the legs back in place and snugged everything down using nuts and lock washers.
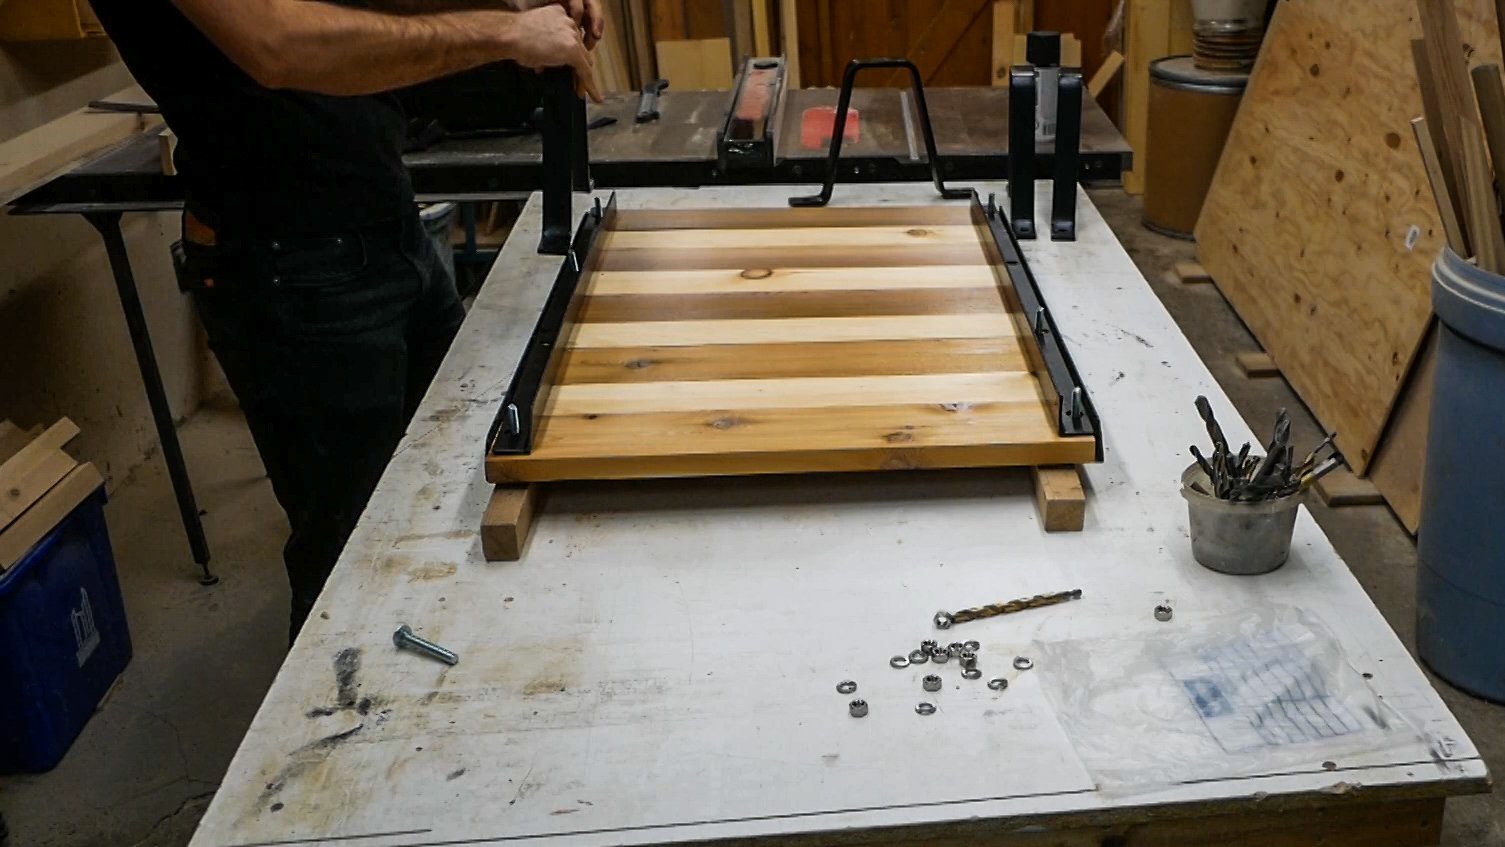
Ta-da! Everything bolted together and looking sharp. Pretty big difference from what it first looked like but I dig it.

Here it is all setup at home and ready to rock.

Measuring at just under 12″ tall it’s a little low for a coffee table, but in my living room it actually works quite well. It’s nice to be able to use it as a foot rest and not worry about scuffing it up. If I scuff it, it will just look better.
Also I put adhesive felt pads on the bottom of each leg in order to keep it from scratching the floor.

I hope you enjoyed this project. Let me know if you have any questions or comments!