Bings Dish Holder
Longtime readers might have seen my cat Bing hanging out in the background of a lot of my photos. Well, I figured it was time I do a project just for her. Possibly the most ornate pet bowl holder ever? Haha
It’s funny because this was a project I was doing concurrently to a bunch of other larger projects, but I ended up liking it more than the larger projects. It just goes to show that bigger isn’t always better 🙂
Sometimes when I’m doing bigger projects there’s a lot of downtimes while I’m waiting for glue or paint to dry, so it’s nice to have these smaller projects to keep me occupied.
This was a relatively simple build that only took me 4-5 hours of actual working time to finish, though it was spread out over a couple of days, because of the other projects.
Before we get into the rest of the post if you havent already, check me out on Instagram! You can find me @zacbuilds or (direct link: https://www.instagram.com/zacbuilds/)

For those of you that don’t know, this is Bing (otherwise known as Bingy, Bing-Bing or Bing-A-Ling), the new owner of the bowl holder. As near as I can tell she enjoys it, but it’s so damn hard to tell with her. She’s a locked box when it comes to her feelings. Just kidding, shes actually an incredibly sweet and affectionate cat.
As a guy in his 30s without any children yet I find myself pouring a lot of my excess love into this cat haha. Maybe this isn’t healthy, damn biological clock.

What kind of wood is that? Glad you asked. The lighter wood is oak, and the darker wood is walnut. I always like the contrast between lighter woods and darker woods in my builds. Plus Bing is Black and Grey and has her own contrasting colour scheme going on, so I thought it only right that her bowl holder reflects that.
It also doesn’t hurt that walnut is my favorite type of wood too.

This wheelbarrow full of wood scraps is where I started this project. A friend of mine works for a company that does much larger wood projects. He messaged me one day to say that they were throwing out a bunch of offcuts and I was welcome to come and pick through them. Needless to say, I wasn’t too discriminating, I backed up my truck to their loading dock and started tossing in every scrap of wood I could get my grubby hands on.
In the end I got a wheelbarrow full of Oak and Walnut for free. I only used a small portion of this wood to make the bowl holder. I’ve still got a bunch left for more projects in the near future. I’m thinking a mosaic coffee table next, but I’m open to suggestions!
Getting all this wood for free brought the cost of this project way down. In fact, I think the only thing I actually HAD to buy, was the bowls themselves. Which I ordered off Amazon for like $20. Everything else I had on hand already. I did spend about $60 dollars on a couple tools to make the build easier, and I’ll talk more about these when they come up. Enough blabbing though, let’s start building.

The first step was to mill all of the wood down to a uniform size and cut off any defective bits (like knots and cracks). Remember this was all scrap wood, so it wasn’t in the best of shape. With most pieces, I had to cut 2 sides of the wood before I was left with anything useable.
I cut most everything to 1″ x 1″, but there were some pieces that were too small for that dimension. I cut a bunch of smaller scraps down to 3/4″ x 1″ and that’s the stock I used to make this bowl holder. This was actually a fun exercise in optimization, I had to figure out what was the optimal way to cut each piece to yield the most usable wood.
Now is probably also a good time to mention that I was an economics major in university, which might explain why I find optimization problems so enjoyable 🙂

Most of the pieces of wood were approximately 18″ long. To achieve the mosaic look I was going for I wanted some of the pieces to be longer and shorter than others. So I grabbed half of the pieces I had just cut on the table saw and cut them in half using the miter saw.
I think having the pieces at random lengths help the overall project look a little less boring. If each piece was the same length I’d have less of a mosaic piece and more of a striped piece.

Over the next few steps, I’m going to glue all of those pieces of wood together. Before that, I want to talk about the benefits of doing a dry run before any glue up. Prior to uncorking the glue bottle, I took a few minutes to arrange my wood pieces in the pattern I wanted to glue them in. This helps save time and make everything go so much smoother once the glue starts flowing. There’s nothing worse than getting halfway through applying your glue and realizing that you need to re-cut a piece or shuffle around your whole layout.
For a small project like this, it probably isn’t necessary, I could re-arrange it 5 times before the glue dried. For bigger projects though, when it’s a real race against the clock, it can make a huge difference.

Time to get my Dexter on. This is 6 mil poly/ vapor barrier. I had some left over from a house I built. I use it as a cover for my work surfaces when I’m doing glue ups. It prevents my tables from getting all covered in glue and the glue doesn’t stick to it very well, which makes releasing my glue-up from the table a lot easier. It’s win-win.
Also, I get to pretend that I’m Michael C Hall pretending to be Dexter. So, really, It’s win-win-win.

Enough prep work, let the glue start flowing!
I laid all of my pieces of wood on the table and rolled them onto their sides. I applied a generous bead of wood/carpenters glue onto each piece. A good practice here is it spread the glue around with a brush (or even just your finger) to make sure you get good even glue distribution. Once the glue was applied I rolled them back up and pressed them together.
The last few glue-ups I’ve done have been mad races against the clock, so doing a smaller one like this was a nice change of pace.

Using a set of 6 F-clamps I clamped the whole thing together.
Recently I questioned my Instagram followers about what techniques they use for glue-ups. Most people got their best results by tightening the clamps just past to the point where the glue is being squeezed out and all gaps between pieces are closed.
That’s what I did here and I’m very happy with the results. I used to tighten my clamps as much as I could, working off the assumption that if some pressure is good, more must be better. In the future, I think I’ll be sticking with this technique. After the clamps were set I went home for the night and left the glue to dry.
Side note: this is probably the best part of sharing my work on social media. I get to interact with so many different and I end up learning a ton of stuff from other people. I do my best to share my knowledge with people, but I still have a ton of learning left to do myself as well!

12 hours or so hours later and I’m back to work. Don’t you just love the smell of freshly planed wood in the morning?
After removing the clamps I ran my glued-up board through the planer to remove any variations in height between the pieces I glued together. I love this part of the process. The wood goes in all uneven and bumpy and comes out perfectly smooth.

After a few passes this is what the planer spit out the other side. Perfectly smooth. I might’ve mistaken it for a single piece of wood if I hadn’t made it myself!
To me, this represents the end of the first stage of the project. I’ve essentially created the material I need to do this project. If you wanted to simplify this project to make it a bit faster and easier for yourself you could just skip everything up until this point and make it out of a single piece of wood.

Using a table saw miter gauge (set to 0 degrees) I cut the uneven ends off of the board.
In a few steps I’m going to re-cut the ends of the board at an angle, but I cut these ends off so I could have a square end to do all of the measurements off of.

With ends cut clean, I was able to easily use a big square to measure and mark the location of my cuts. From this single piece of wood, I need to cut a midsection (that will hold the bowls) and 2 legs.

I wanted my legs to sit at a 60-degree angle, so to make the miter cuts necessary I set my table saw to 30 degrees. For a miter joint, you cut both sides of the wood at half of the total angle. So 60-degrees, divided by two cuts, equals two 30-degree cuts. Make sense? I’m not even sure that makes sense to me and I just wrote it. I hate angles.
Cutting along the lines I had just made I made a total of 6 cuts. In order to get my angles right I had to cut along the same line twice in some cases, flipping my piece of wood over to invert the angle of the cut.
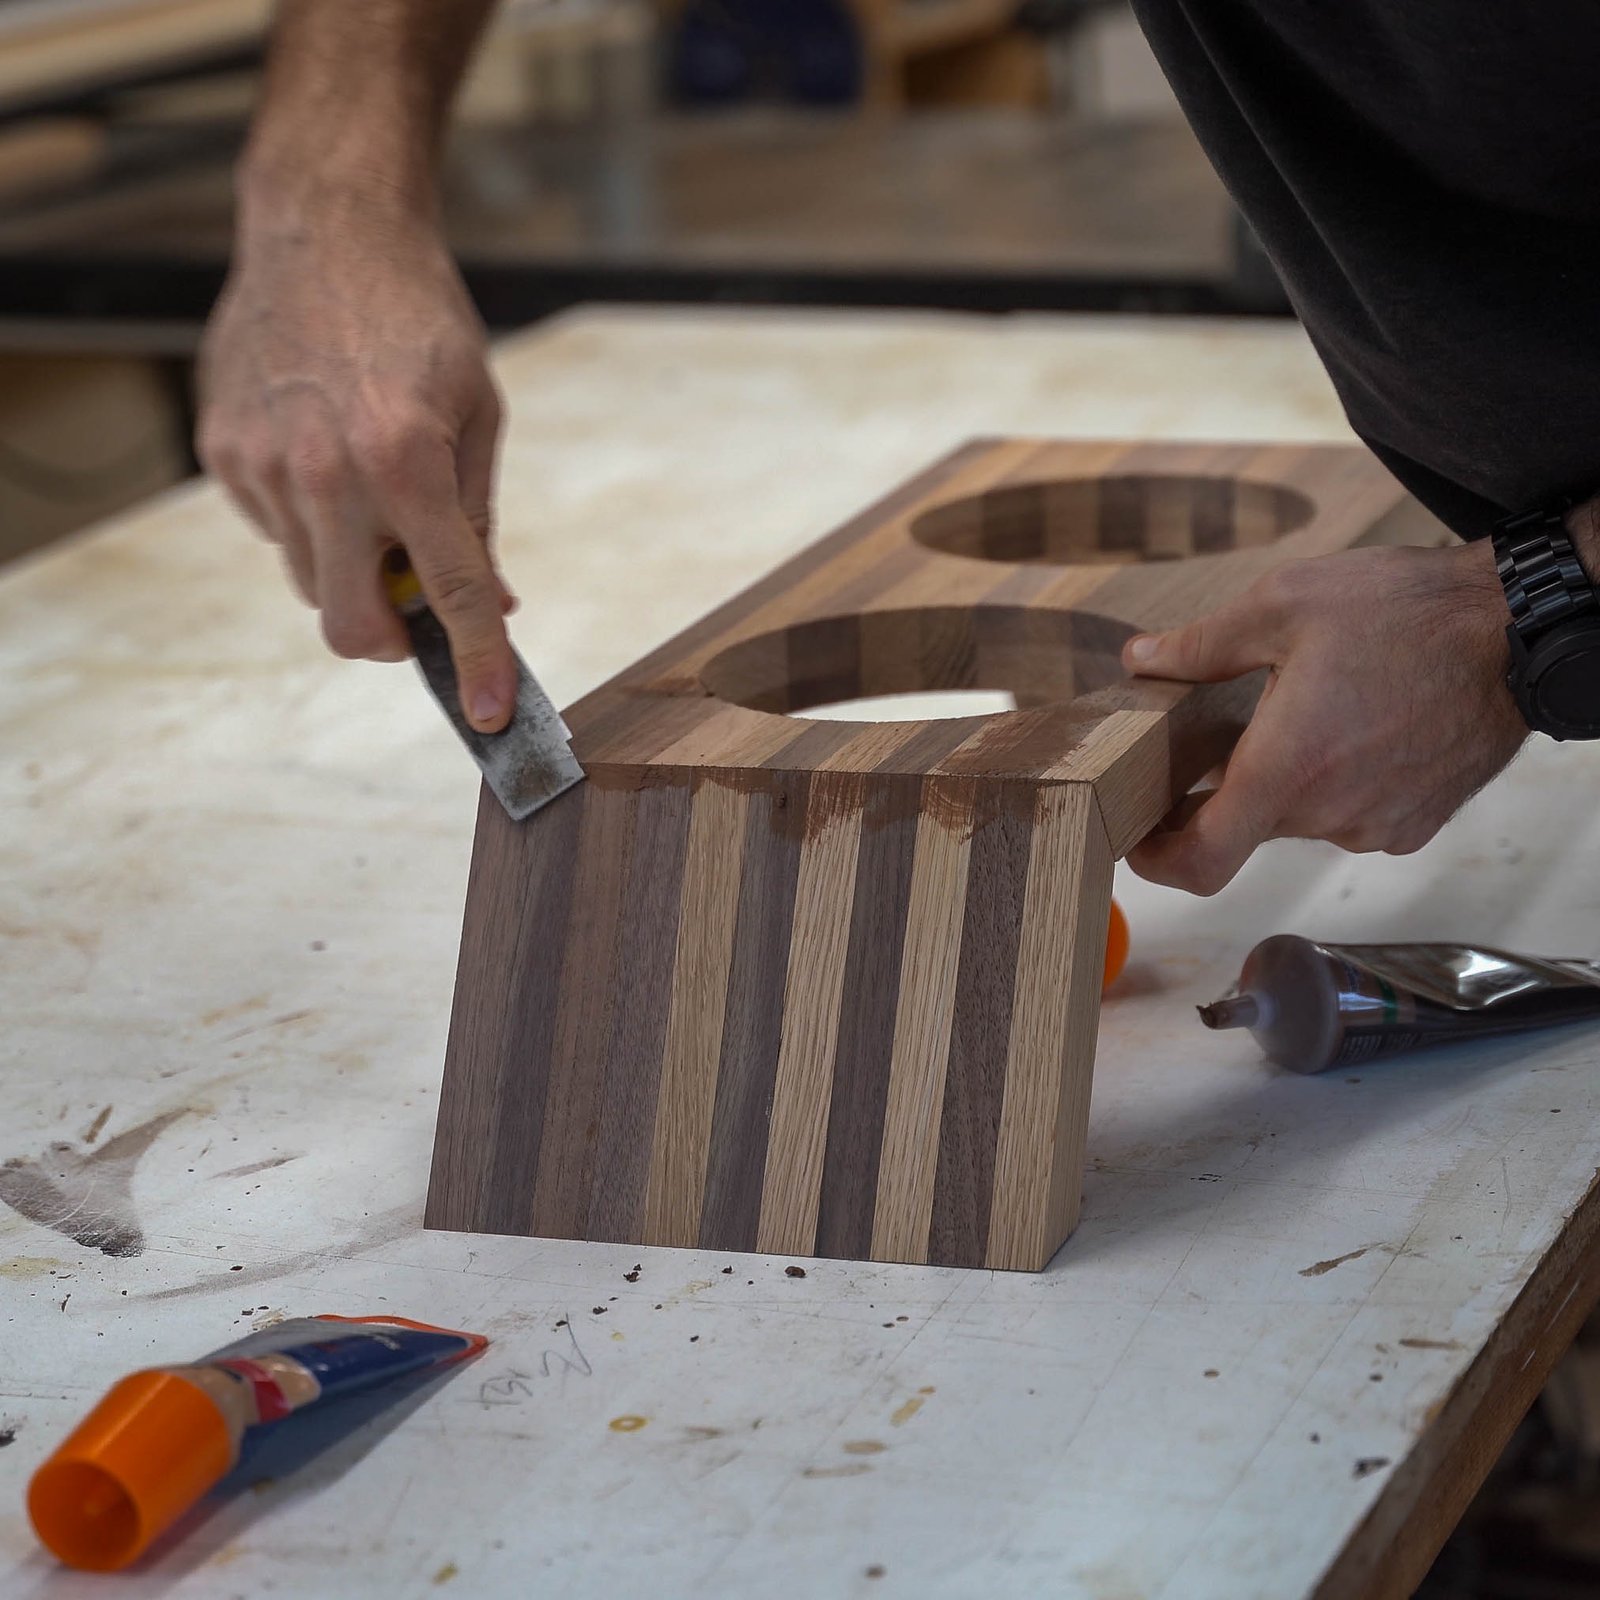
See what I mean? This is the left leg and the left side of the midsection. Once that leg is reattached to the midsection it will sit at a 60-degree angle.

You guys ready for the drill press? It’s been a long time since I’ve had a need to use a drill press in one of my builds, I’m kind of excited!
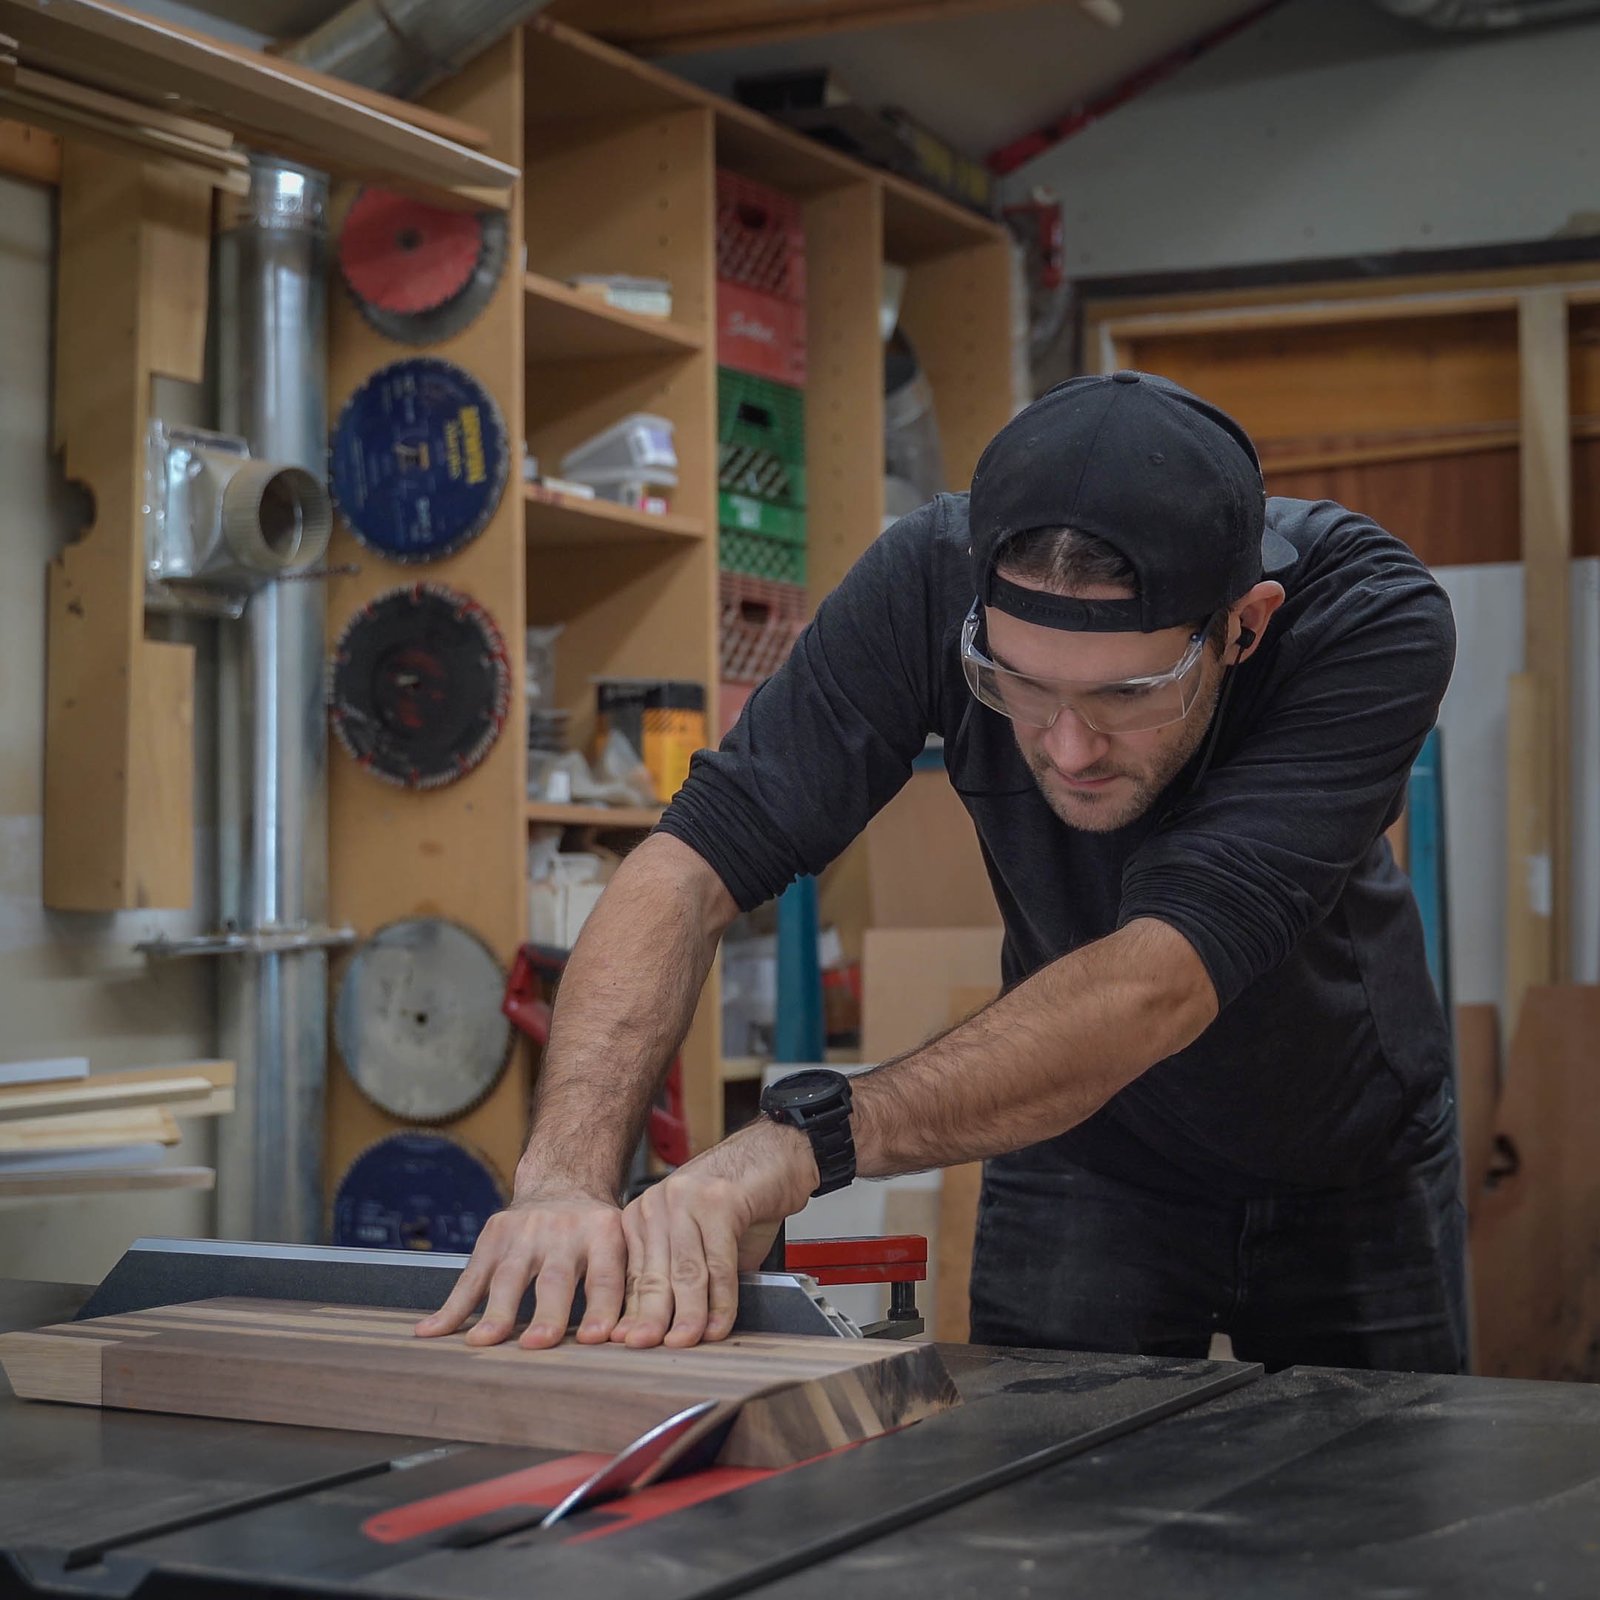
I cut 2 large 6″ diameter holes in the center of the midsection using a huge hole saw (more on this guy in a second). The dishes I bought for this project have a diameter that is slightly less than 6″ so they’ll slot right into these holes (the lips of the bowls are greater than 6″ though, don’t worry they won’t fall right through)
I clamped my mosaic piece to the platform of the drill press and, slightly nervously, flicked the on-switch. I wasn’t sure if this giant hole saw would be too much for my trusty old drill press, but luckily it held up just fine. Didn’t skip a beat, even with all that cutting area. Old tools are the best tools! Except for all the shitty old tools, luckily those all died a long time ago so we’re only left with the good ones. It’s called the survivorship bias, its basically the reason everyone thinks old tools were so much better than modern tools haha.

I own many hole-saws. I even own 3-4 hole-saw KITS. Ok, so I might be bragging about my hole-saw collection a bit, but for some reason, the largest hole saw I have is 4 3/4″! Most tool companies seem to think that’s the biggest hole saw anyone could ever need.
For this project I needed bigger, much bigger!
This was going to be a special order. I found a random no-name brand hole-saw on Amazon that wasn’t crazy expensive. And trust me, some hole saws are crazy expensive. I paid about 20 dollars for this one and I thought that was a deal. According to it’s packaging this hole saw is meant more for cutting holes in drywall and other, similar, lightweight materials. I was definitely pushing the boundaries of what this thing was designed for, but I only needed it to survive two cuts. Thankfully it held up well and I might even get another 2-3 cuts out of it.

One big question I had going into this project was how I was going to connect my miter joints. Previously I’ve used biscuits (wooden waffers cut into channels in the wood) and a lot of glue to connect miters. To be fair to that method, its always worked well for me. Never the less I still had the urge to try out a new technique.
Recently I saw a video of someone using pocket screws to connect a miter and thought “oh that looks cool, I’m gonna try and do that”. It’s not really how pocket screws are meant to be used, but it looked like it would be quite strong if done right.
Normally pocket screws are meant to hold joints that are butted together flat. Because I was going to be using them on a mitered corner I had to be very careful about the location of the holes and the length of my screws. A poorly positioned pocket screw hole or a screw that was too long would mean the screw would poke out the other side of the wood. I experimented on a bunch of scrap pieces until I perfected my technique.
I don’t think this technique would work on a 90-degree miter corner unless the material was quite thick, but because my corner was only 60 degrees there was enough “meat” to catch the screws on the other side.

Continue my theme of trying out new techniques I bought a Kreg jig for this project. This is my first time using a Kreg jig, or any store bought jig for that matter. Normally I like to make my own jigs, or if I’m really looking to screw things up, I’ll try and do it freehand.
There’s something to be said for quality jigs. They can help you work more efficiently and reduce the chance of you making an error. That being said I still really resent paying 40 dollars for what is essentially a cheap piece of plastic. Kreg tries to soften the blow by packing in a bunch of screws and drill bits. It still feels like it could be 25-50% cheaper though.

4 pocket screws per side. That ought to hold it! Everyone knows cat food bowls are really heavy so the structural integrity of this joint was really important to me.
Oh, what? Cat bowls aren’t that heavy? Ok so maybe I just wanted to keep practicing using my new jig 🙂

I’m not completely ready to give up on homebrew jigs though! Here’s a quick one I made out a piece of 2×6 and some plywood. I cut the 2×6 at the same 30-degree angle I cut my miters at and then screwed it to a piece of plywood.
This jig will help hold the leg and midsection in place while I screw them together. I’ll show you what I mean over the new few pictures.

First I applied a generous bead of glue on both sides of the miter. Maybe the screws would’ve been enough to hold everything on their own, but I feel better knowing that there’s some glue in the joint too. I used regular old carpenters glue, the same glue I used to do the glue-up in the first place.

Using my right hand I applied downward pressure on the leg, keeping it locked in position, and sank the pocket screws with my left.
Is it just me or does anyone else feel like a complete badass when they’re holding an impact gun or drill upside down? I imagine this is how gangsters feel when they’re shooting a gun sideways.

With everything, all screwed and glued (the name of my sex tape) all I had left to do was some quick finishing. Any small gaps and imperfections got filled with walnut coloured wood filler.
Believe it or not, not all of my joints are 100% perfect, but no one besides you and I needs to know that.
Hey look! A rare picture where I’m wearing my hat forwards. Oppps, don’t know how I let this one slip through the editing process.
Once the wood filler dried it was time to give the whole thing a quick sand. I started out with 80 grit sandpaper to remove the wood filler, round the corners and knock off any loose splinters. Then 120 grit and finally I ended on 220 grit.
A good sanding at 220 grit gives the wood a silky smooth feel to the hand but still leaves enough surface variation for good adhesion of the clear coat.

After sanding, and before applying the finish, I always like to give whatever I’m working on a good wipe down. It helps to remove dust and any other contaminants that you wouldn’t want to be trapped underneath you finish layer.
I find that blue shop towels are really good at collecting dust and not leaving behind any fibers of their own.

Almost done now!
I decided to use a satin floor varnish as my finish. I picked this finish for a few reasons. For one it’s really strong and resistant to scratches, probably owing to it being a floor varnish. Two, it’s a hybrid oil and water product that dries really fast, which means that putting on multiple coats is a much easier affair. Third, and probably most importantly, I already had a can of it on hand from another project 🙂

The application was dead simple. I used a mini roller and tried to roll on very thin coats as quickly as I could. I find that many thin coats are the best way to apply any clear coat. Don’t worry about getting it perfect on the first try. Just roll it on thin, sand lightly with more 220 grit sandpaper between coats and layer up the coats until you have a nice finish.
After that, all I had to do was let the clear coat dry and drop the bowls in place.

I’ve been trying to have more fun when it comes to taking the photos of my projects. You’ll see in the first few photos I used some coloured LED lights while I was taking the photos. While they are fun, and I like the way the photos turned out, they do kind of make it hard to get a sense of what the actual bowl holder colours looked like. So for posterity, I’ve included a photo with normal lighting.

Annnnd snap back to the futuristic lighting. I kind of like the way this looks. Maybe I’ll light my living room with orange and blue light all the time.
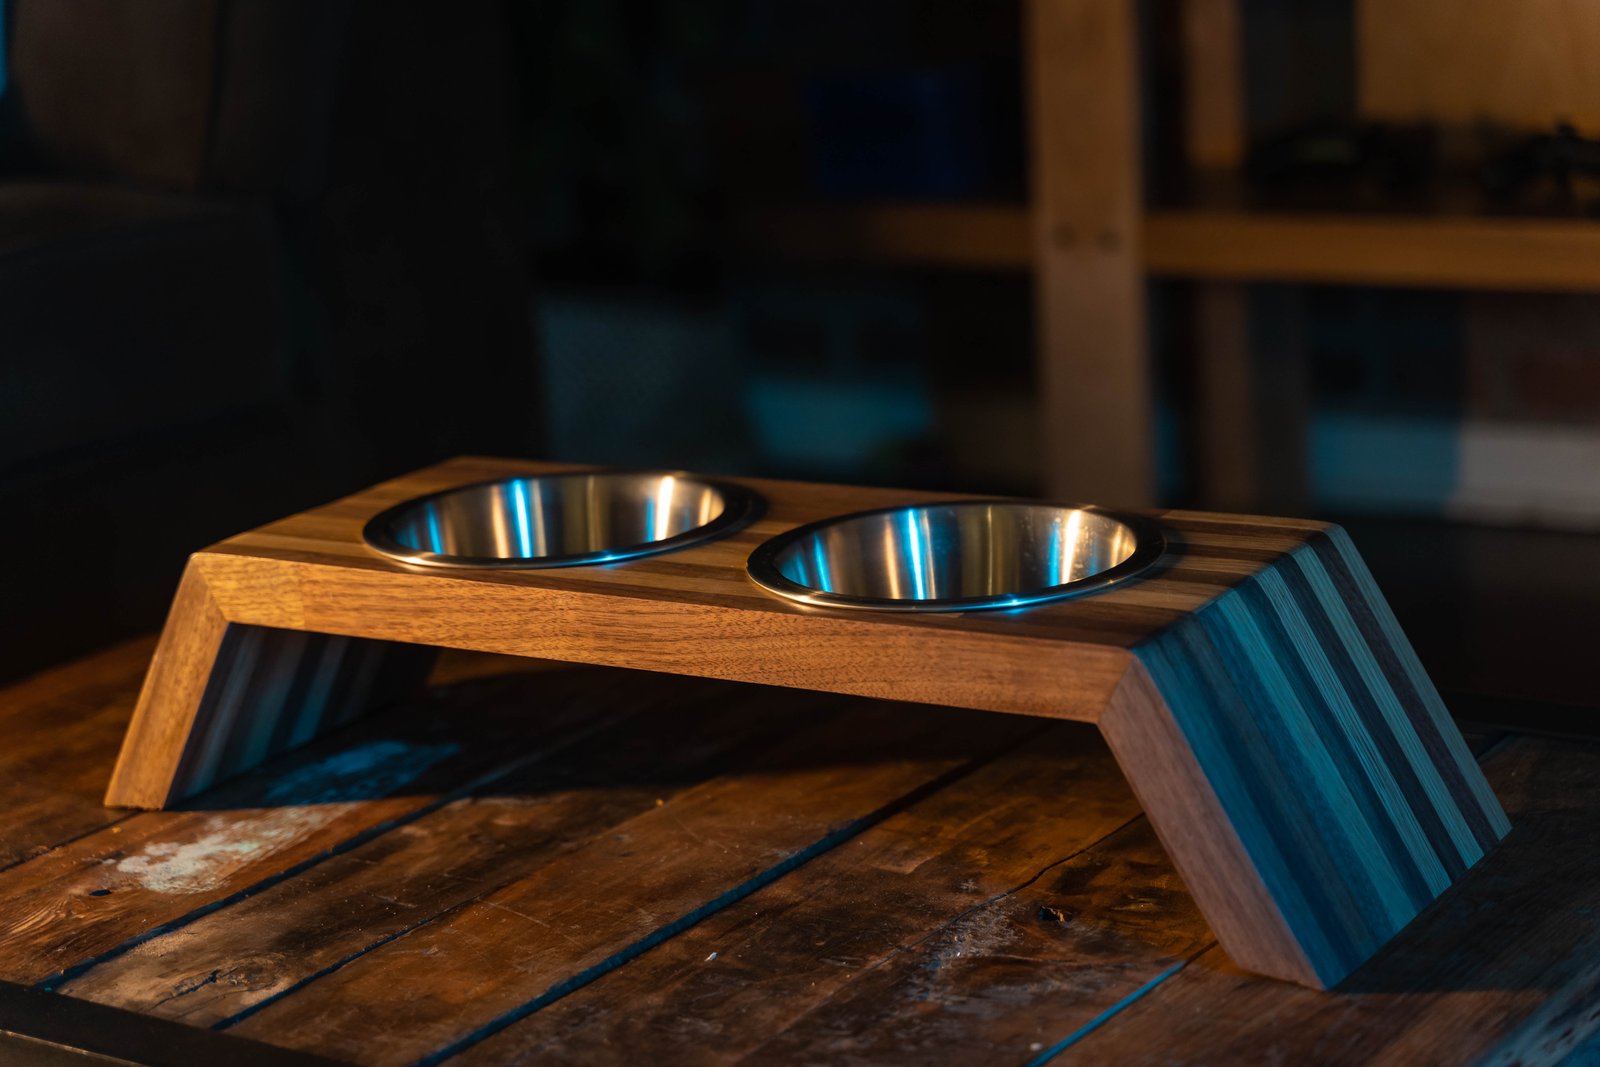
From below here you can see that the bowls protrude ever so slightly. It doesn’t bother me that much, but if anyone knows where I can get some shallow bowls that are 6″ wide I’m all ears.

Dont you just love the grain of oak? Watch out walnut, you might have a new competitor as my favorite type of wood!

Looks like Bing is getting hungry, so we better let her eat. If you have any questions or comments leave them below and I’ll do my best to get to them all.

See you guys on the next build!